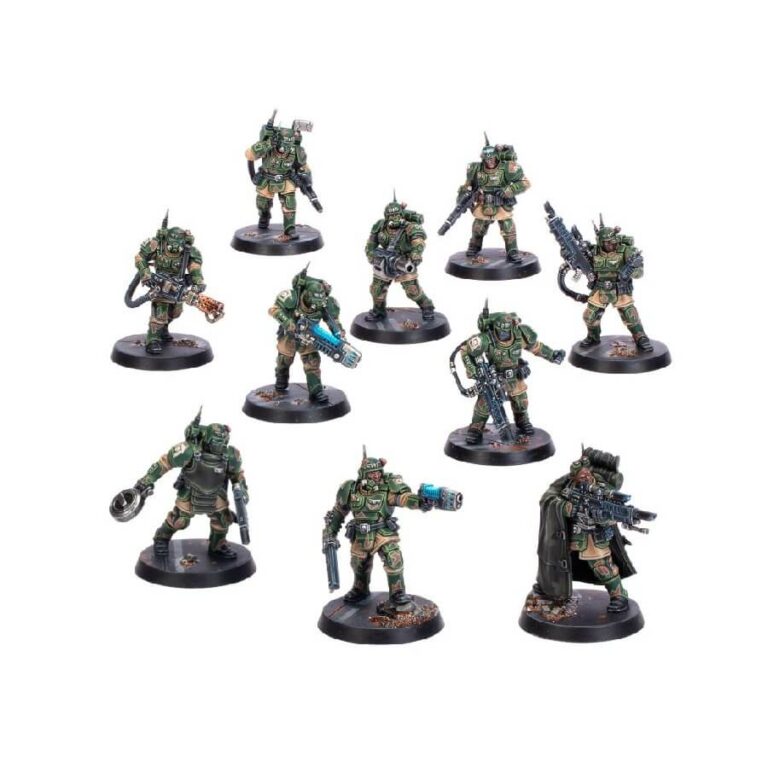
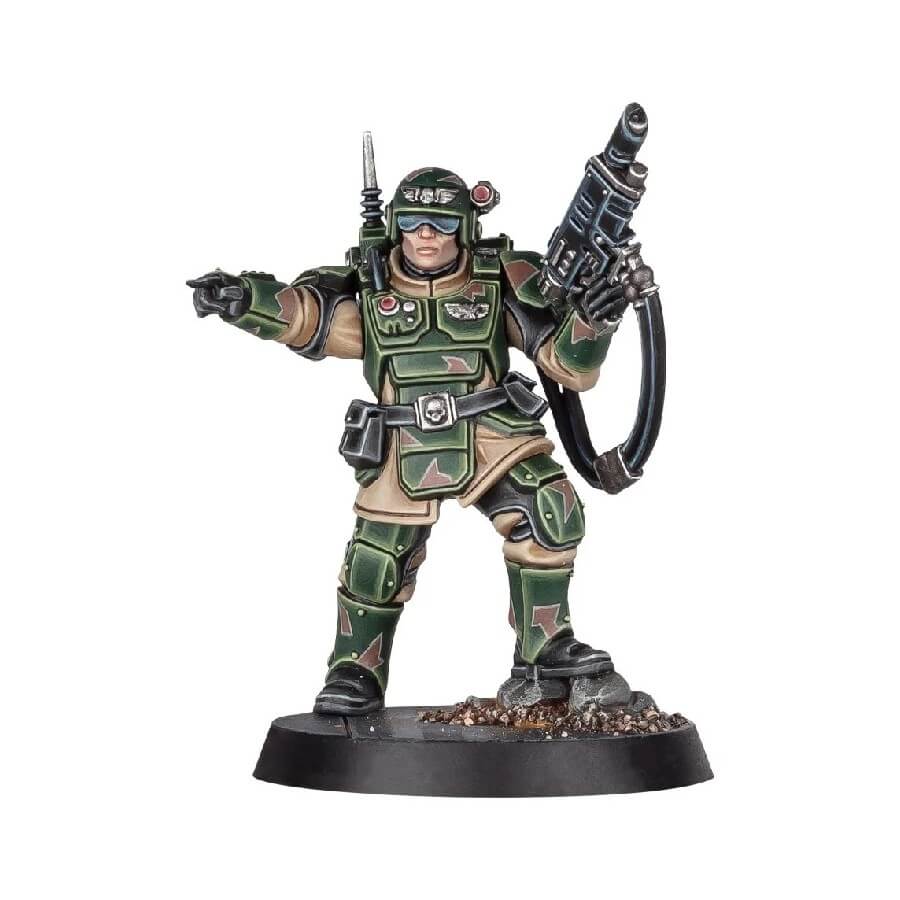
The Kasrkin Squad Set showcases the elite warriors of Cadia, renowned across the galaxy in the lore of Warhammer 40,000. These exceptional soldiers, known for their advanced training and superior equipment, epitomize the might of the Astra Militarum.
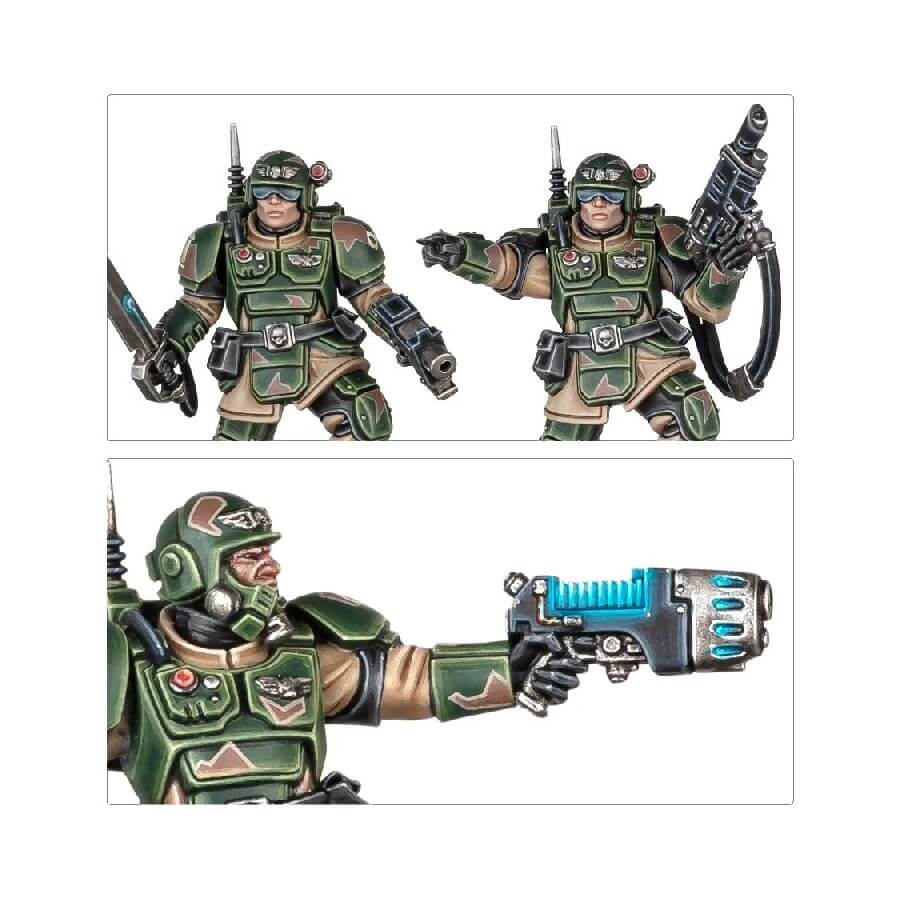
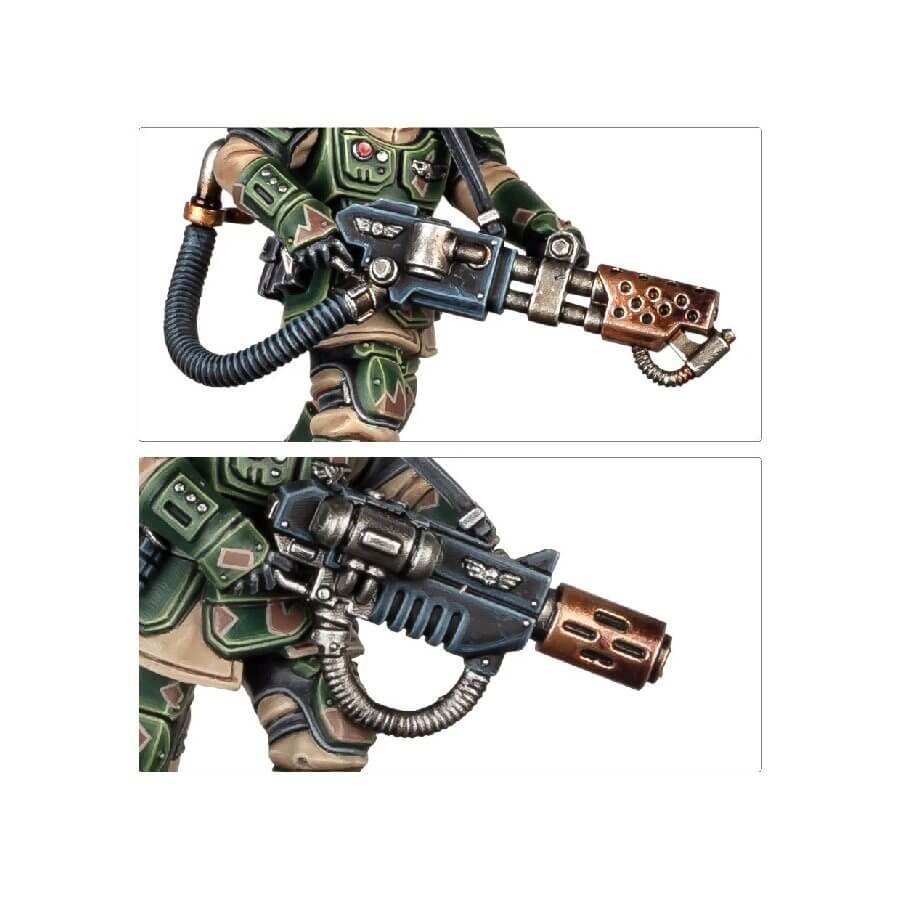
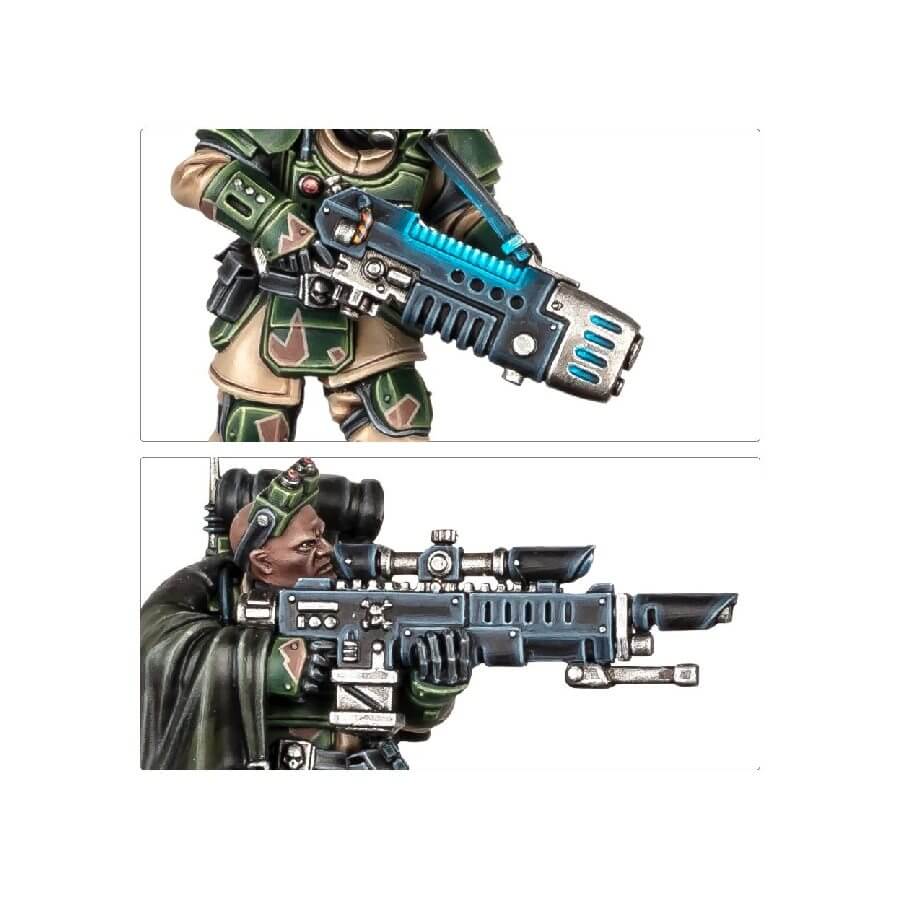
In the Kasrkin, one finds a perfect blend of skill and technology. They are equipped with high-powered hot-shot lasguns, drawing energy from back-mounted power-packs, and protected by enhanced carapace armor. Their marksmanship and combat skills are unparalleled, setting a standard for all Imperial forces.
This multipart kit offers the opportunity to assemble a diverse range of Kasrkin operatives. Each miniature in this set is a testament to the elite status of these soldiers, allowing players to deploy them in various roles in both Kill Team games and larger Warhammer 40,000 battles.
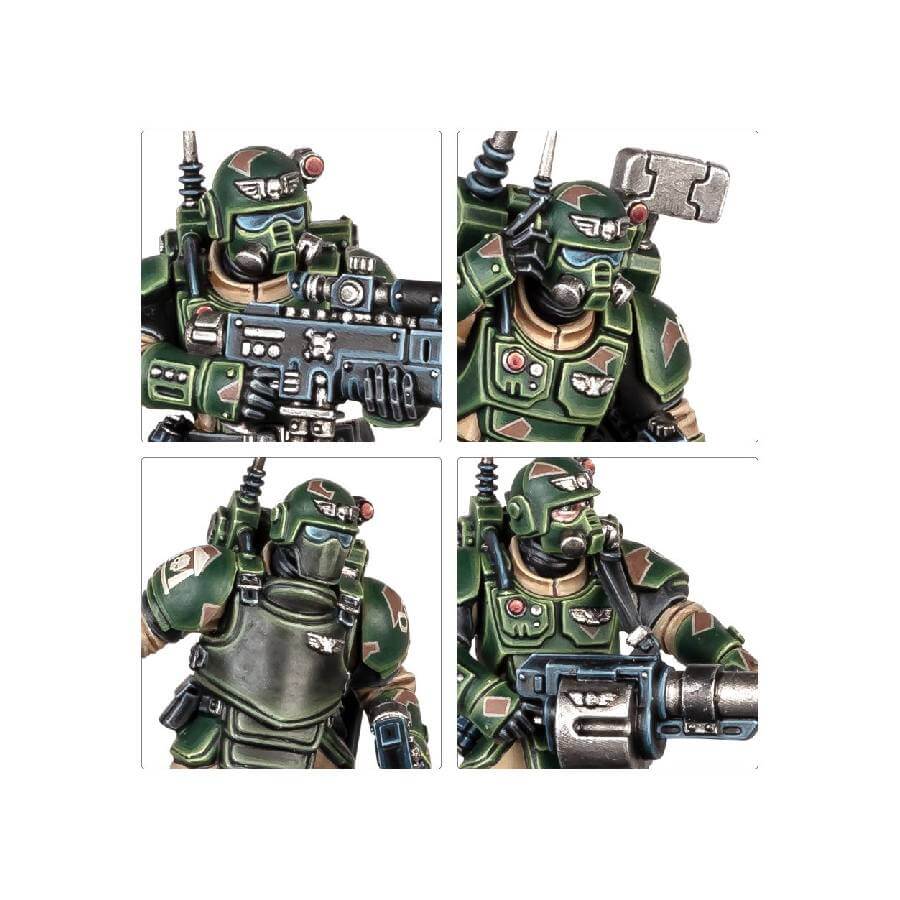
The set is rich in customization options. You can equip your Kasrkin with an array of special weapons, from grenade launchers to meltaguns, tailoring them to any tactical situation. Interchangeable heads and accessories further enhance the personalization, ensuring your squad stands out on the battlefield.
Specialist operatives such as the Sharpshooter and Combat Medic add strategic depth to your army, with each model showcasing unique capabilities and roles. This versatility makes the Kasrkin Squad Set a valuable addition to any Astra Militarum collection.
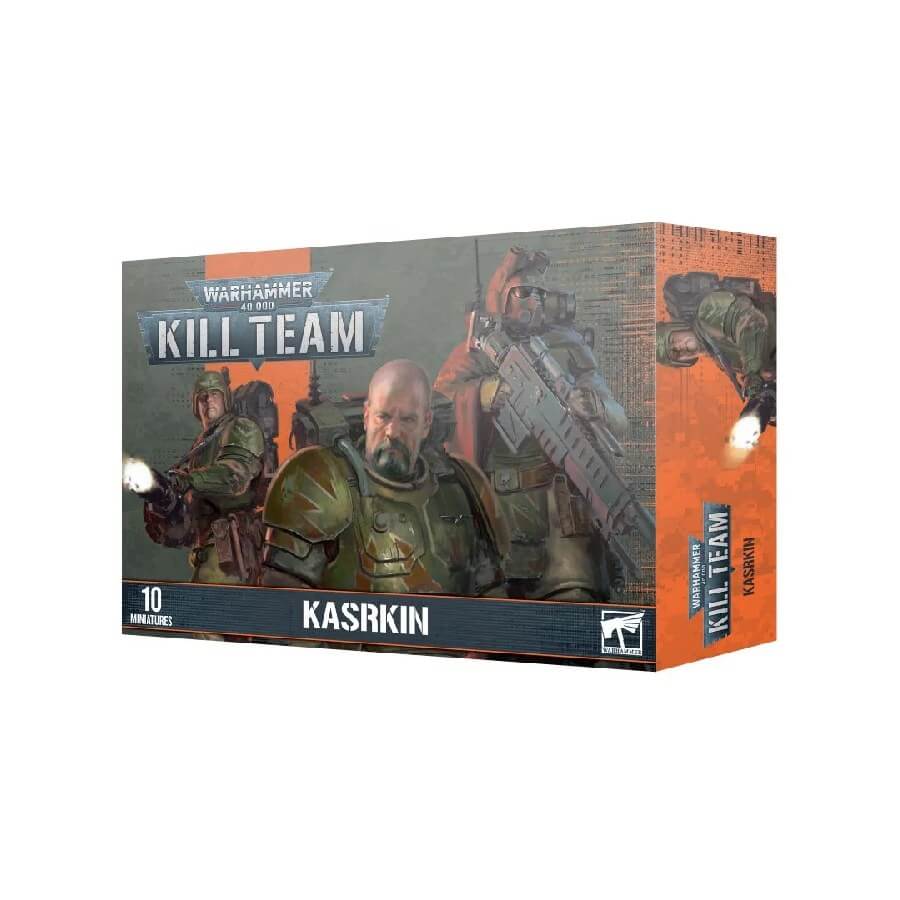
What’s in the Kill Team: Kasrkin box
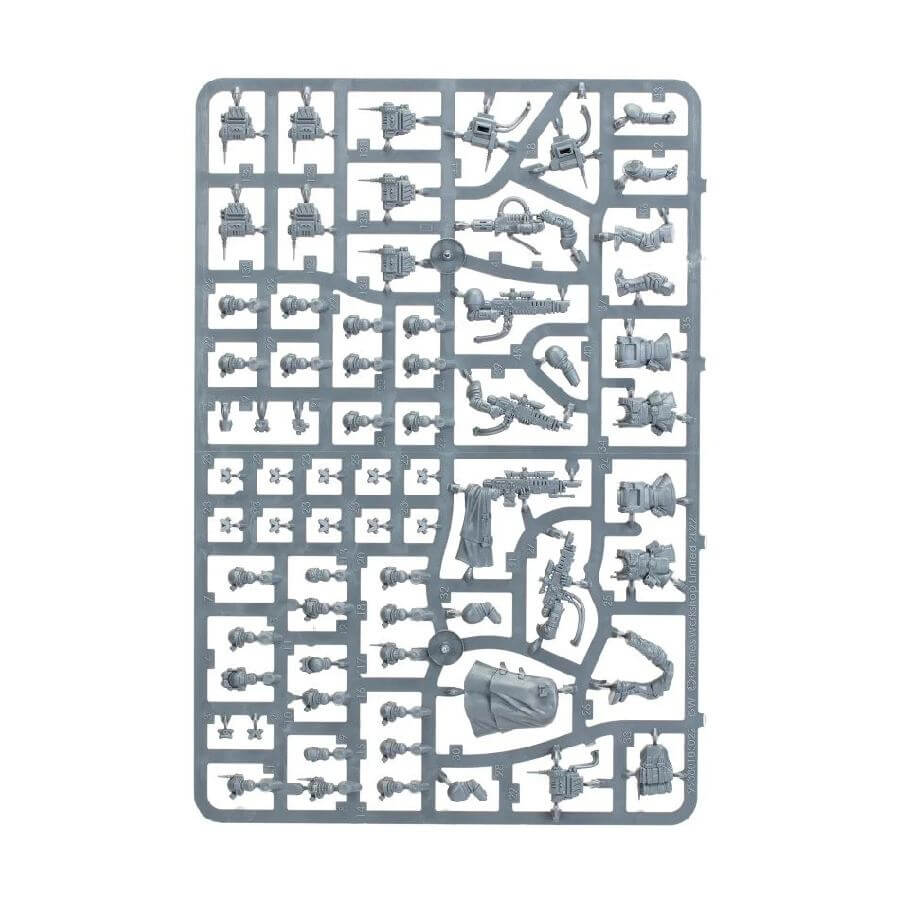
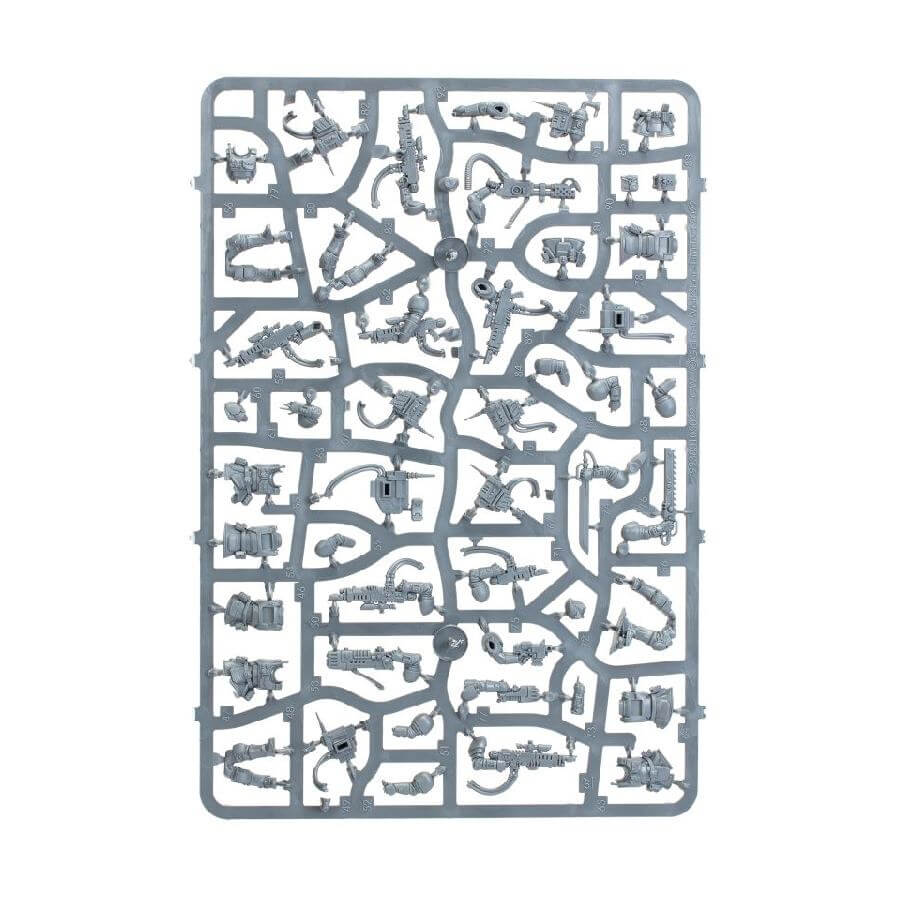
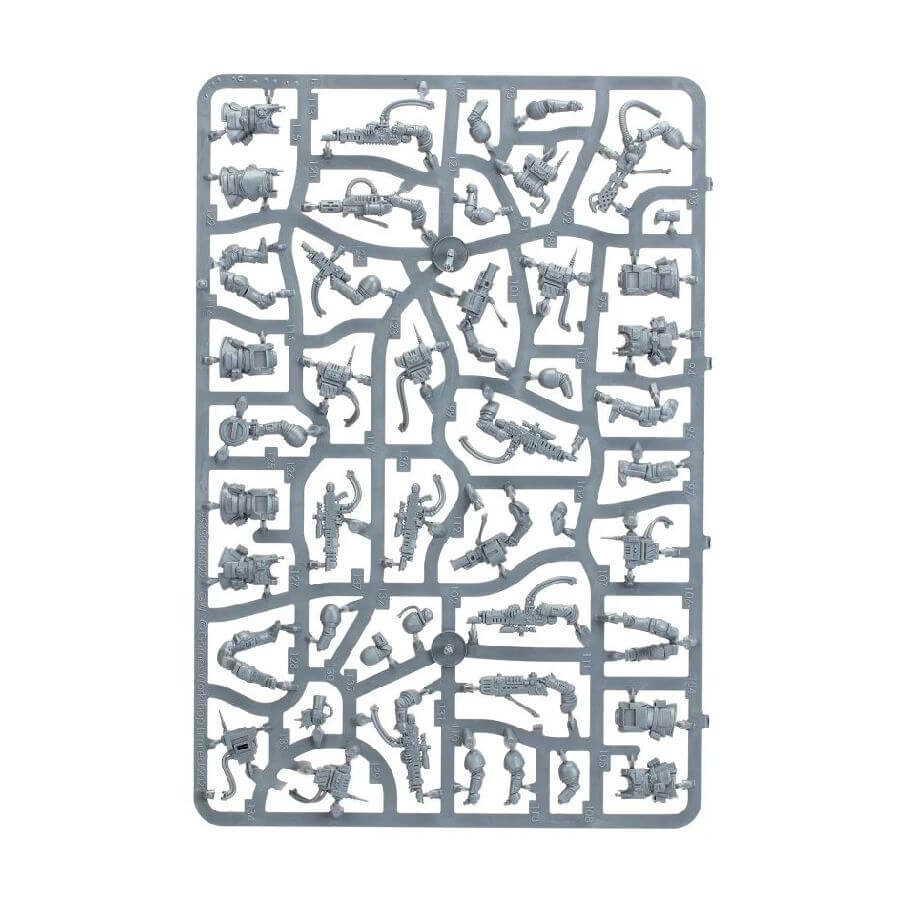
This boxed set contains x66 plastic components that make a Kasrkin squad.
- x10 Kasrkin Miniatures.
- x10 Citadel 28.5mm Round Bases.
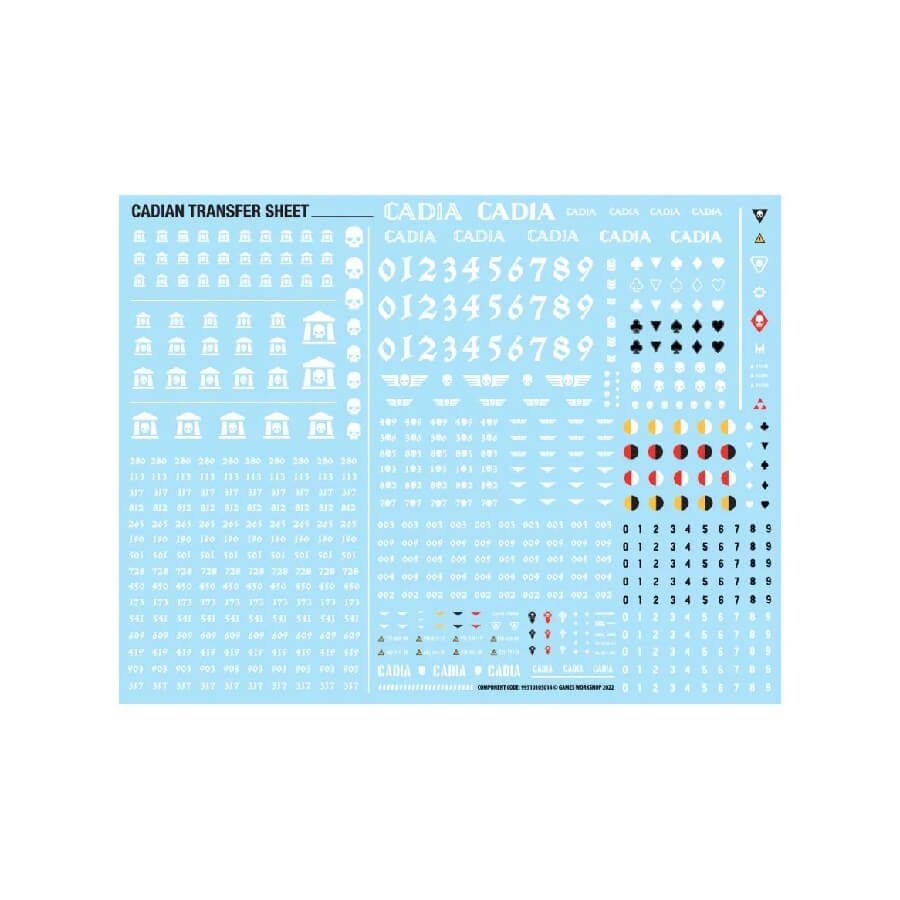
- x1 Cadian Infantry Transfer Sheet.
FAQs
What is a Kasrkin?
Kasrkin are elite soldiers from the Warhammer 40,000 universe. They are part of the Imperial Guard, specifically from the planet Cadia. These soldiers are known for their exceptional training, discipline, and equipment, making them some of the most formidable non-augmented human soldiers in the Warhammer 40,000 setting.
When was Kasrkin released?
The original Kasrkin models were released several years ago, as part of the Warhammer 40,000 range of miniatures by Games Workshop. Today you can buy these elite soliders from GW or affiliated resellers in the Kill Team: Kasrkin box for around $60.
What is the difference between Scions and Kasrkin?
Scions, also known as Tempestus Scions in the Warhammer 40,000 universe, are elite storm troopers of the Imperial Guard. The main differences between Scions and Kasrkin lie in their origins and roles. Scions are drawn from the Schola Progenium and serve as special forces throughout the Imperium, operating independently or alongside other Imperial forces. Kasrkin, on the other hand, are specifically from the planet Cadia and serve as elite infantry within the Cadian Shock Troops. While both are elite units, their training, equipment, and operational roles can differ based on their distinct backgrounds and specialties.
Are Kasrkin genetically modified?
In the lore of Warhammer 40,000, Kasrkin are not typically described as genetically modified. Unlike Space Marines, who undergo extensive genetic modification, Kasrkin are regular humans who have been exceptionally trained and equipped. Their capabilities come from rigorous training and high-grade equipment rather than genetic augmentation.
