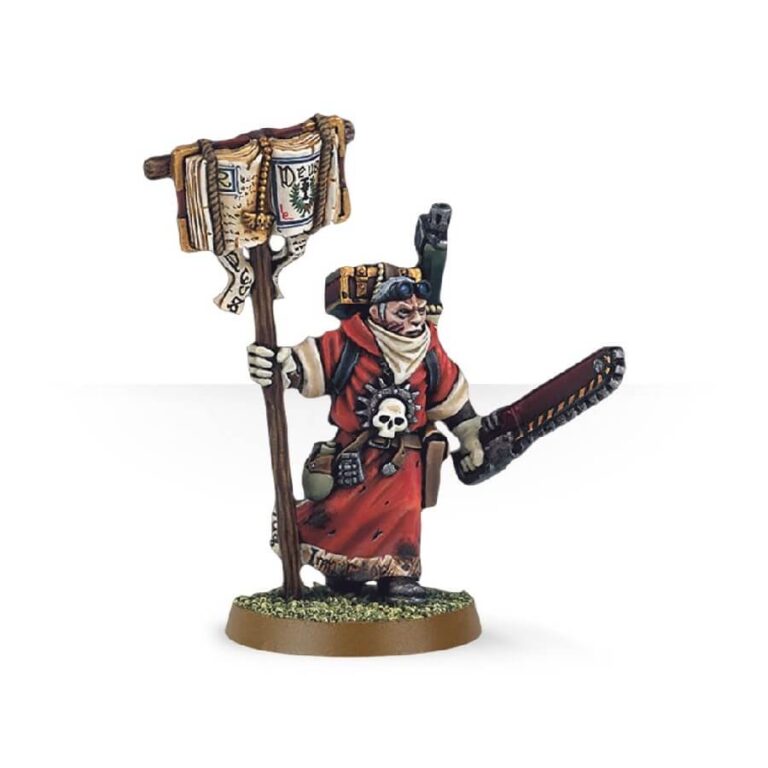
In the Imperial Guard, Ministorum Priests take up the mantle of the Missionaries. These battle-hardened men, who have fought alongside the common soldiers for years, dedicate their lives to ensuring the spiritual well-being of the army. Leading by example, they are willing to sacrifice themselves on blood-soaked battlefields, considering it the highest honor to fight alongside the Emperor’s forces.
Inquisitors often enlist the aid of Preachers or Banishers, whose passionate sermons strike fear into the hearts of Chaos creatures. Their fervent Litanies of Purity act as a deadly weapon, inflicting wounds upon Daemons that would otherwise be ignored.
Ecclesiarchy Confessors, known for their righteous fury, have been known to lead the Orders Militant, the Adepta Sororitas, into battle. Their presence ignites a burning fervor in those around them, inspiring greater resilience and combat prowess in the name of the Emperor. Any foe underestimating the formidable Confessor and their loyal followers would do so at their own peril.
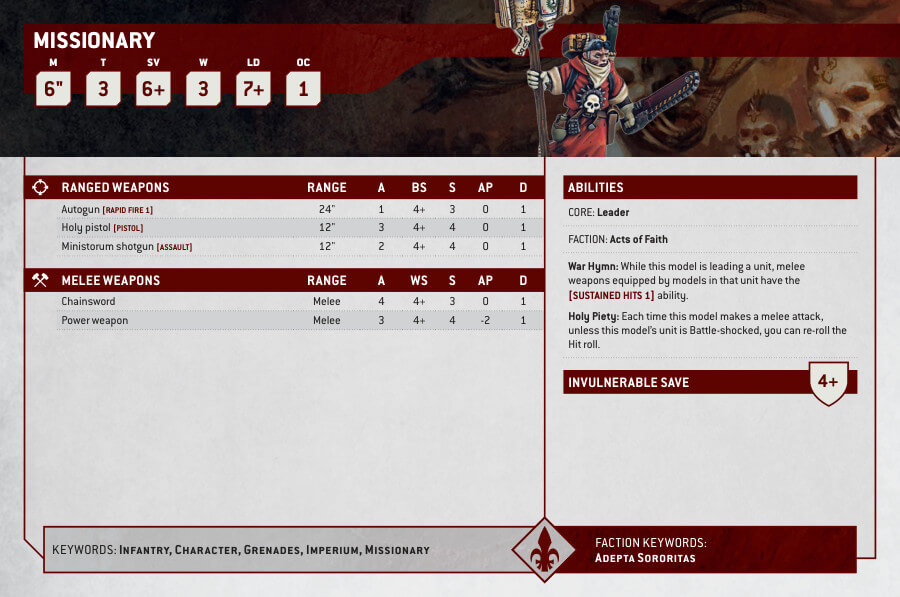
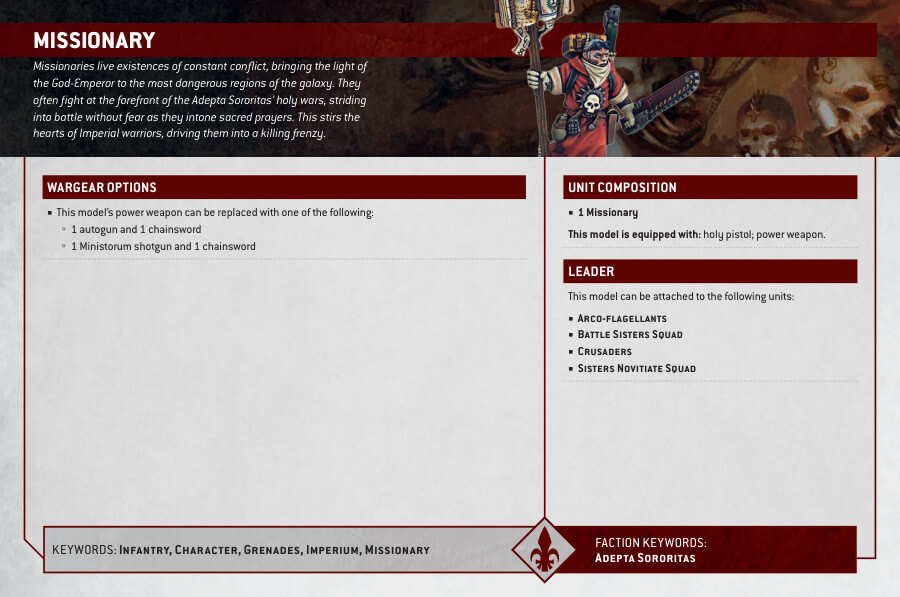
Missionary with Chainsword Datasheets
What’s in the Missionary with Chainsword box
- x3 metal components that make this miniature
- x1 25mm round base
How to paint the Missionary with Chainsword set
- Step 1: Basecoat the model
Apply a basecoat of Abaddon Black to the entire model using a suitable brush. This will provide a foundation for the subsequent layers of paint. - Step 2: Paint the armor
Using a metallic silver paint, such as Runefang Steel, paint the armor sections. Apply multiple thin layers to achieve smooth and even coverage. Leave any desired areas for other colors, such as the trim or details. - Step 3: Paint the details
Use suitable colors, like Mournfang Brown or Mechanicus Standard Grey, to paint the fabric areas or other details on the model. For the weapon, use a metallic silver or gunmetal color like Leadbelcher. Be careful and steady while painting smaller details like buttons or symbols. - Step 4: Wash the model
Apply a wash, such as Nuln Oil, to the entire model. This will add depth and shading to the recessed areas, enhancing the overall appearance of the model. Allow the wash to dry completely before moving on to the next step. - Step 5: Highlight the model
Using a lighter shade of the base color, like Ironbreaker for the silver armor, carefully apply highlights to the raised areas of the model. This will add dimension and make the details stand out. Focus on the edges and prominent features to create contrast and depth. - Step 6: Paint the face and skin
Paint the face and exposed skin areas with a flesh tone paint like Cadian Fleshtone. Be careful not to paint over any areas that should remain a different color, such as a helmet or gloves. Use a smaller brush for precise application. - Step 7: Paint the base
Paint the base of the model using suitable colors to represent the terrain or environment. For example, use Rhinox Hide for a rocky base or Caliban Green for a grassy base. Add additional details like grass tufts or rocks if desired. - Step 8: Apply a protective coat
Once all the paint is dry, apply a protective coat of varnish or sealant to the model. This will help protect the paint job and give it a finished look. Follow the instructions on the product for proper application.

