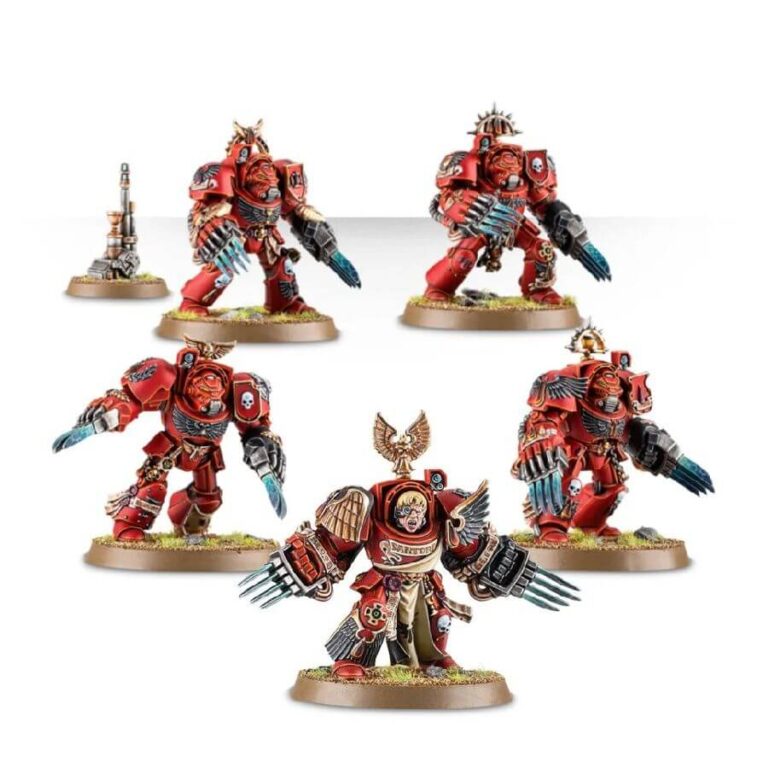
This kit contains all the components required to create a formidable squad of 5 Blood Angels Terminators, each equipped with either lightning claws or thunder hammer and storm shield. With 5 pairs of Lightning Claws, each boasting matching details on the gauntlets, and unique designs for each thunder hammer and storm shield, this kit offers unparalleled customization. Keep an eye out for the Sergeant’s storm shield, which stands out as the largest in the box.
But that’s not all – the kit also includes 5 Crux Terminatus shoulder pads specially designed to fit on the left shoulders, as well as 8 unique shoulder pads featuring Blood Angels iconography for the right shoulders. For added customization, there are 12 tilting plates that can fit on the front of the shoulder pads. The torso fronts offer further options, with 4 of them featuring helmeted heads sculpted into them and the fifth offering the option to add one of the 5 spare heads included in the set.
And for those looking to add some extra flair to their squad, one of the models can be assembled as the Company Standard bearer. To top it off, a teleport homing device is included for added tactical options.
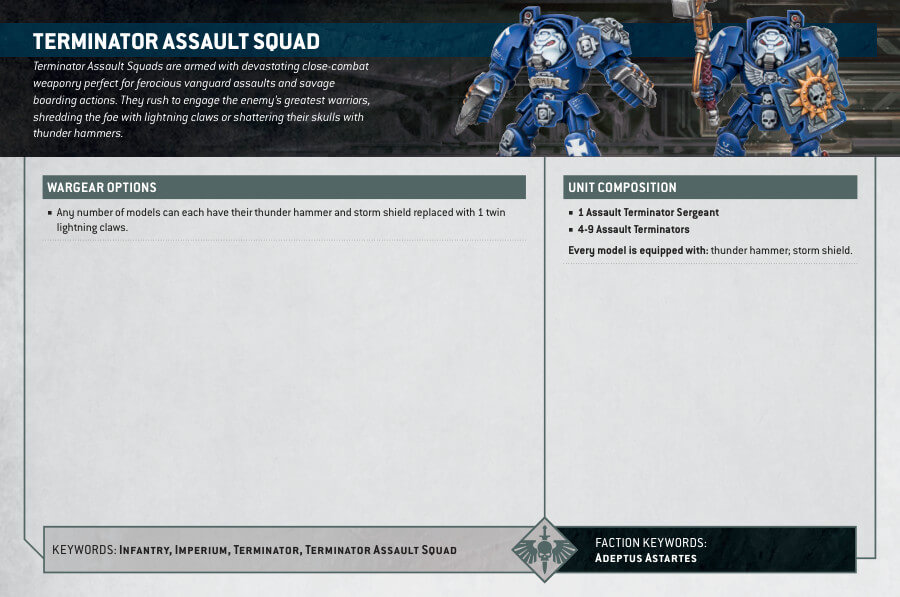
Blood Angels Terminator Assault Squad Datasheets
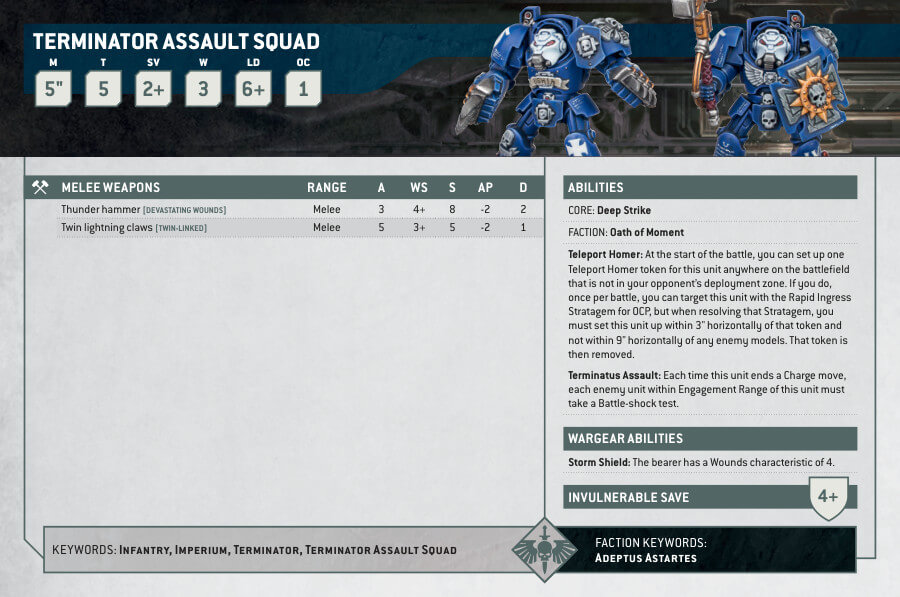
What’s in the Blood Angels Terminator Assault Squad box
- x76 plastic components that make a 5 man Blood Angels Terminator Assault Squad armed with either lightning claws or thunder hammer and storm shield.
- x5 Citadel 40mm round bases.
- x1 Citadel 25mm round base.
How to paint the Blood Angels Terminator Assault Squad
- Step 1: Base Coat
Start by priming the Blood Angels Terminator Assault Squad with a primer spray. This provides a solid base for the paint to adhere to. Ensure you have a smooth and even coat of primer before moving on. - Step 2: Armor
Paint the Terminator armor plates with your chosen red paint. Use a color like Mephiston Red or a similar bright red shade. Apply thin coats to preserve the details and build up the color gradually. - Step 3: Headgear
For the headgear, you can paint it red to match the armor but if you want a contrasting look, you can paint them using White Scar. Again, use thin coats to achieve a smooth finish. If the Terminators have lenses on their headgear, paint them with a bright green color, such as Warpstone Glow, to create a striking contrast. - Step 4: Exposed Heads
For the Terminators without helmets, paint their heads with your chosen flesh tone. Kislev Flesh or Cadian Fleshtone are good options. This will add variation and realism to the squad. - Step 5: Metallic Claws
Paint the claws of the Terminators with a metallic color of your choice, such as Leadbelcher. Ensure that you paint the claws carefully and avoid getting paint on the surrounding red armor. - Step 6: Black Support
Paint any support structures or auxiliary equipment on the Terminator’s arms and back with Abaddon Black or another black color. This will provide a strong contrast to the metallic claws and red armor. - Step 7: Gold Blood Angels Markings
Using a gold paint like Retributor Armor, carefully add the Blood Angels markings on the armor. This could be the Chapter symbol, winged skulls, or any other insignia. Take your time with this step, as it can be intricate. - Step 8: White Skulls
To paint the skulls on the armor, use a white paint like White Scar. Focus on the details and make the skulls stand out against the red background. - Step 9: Final Touches
Check the model for any areas that might need touch-ups. Ensure that all the colors are neat and consistent. If you want to add additional details, this is the time to do so. - Step 10: Varnish (Optional)
If you wish to protect your paint job and give the models a finished look, consider applying a layer of varnish. A matte varnish will provide a more realistic finish, while a gloss varnish can enhance certain details.

