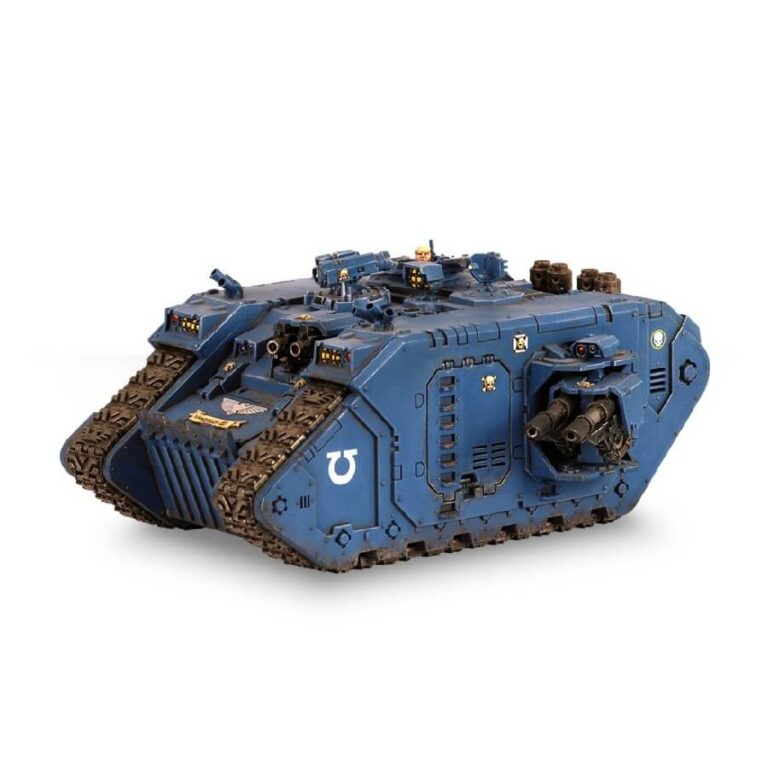
The Land Raider is a truly devastating weapon in the arsenal of the Adeptus Astartes. Its bonded ceramite and adamantium armour make it practically impervious to all but the most powerful attacks. Equally impressive are its armaments, which include lascannons and heavy bolters that can unleash a withering barrage of fire, capable of decimating both enemy infantry and tanks alike. With its unrivaled combination of protection and firepower, the Land Raider is an essential addition to any Space Marine army that seeks to dominate the battlefield.
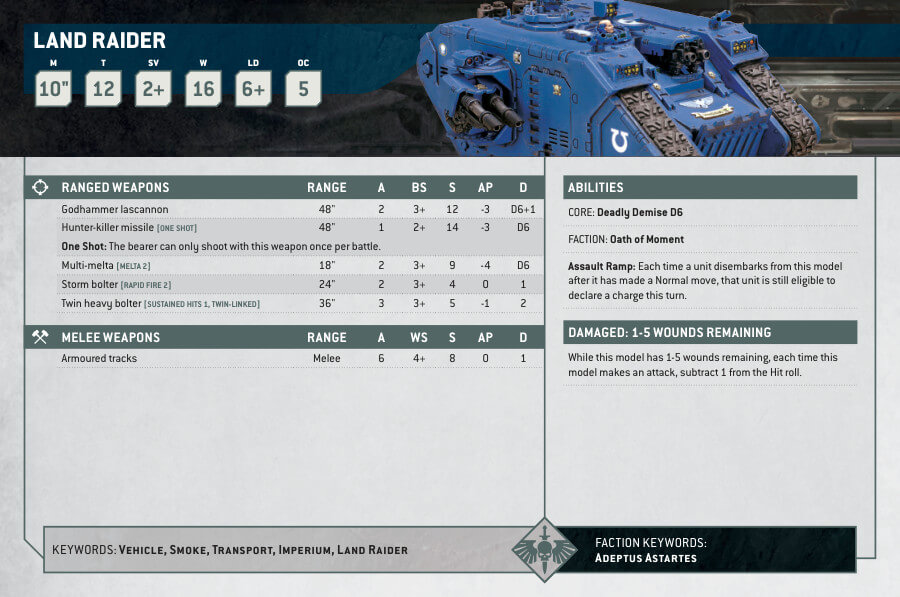
Land Raider Datasheets
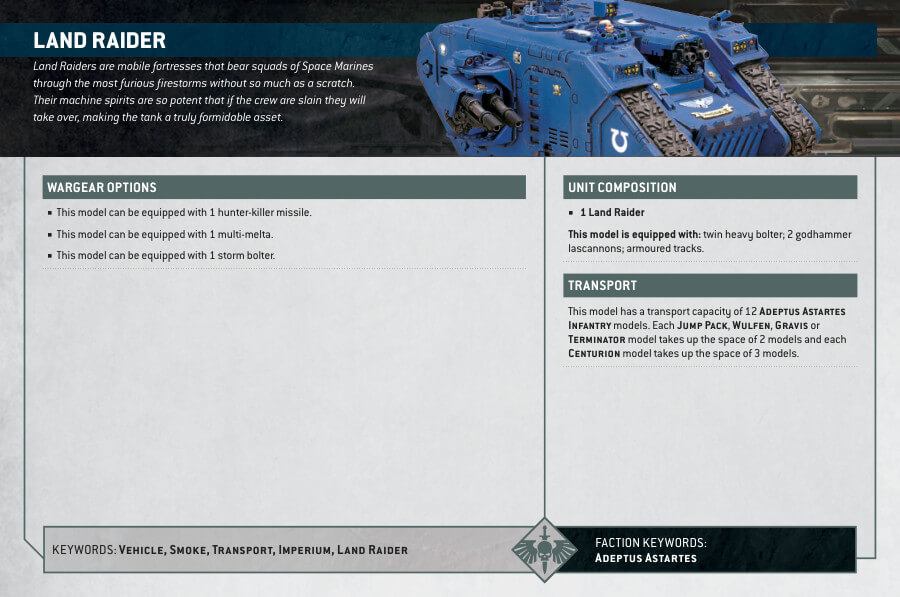
What’s in the Land Raider box
- x101 plastic components that make 1 Land Raider.
How to paint the Land Raider
- Step 1: Clean and assemble the miniature
Before you start painting, make sure your Land Raider miniature is clean and fully assembled. You can use a hobby knife or clippers to remove any excess plastic from the sprues, and a mold line remover to smooth out any rough edges. Then, use plastic glue to put the pieces together. - Step 2: Prime the miniature
Priming your miniature is an important step in the painting process. It helps the paint adhere better and gives you a better overall finish. You can use a black or white primer depending on the look you’re going for. - Step 3: Base coat the Land Raider
Using a large brush, apply a base coat of your chosen color to the Land Raider. For example, you could use Macragge Blue. Make sure to apply the paint evenly and cover all the areas you want to paint. - Step 4: Paint the details
Once the base coat is dry, it’s time to add some details to your Land Raider. Using a smaller brush, paint the vehicle’s guns, lights, and any other details. You could use Leadbelcher for the guns, or Averland Sunset for other details. - Step 5: Shade the miniature
To give your Land Raider some depth and definition, use a shade or wash to apply a darker color to the recesses of the model. This will help the details stand out more. Nuln Oil is a good option, which you can re-use in the future, for other projects. - Step 6: Highlight the miniature
Using a smaller brush, add some highlights to your Land Raider to make it pop. Choose a lighter shade of your base color and paint the raised areas of the model. For example, you could use Calgar Blue to highlight the blue areas. - Step 7: Apply decals
If you have any decals or transfers for your Land Raider, now is the time to apply them. You can use a decal softener to help them adhere better to the model. - Step 8: Seal the miniature
Once your Land Raider is fully painted and dry, it’s a good idea to seal it with a varnish to protect the paint job.

