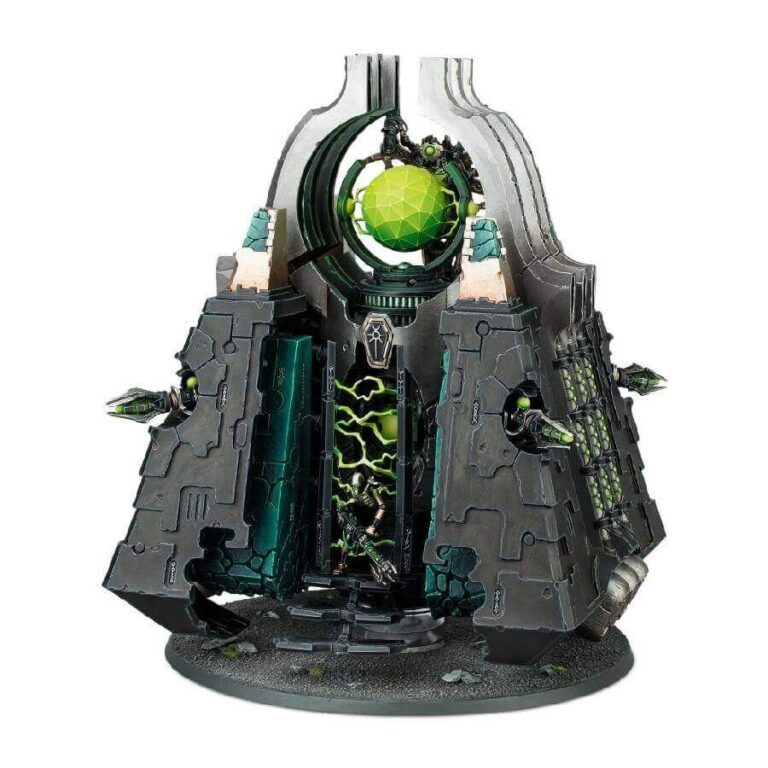
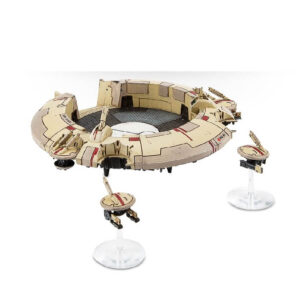
The Monolith stands as an iconic symbol of Necron indomitability. Crafted from the enigmatic living metal, a remarkable semi-sentient alloy that instantaneously repairs damage, and adorned with its formidable slab-sided armor, the Monolith presents an imposing challenge for any adversary on the battlefield.
Enhance your Necron army’s unwavering march with the might of a Monolith. Not only does it serve as a stalwart source of covering fire with its gauss flux arcs, but it also possesses the unique ability to summon reinforcements through its formidable eternity gate. Furthermore, you have the flexibility to replace its gauss flux arcs with devastating death rays, providing adaptability to your strategy. This kit also offers you the choice of selecting your preferred eternity gate configuration.
What’s in the Monolith box
- x123 plastic components that make one Necron Monolith.
- x1 Citadel 160 mm round base with a clear hover stand.
How to paint the Monolith set
- Step 1: Base Coat the Living Metal
Paint the main body of the Monolith, known as the living metal, with Abaddon Black. Apply this paint evenly to cover the entire surface of the living metal. - Step 2: Detail the Armor Plates
For specific armor plates and other metallic details on the Monolith, choose a contrasting metallic color. You can use Balthasar Gold or Brass Scorpion for these parts. Apply this color to elements like the edges and embellishments to make them stand out. - Step 3: Add Depth with Shading
To enhance depth and shadows, use a shade like Nuln Oil on the recessed areas and crevices of the Monolith. This adds dimension to the model. - Step 4: Highlights with a Lighter Metallic
For highlights, select a lighter metallic color, such as Runefang Steel or Retributor Armor. Carefully paint the raised edges of the living metal and any details you want to emphasize. This creates the illusion of light reflecting off the surfaces. - Step 5: Special Effects
Consider any special effects you want to add. For instance, if you want the Gauss Flux Arcs to stand out, paint them with a different metallic color, like Ironbreaker. You can also use Tesseract Glow for any glowing or energy effects. - Step 6: Base Painting
Paint the base of the Monolith to match your preferred theme. Texture paints like Astrogranite Debris or Stirland Mud work well for creating a realistic base. Add details like grass, rocks, or other elements to enhance the base’s appearance. - Step 7: Varnish for Protection
To protect your hard work and give the model a professional finish, apply a protective varnish like Munitorum Varnish. This adds durability and can provide a satin-matte finish, reducing glare.

