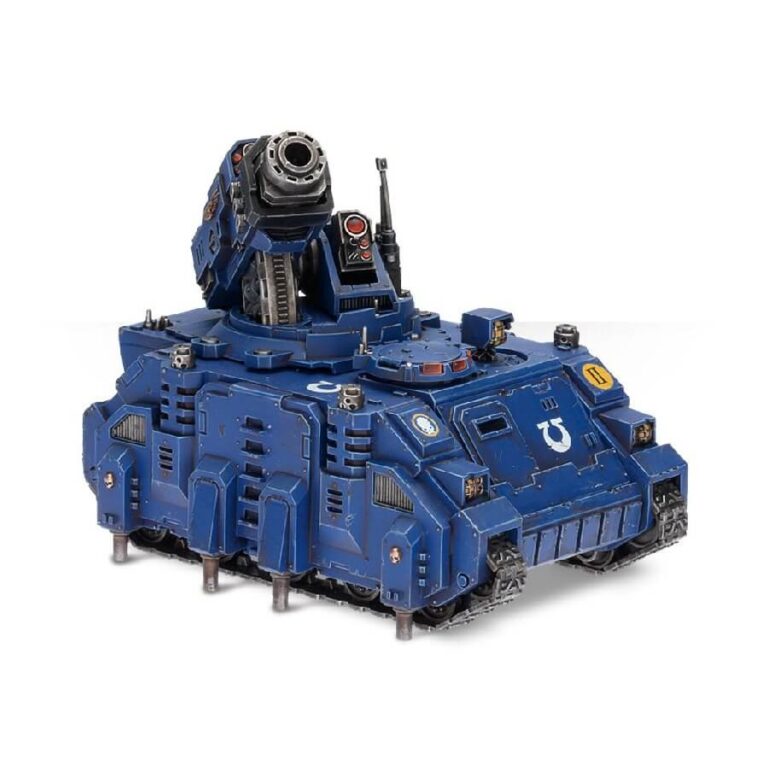
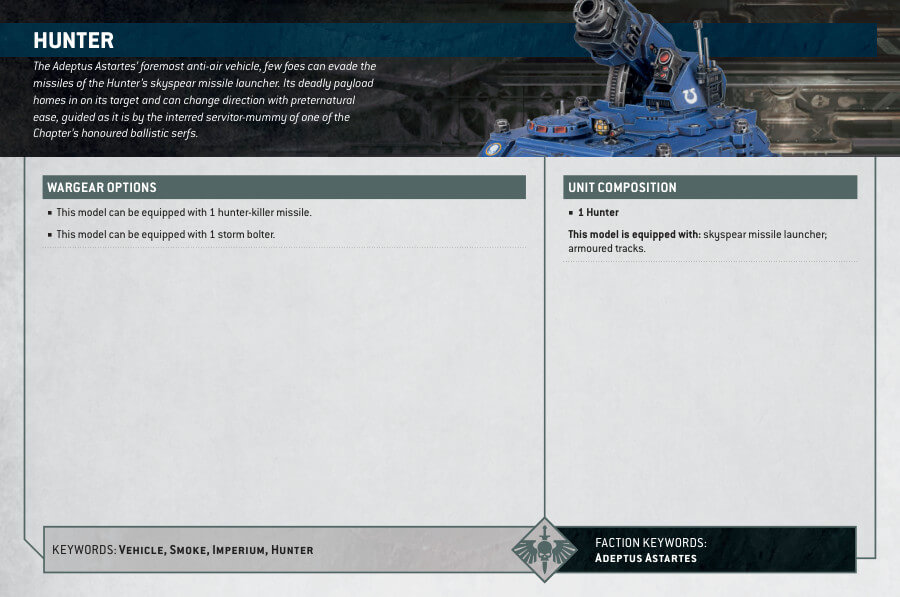
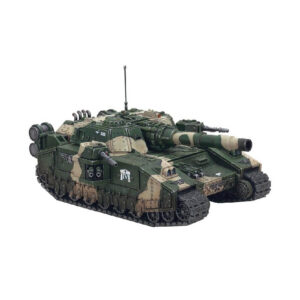
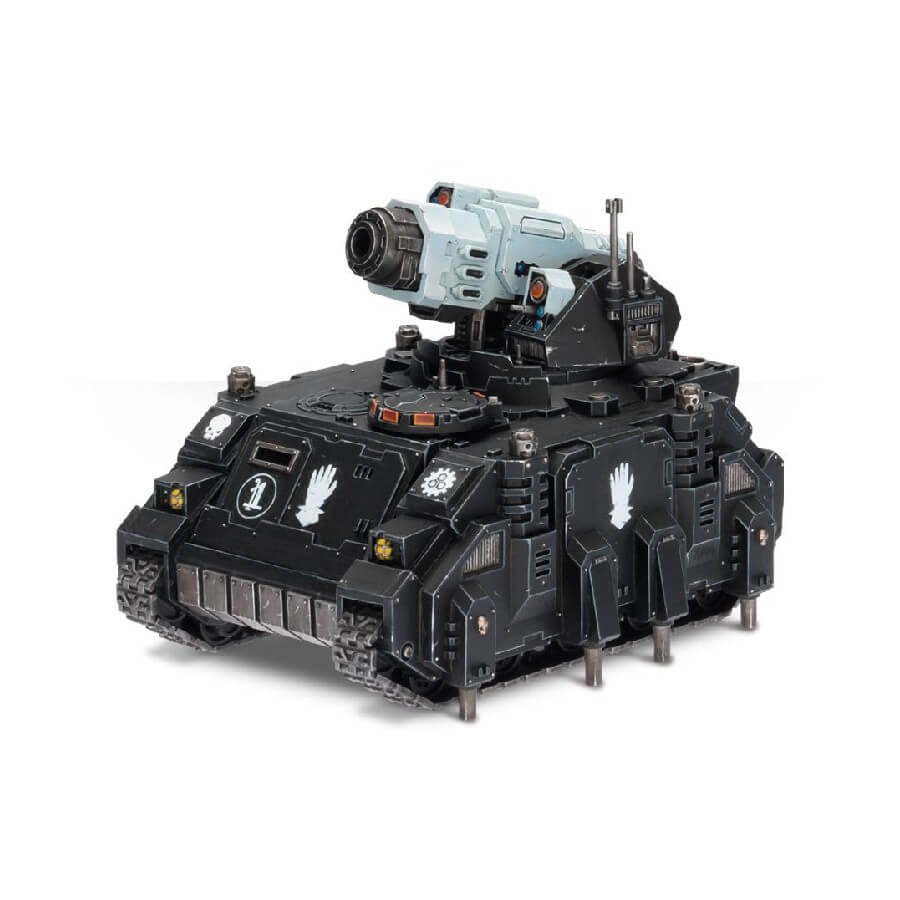
Introducing the Space Marine Hunter, a formidable tank designed for air defense and ground-based combat. Equipped with the skyspear missile launcher, this tank is capable of taking down enemy bombers and fighter craft with ease.
Built on the reliable Rhino hull, the Hunter features reinforced armor on its sides and pneumatic pins along its base. The tank also comes with a back ramp that can be left unglued for easy access, a control panel with a spare boltgun, and two side hatches that can be glued open or closed.
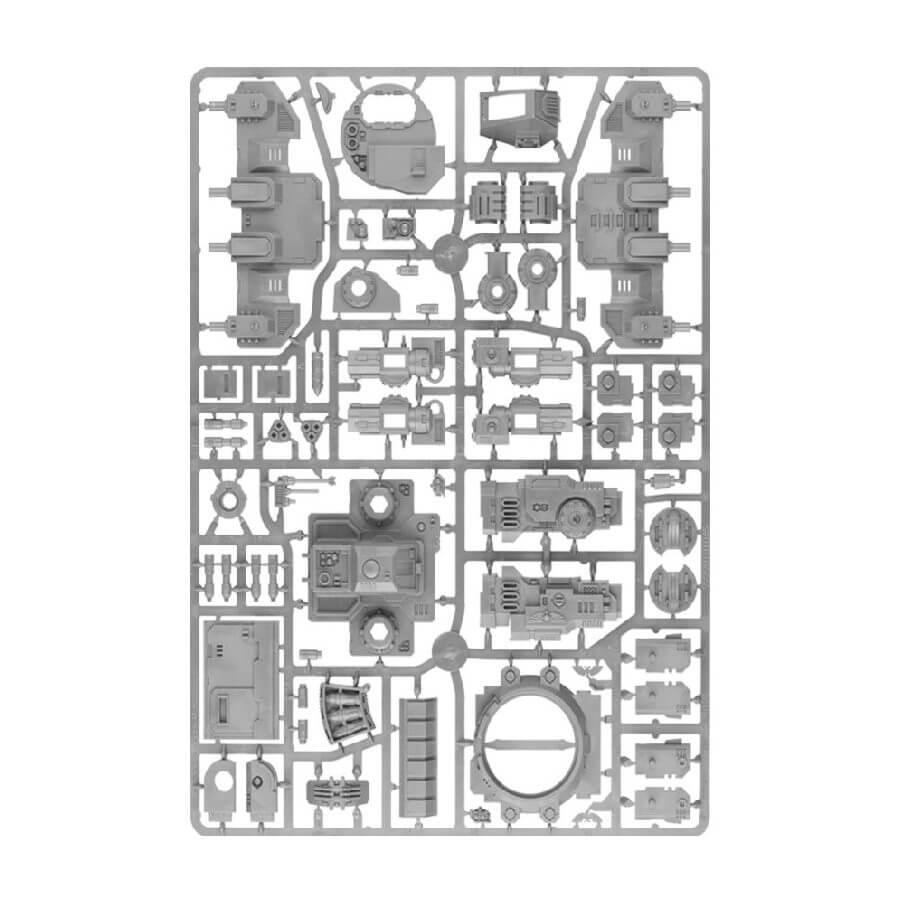
For even more customization, the kit includes a sprue of vehicle upgrades that can be added to the model. You can choose between two top hatches, one of which can mount a storm bolter. Additionally, there are enough parts to create either a Space Marine gunner in a turret or an automated weapons system. Other upgrades include a hunter killer missile, a pintle-mounted storm bolter, a sensor array, a searchlight, two smoke launchers, two towing hooks, and a name plate for the tank.
One of the great advantages of the Space Marine range is that all the plastic parts can be interchanged between different kits. This means that the Space Marine Hunter can be combined with other Space Marine vehicles to create truly unique collections of miniatures.
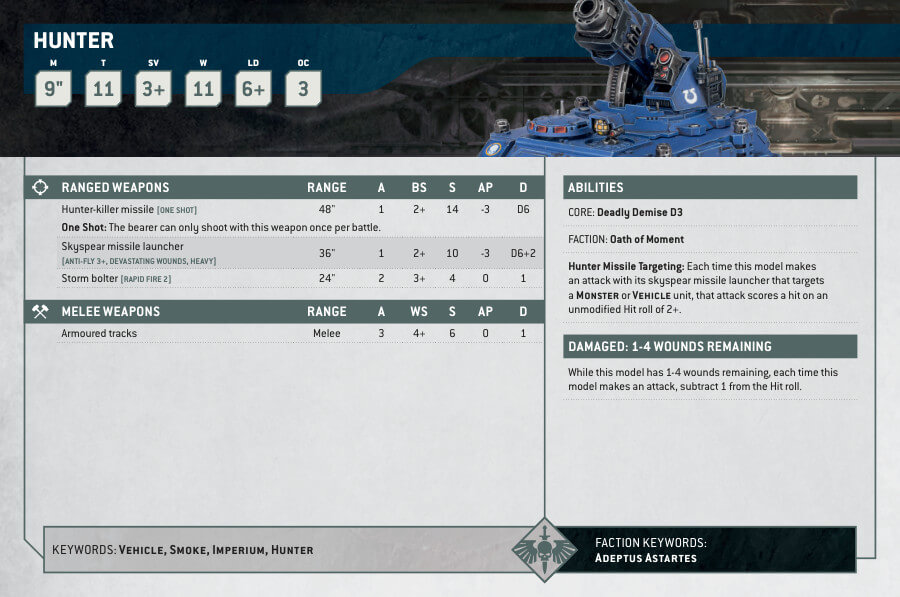
Hunter Datasheets
What’s in the Hunter box
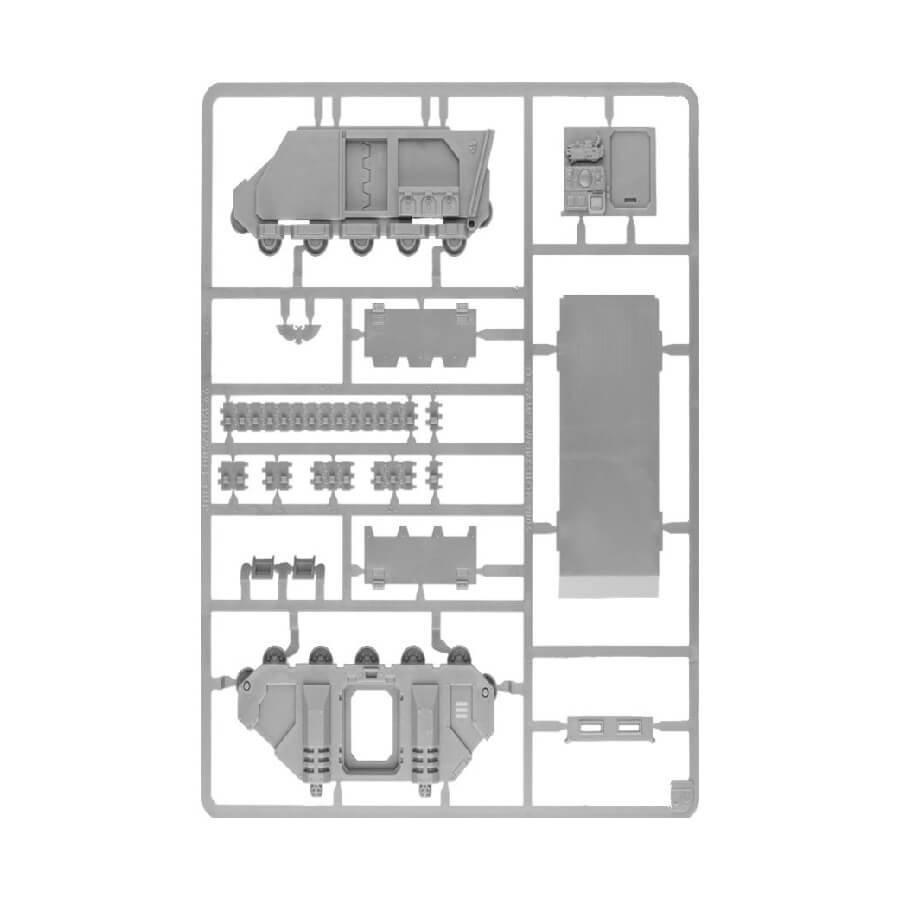
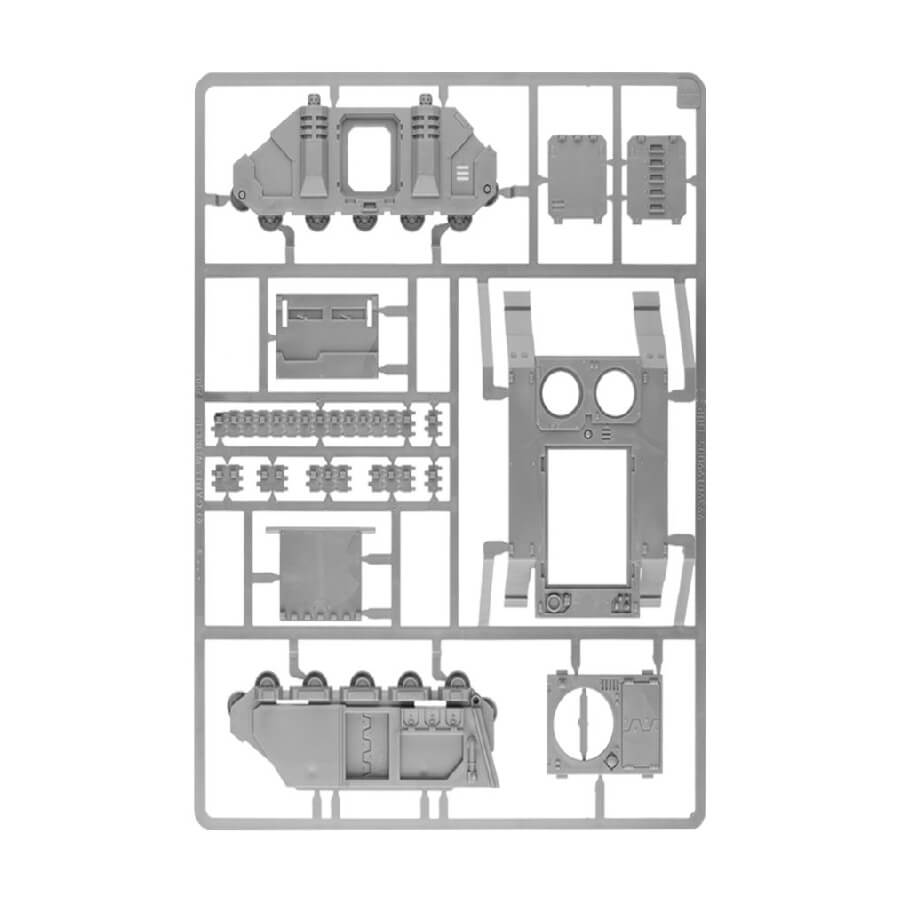
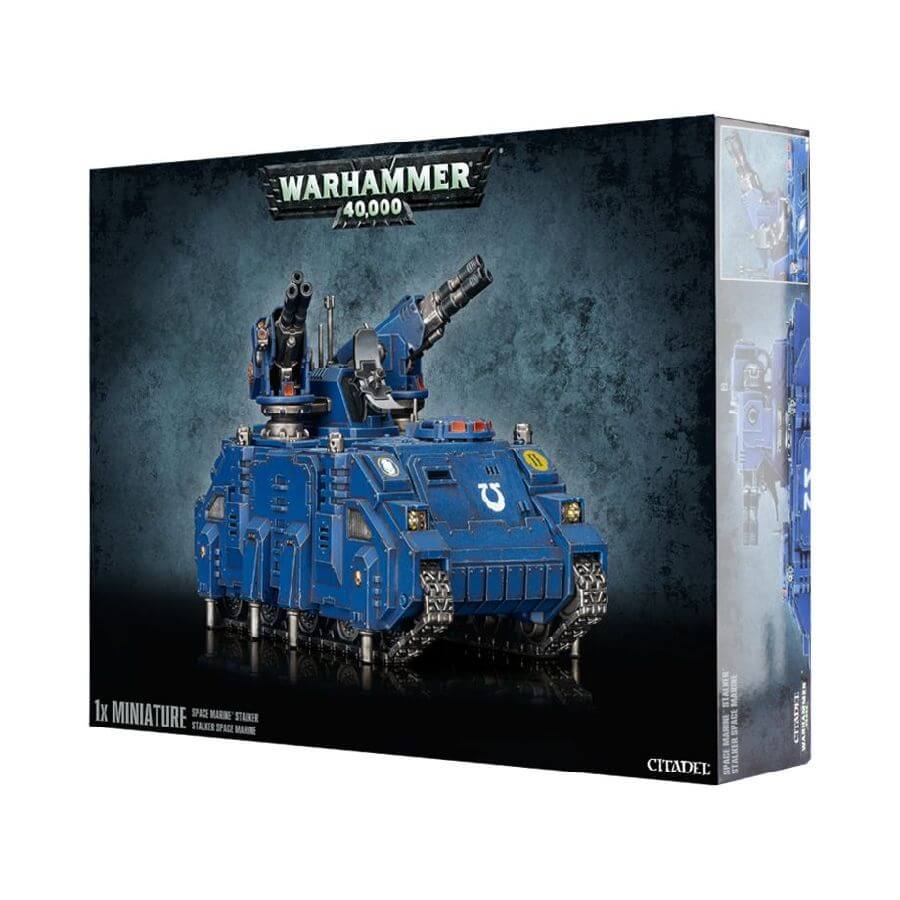
- x125 plastic components that can be used to build either a Hunter or a Stalker. This versatile kit allows you to choose between two of the Space Marine’s most deadly tanks.
- x1 Space Marine vehicle transfer sheet that features a wide variety of Chapter iconography and vehicle markings. These transfers are easy to apply and add an extra level of customization to your finished model.
How to paint the Hunter
- Step 1: Clean and prime your miniature
Before you start painting, make sure your miniature is clean and free of any mold lines or excess plastic. Then, you can prime your model with one of our sprays. This will help the paint adhere better and provide a smoother finish. - Step 2: Paint the base colors
Start by painting the base colors of your model. For the Hunter, the most prominent color will be the armor, which can be painted with a base coat of Abaddon Black or Macragge Blue depending on the color scheme you want to use. Then, paint the other details like the weapons, sensors, and hatches using colors like Leadbelcher, Mephiston Red, and White Scar. - Step 3: Apply washes
If you want to add some depth and shadows to your model, you can apply washes. These are thin paints that will settle in the recesses of your model, highlighting the details and adding a sense of depth. For example, use Nuln Oil to shade the armor and Carroburg Crimson for the red details. - Step 4: Drybrush
To highlight the raised areas of your model and give it a worn look, use the drybrush technique. Take a brush with a small amount of paint on it and lightly brush it over the raised edges of the armor. This will create a highlight effect. For example, use Ironbreaker to drybrush the edges of the armor. - Step 5: Highlight
For a more advanced technique, you can add highlights to your model to bring out the details even more. Using a small brush, carefully apply a lighter color to the raised edges of your model. For example if your basecoat is a blue, use Calgar Blue to highlight the edges of the armor. - Step 10: Varnish
Once the paint has dried, apply a protective varnish to the tank to safeguard the paint job and give it a finished look. We recommend using Munitorum Varnish for this purpose.