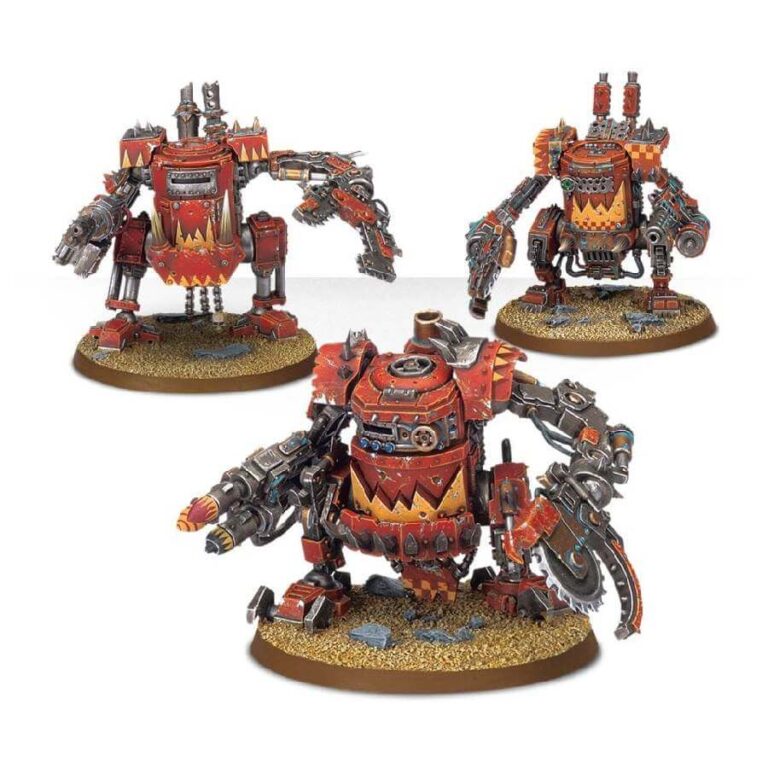
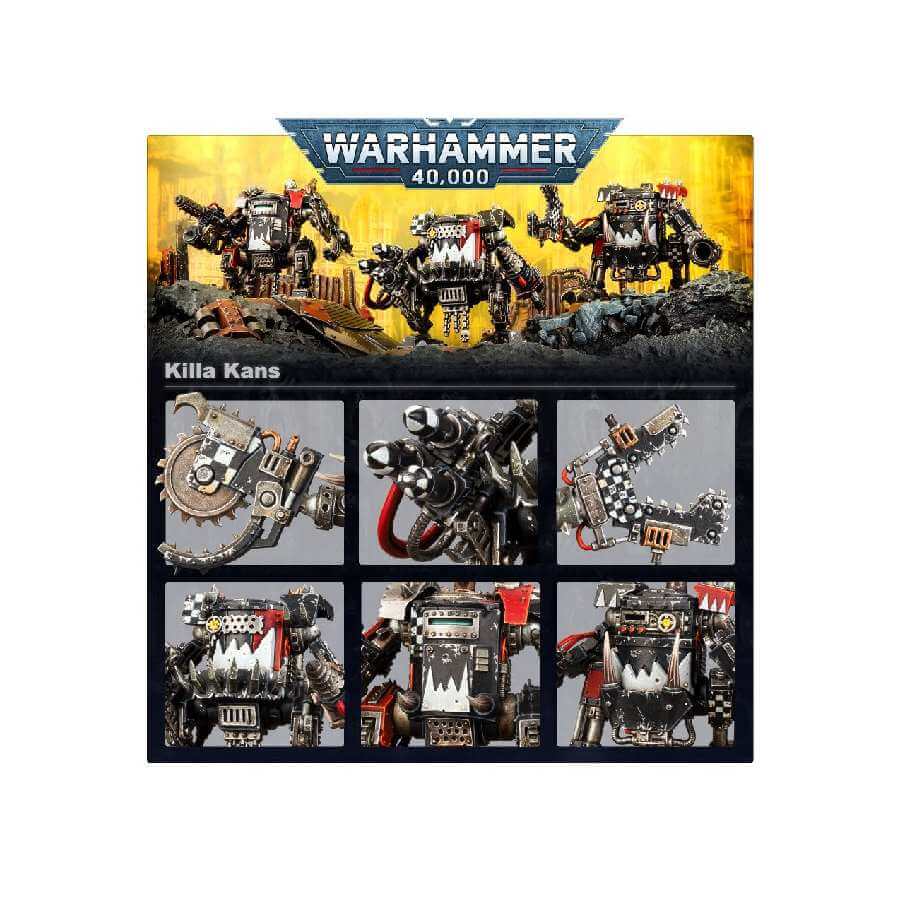
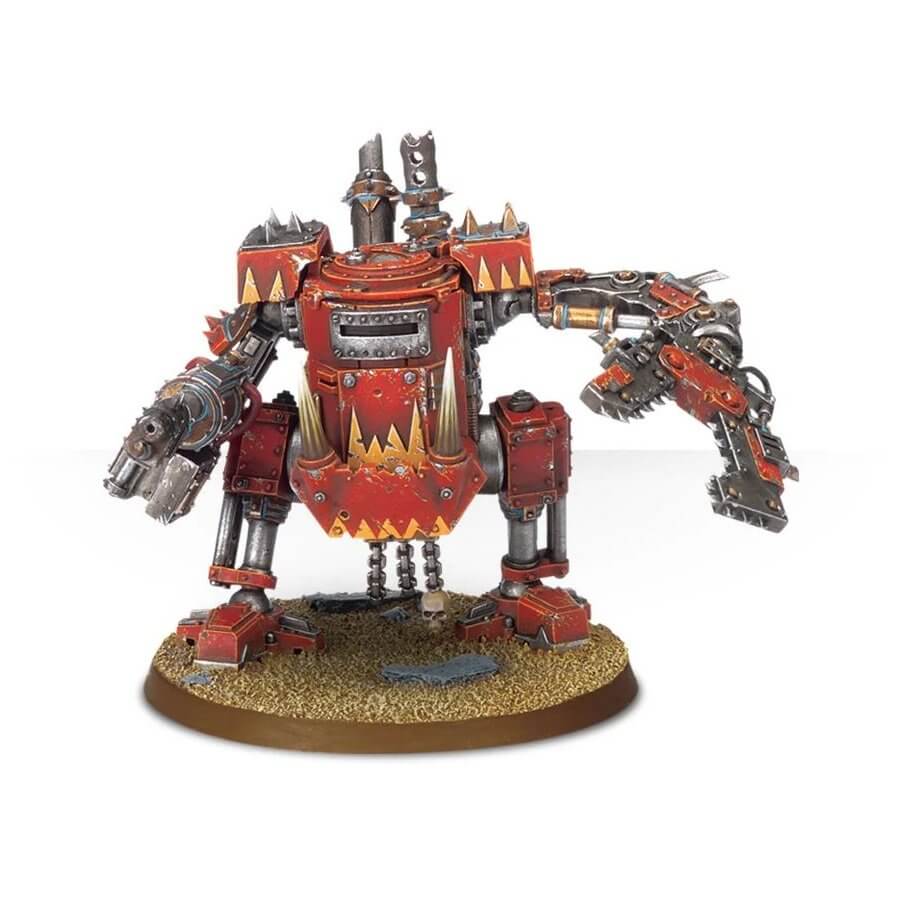
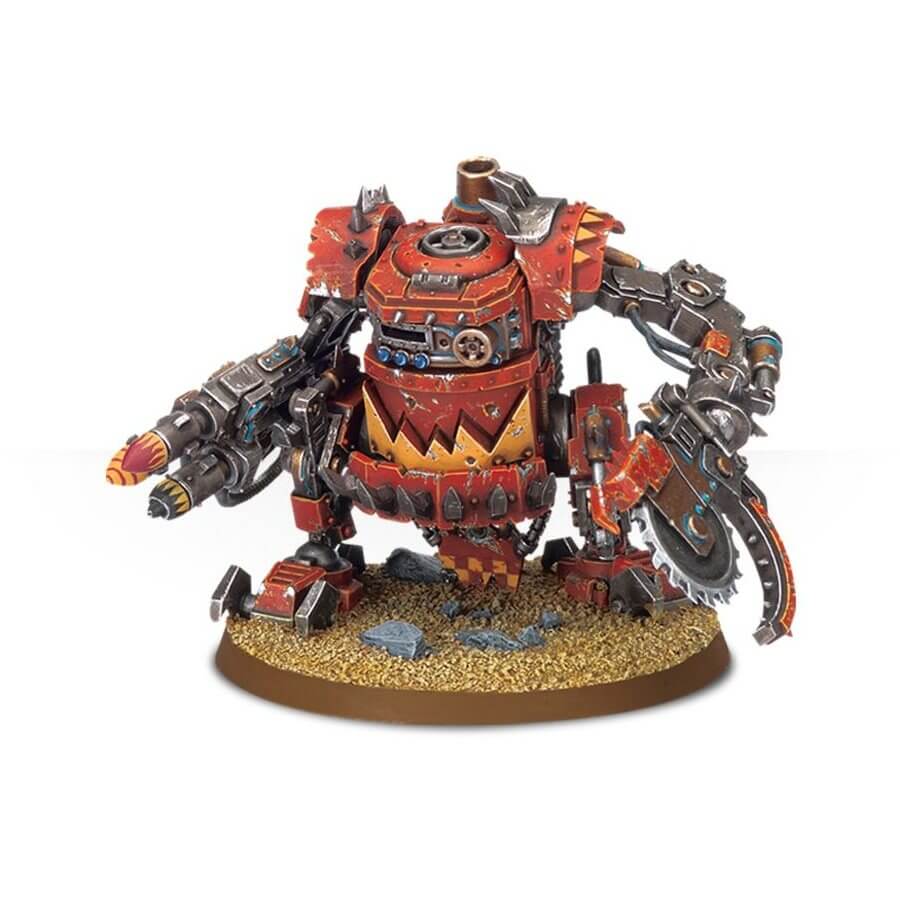
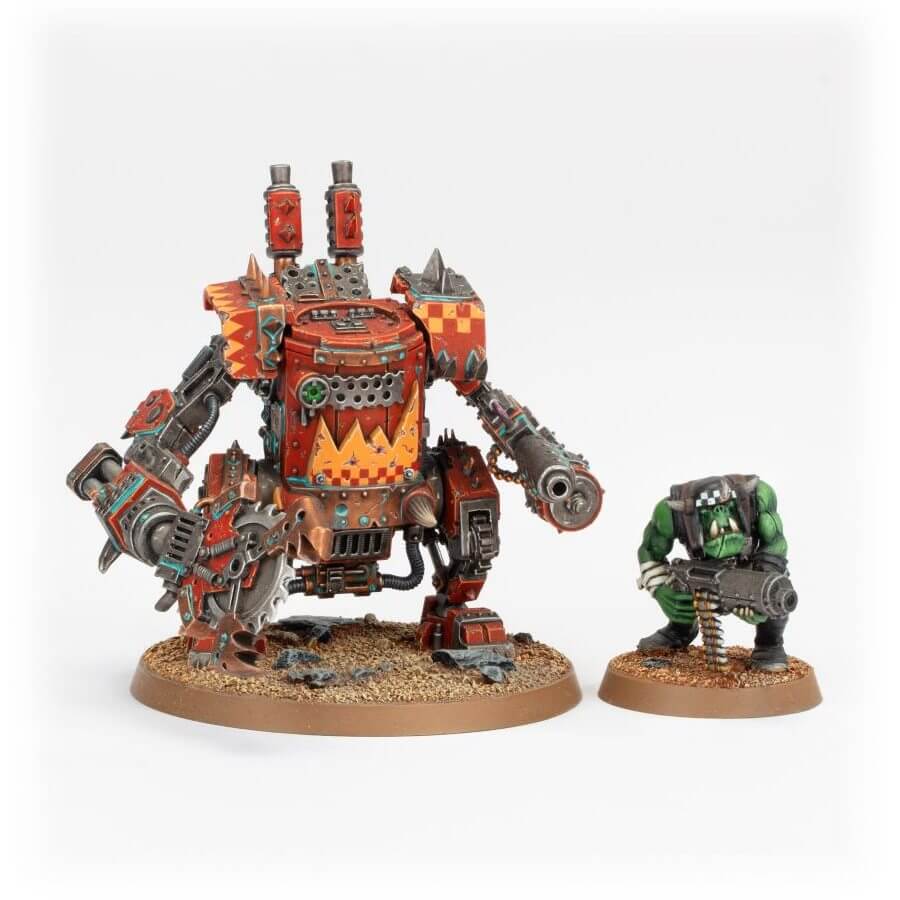
Killa Kans are fearsome Ork war machines resembling massive metal canisters mounted on piston-driven legs, equipped with deadly close combat attachments and powerful weaponry. One limb typically wields menacing power shears or a bloodied buzz saw, while the other side features a formidable large-caliber weapon. These formidable constructs strike fear into the hearts of their enemies and serve as formidable assets on the battlefield.
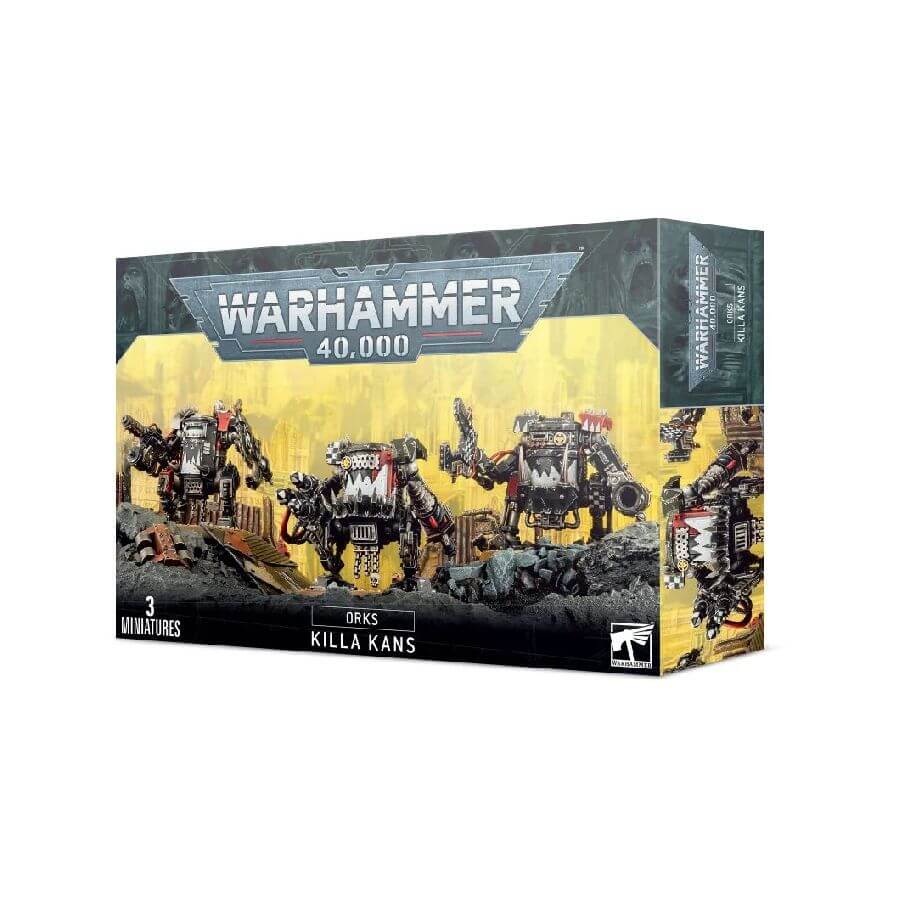
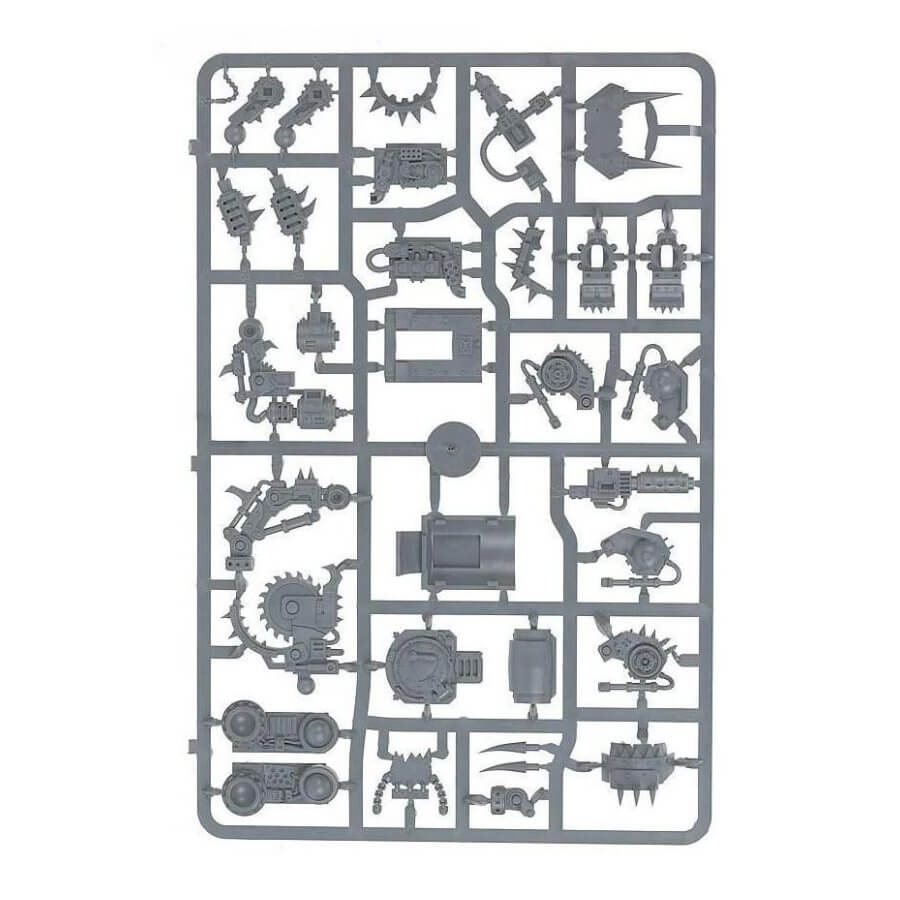
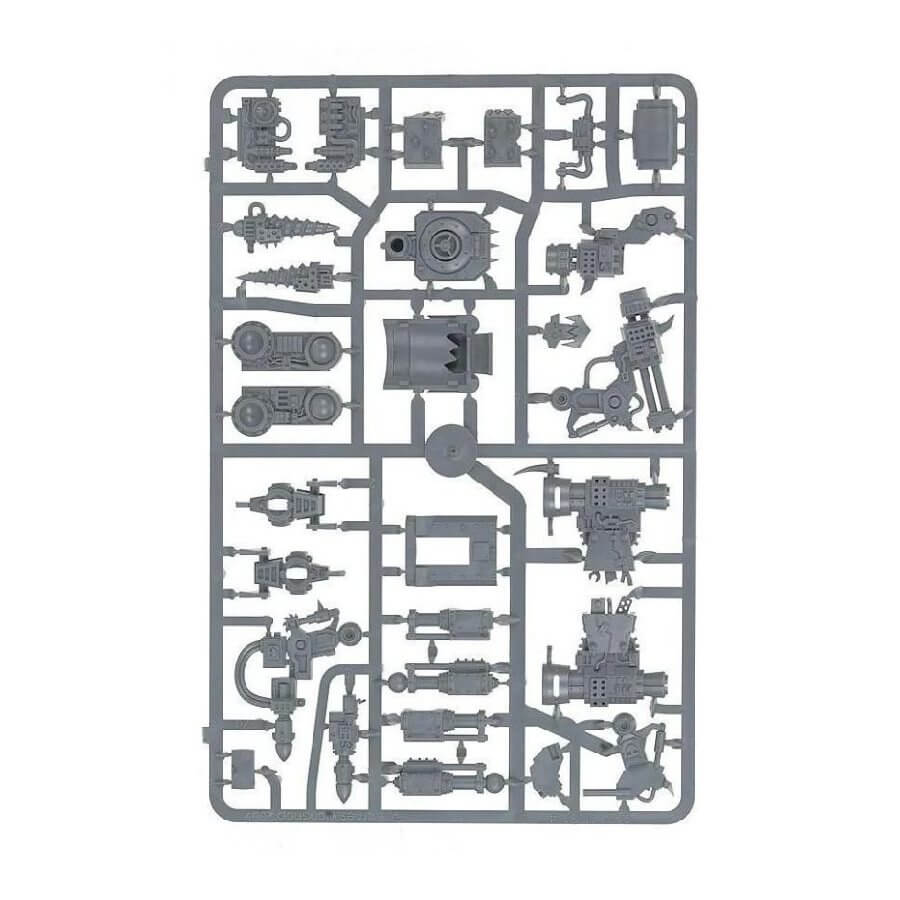
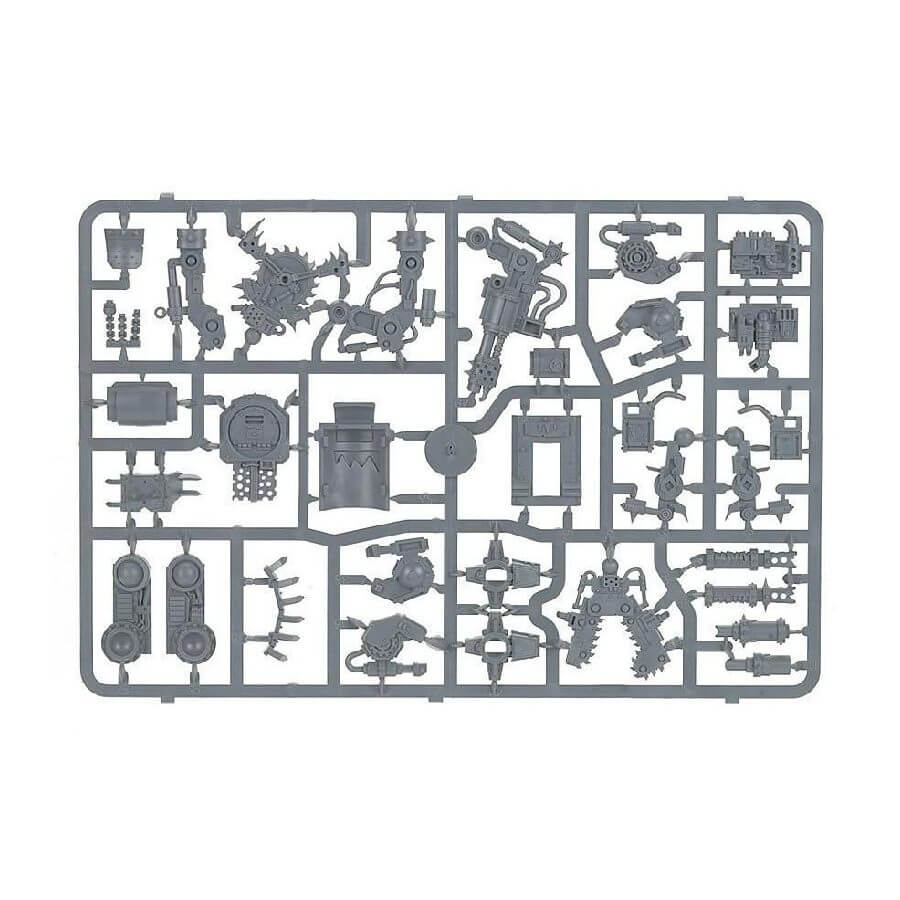
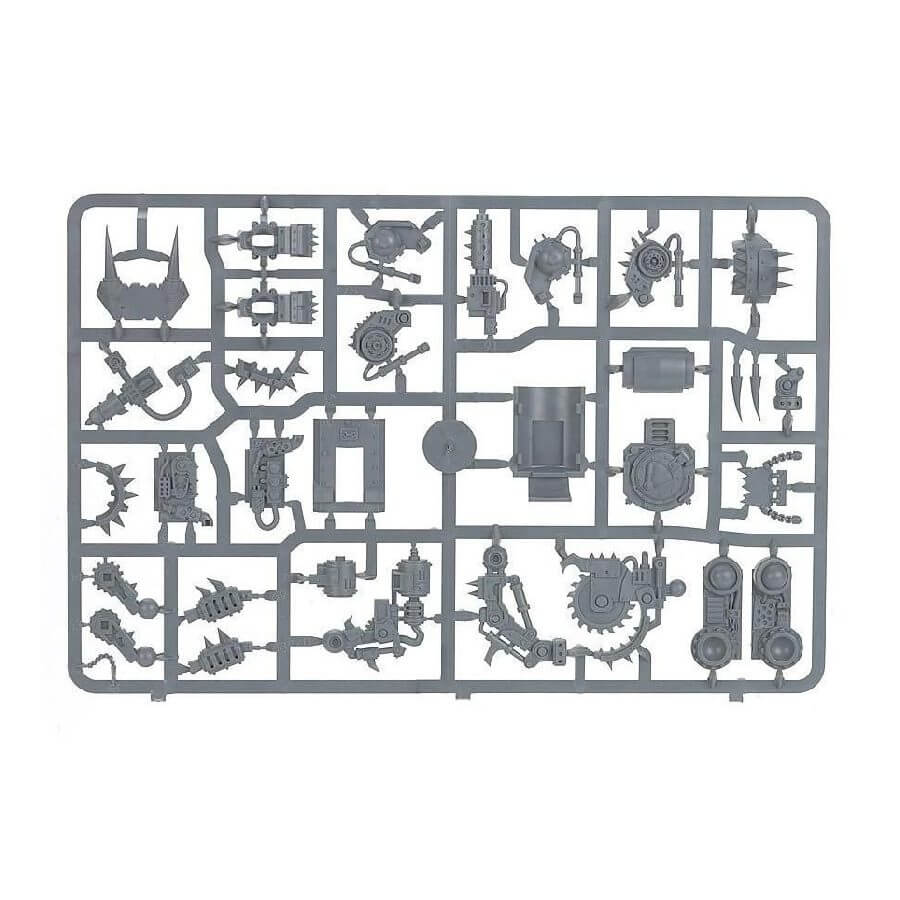
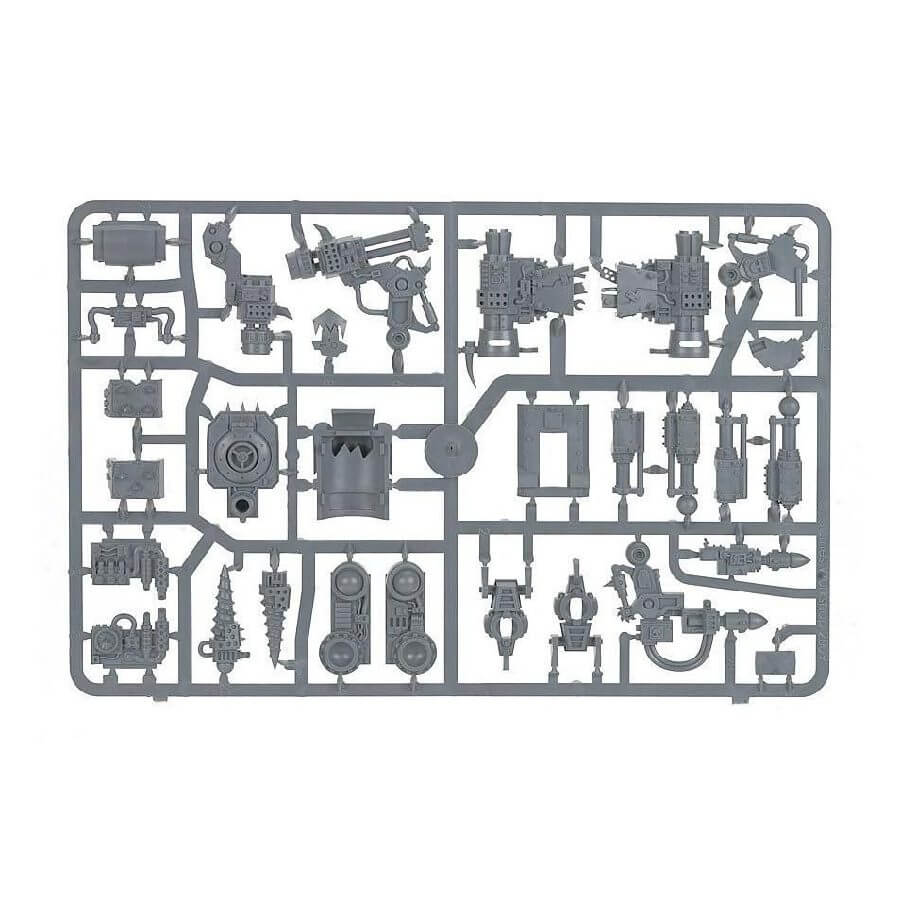
What’s in the Killa Kans box
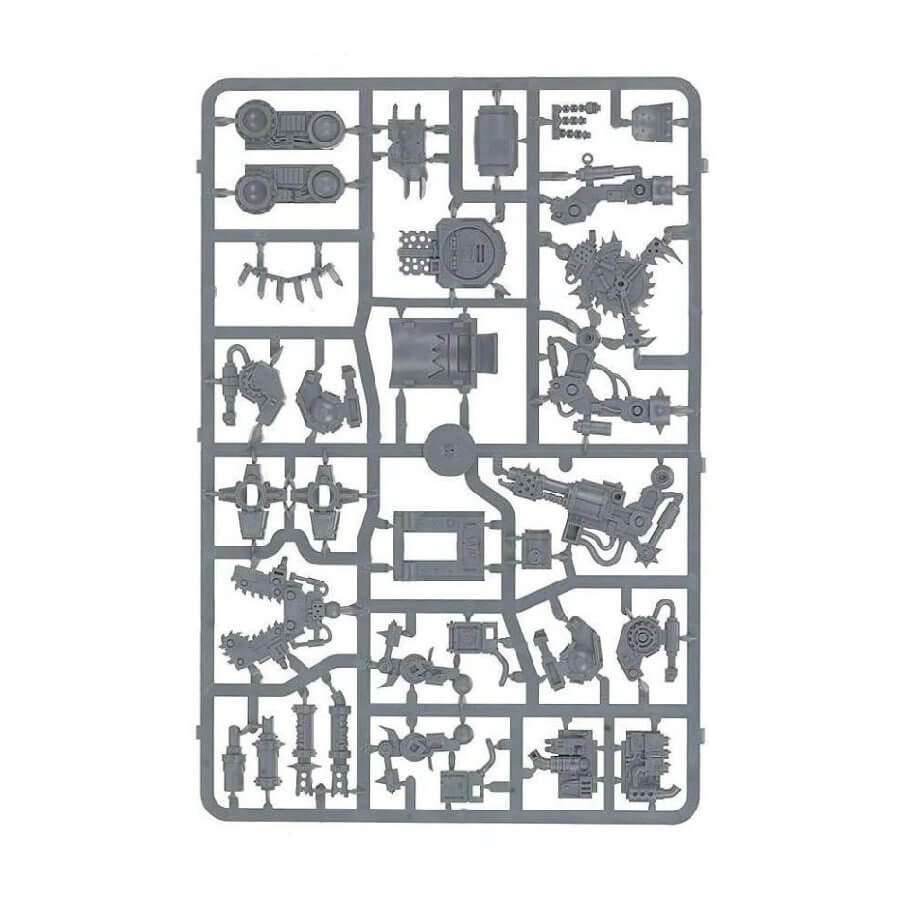
- x94 plastic components that make 3 Ork Killa Kans. The set includes: three variations of Cockpit, three different close combat weapons, a big shoota, a rokkit launcha and a skorcha. Also included are a host of glyphs, armour plates, horns, metal teef and dangly bitz.
- x3 Citadel 60mm round bases.
How to paint the Killa Kans set
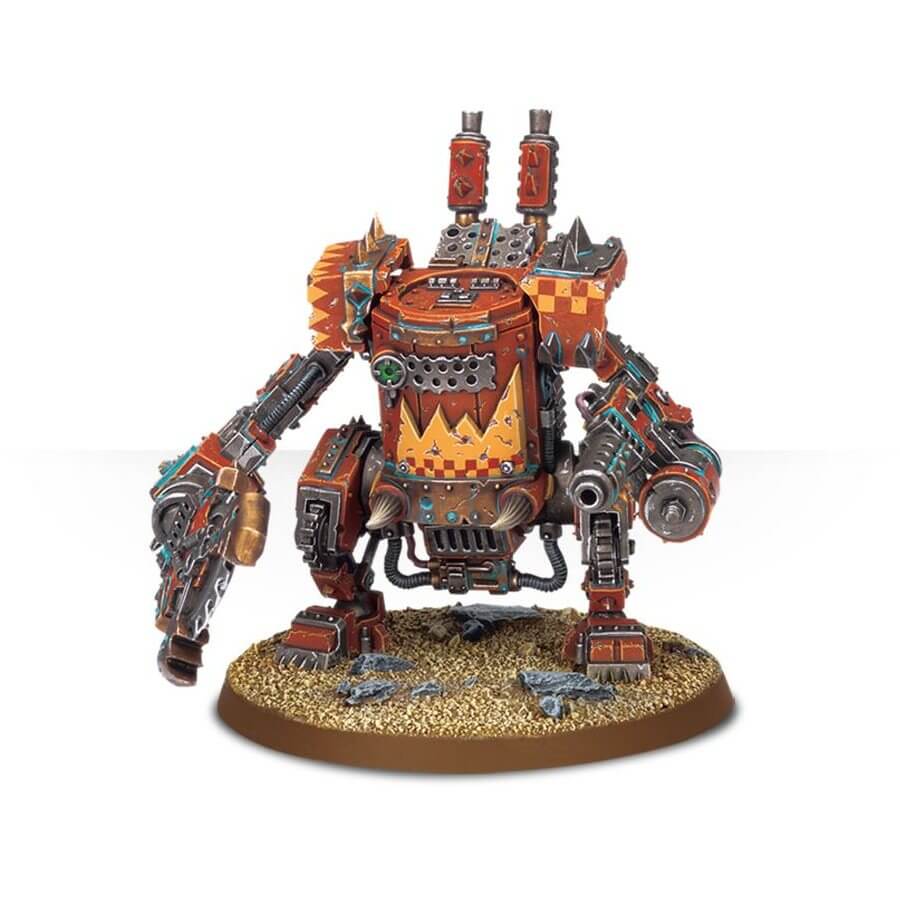
- Step 1: Basecoat the Body with Red
Start by applying a basecoat of red paint to the main body of the Killa Kan. Choose a vibrant red color like Mephiston Red or Evil Sunz Scarlet to cover the entire body. - Step 2: Shade the Red Body
To add depth and dimension to the red body, apply a shade or wash like Carroburg Crimson or Nuln Oil over the entire surface. This will create shadows and make the red color appear more rich and realistic. - Step 3: Layer the Red Body
Once the shade has dried, use a lighter red color like Wazdakka Red or Wild Rider Red to layer and highlight the raised areas of the body. Concentrate on the edges and surfaces that catch the most light. This will make the red body pop and add visual interest to the model. - Step 4: Paint the Panels with Yellow
Next, paint the panels that resemble the bottom part of the mouth with a yellow color. Use a bright yellow like Yriel Yellow to add a striking contrast to the red body. - Step 5: Shade the Yellow Panels
Apply a shade or wash like Casandora Yellow over the yellow panels to add shading and depth. This will make the panels look more three-dimensional and realistic. - Step 6: Highlight the Yellow Panels
Once the shade is dry, use a lighter yellow color like Flash Gitz Yellow or Dorn Yellow to highlight the edges and raised areas of the yellow panels. This will make the panels stand out and add visual interest to the model. - Step 7: Paint the Metallic Parts
Now, paint the various metallic parts of the Killa Kan, such as the weapons and joints, with metallic colors. For example, you can use Leadbelcher or Ironbreaker for silver metallics and Balthasar Gold for gold metallics. - Step 8: Shade the Metallic Parts
Apply a shade or wash like Nuln Oil over the metallic parts to add shading and depth. This will make the metallic parts look more realistic and add a weathered appearance. - Step 9: Highlight the Metallic Parts
Once the shade is dry, use a lighter metallic color like Runefang Steel or Liberator Gold to highlight the edges and raised areas of the metallic parts. This will make the metallics shine and add visual interest to the model. - Step 10: Add Details with Other Colors
Use other colors to add details to the Killa Kan, such as black for power shears or buzz saws, and different colors for additional details on the model, like glyphs and other markings. - Step 11: Apply a Wash (Optional)
If you want to add additional shading and depth, you can apply a wash like Nuln Oil or Agrax Earthshade over specific areas that need more definition. This will enhance the details and make the model look more realistic. - Step 12: Final Touches
Add any final touches to the Killa Kan, such as highlighting specific details, adding additional weathering effects, or painting the base. You can also use different colors to paint any additional details you want to include, such as eyes, symbols, or other markings. - Step 13: Varnish (Optional)
To protect your painted model and give it a finished look, you can apply a varnish like Munitorum Varnish or Ardcoat. Varnishing will help protect the paintwork from chipping or fading during gameplay and storage.
