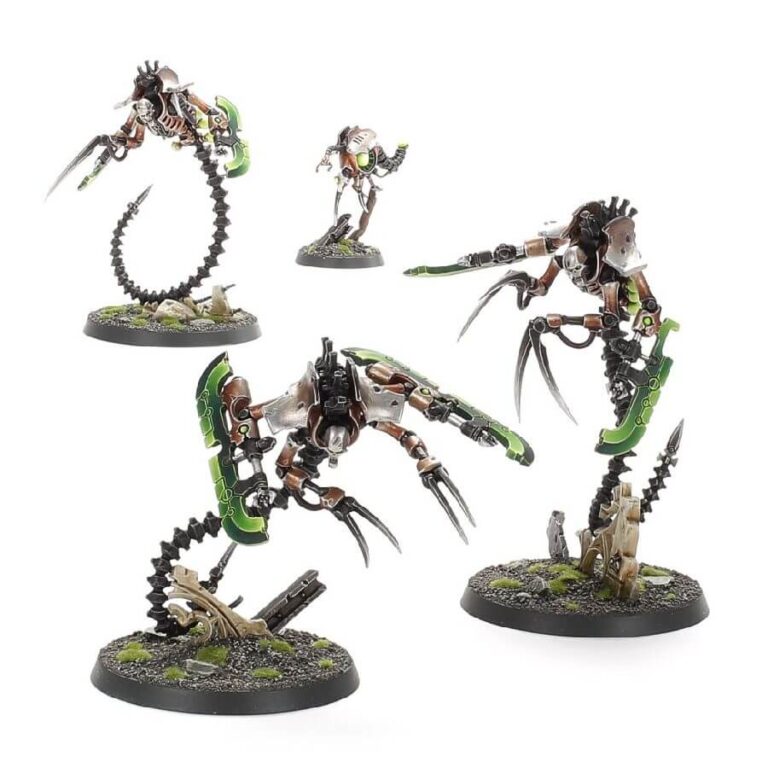
Unveiling a blend of unsettling features drawn from both the subservient Canoptek Wraiths and the dreaded Flayed Ones, the Ophydian Destroyers emerge as a chilling addition to the Necron forces. Propelled by a drive for optimized destruction, their bodies exhibit an unsettling combination of traits. Propelling themselves through solid ferrocrete with a frenzy reminiscent of untamed violence, these destroyers utilize fleeting flashes of dimensional displacement to execute ambushes with precision, unleashing a brutal assault that shatters and rends their prey.
Harness the swift and lethal capabilities of the Ophydian Destroyers to cut a swathe through enemy ranks. Equipped with hyperphase weaponry and Ophydian claws, these hovering predators leave little chance for survival when they strike. Augmenting their lethality is the option to include a Plasmacyte, who empowers the Destroyers even further. The kit offers six distinct heads, providing ample room for personalization, allowing you to sculpt your own unique narrative within the Necron forces.
What’s in the Ophydian Destroyers box
- x57 plastic components that make three Ophydian Destroyers and a Plasmacyte.
- x3 Citadel 50mm round bases.
- x1 Citadel 28.5mm round base.
How to paint the Ophydian Destroyers set
- Step 1: Prime Your Models
Begin by applying a layer of Chaos Black primer to the Ophydian Destroyers. This sets the foundation for your paintwork. - Step 2: Armor Plates
Paint the armor plates on the models using Runelord Brass. This metallic hue provides a regal touch to their appearance. - Step 3: Shading
Enhance the depth of the armor plates by shading them with Nuln Oil. This step accentuates the contours and adds a layer of dimension. - Step 4: Claws and Metallic Details
Focus on the claws and other metallic details. Utilize metallic paints like Retributor Armour for a stunning metallic finish. - Step 5: Blade Base Coat
For the blades, apply a base coat of Caliban Green. This forms the starting point for the glowing effect you’ll achieve. - Step 6: Layering the Blades
Build up the glow of the blades in layers. Begin with Warpstone Glow, followed by Moot Green, and then a final touch of a bright color like Flash Gitz Yellow at the tips. This gradual transition creates a vibrant, radiant look. - Step 7: Final Touches
Revisit any other metallic details, ensuring they are refined and polished. Pay attention to any additional elements that require highlighting or touch-ups. Once you’re done, apply a varnish to your models.

