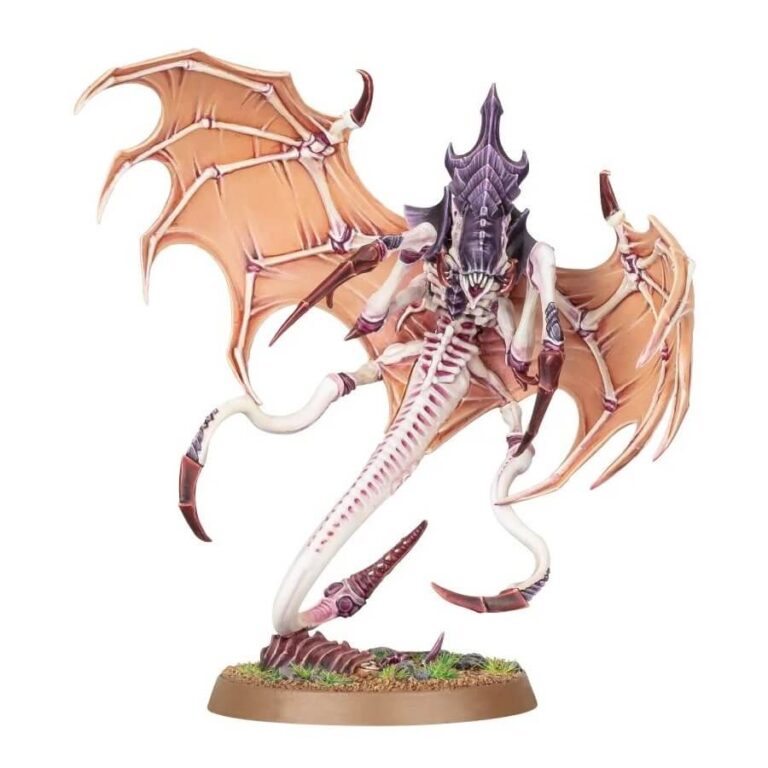
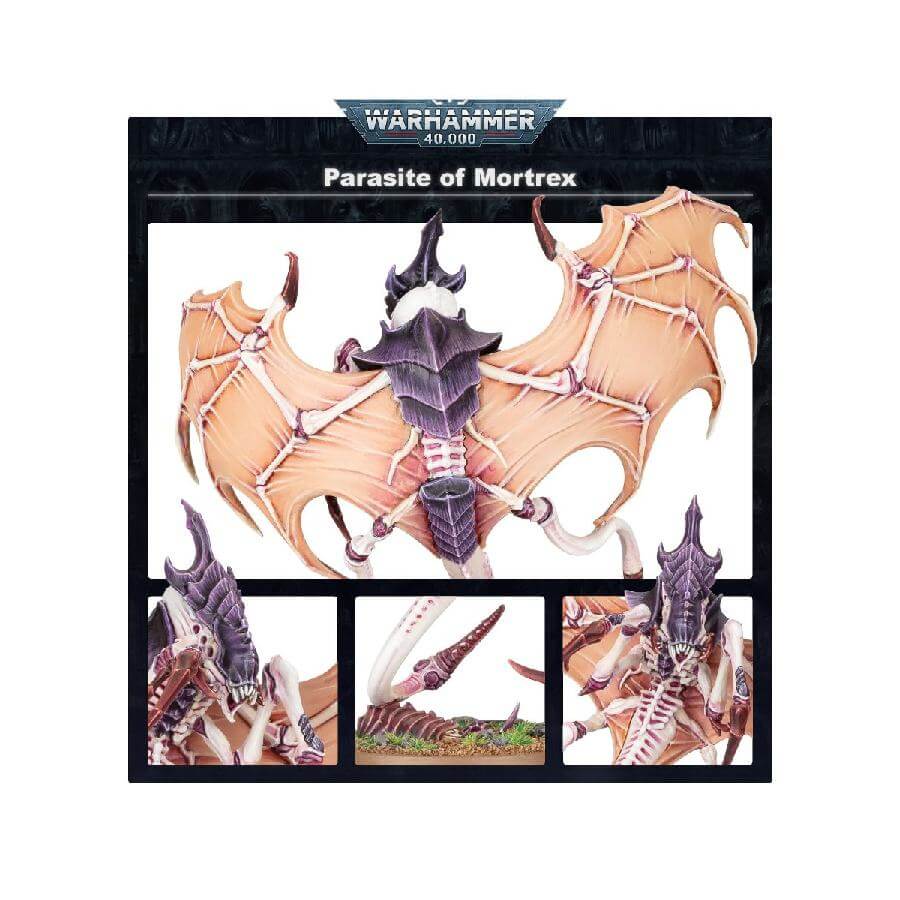
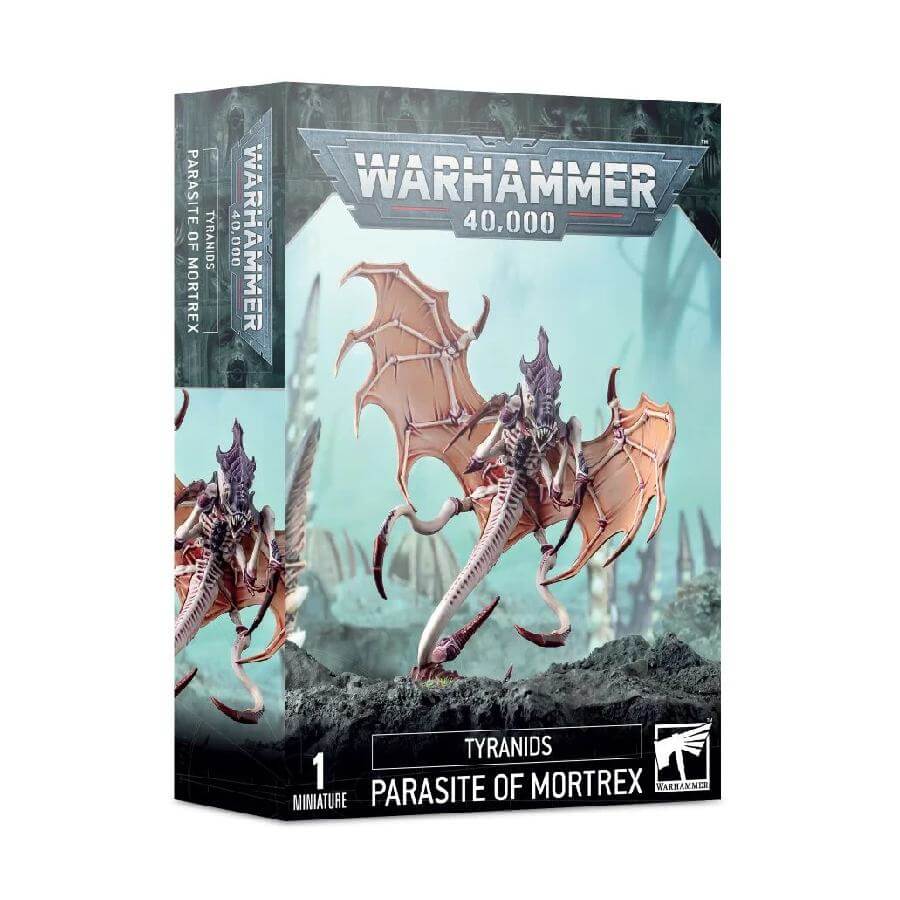
With their leathery wings and barbed ovipositors, the Parasites of Mortrex strike fear into the hearts of their enemies as they swoop down, driving Ripper gestation pods deep into their victims’ bodies. These pods give birth to rapidly growing creatures that eventually break free, wreaking havoc on the battlefield. Once the defenders of the Imperial planet Mortrex fell victim to their onslaught, but now these winged beasts serve the Hive Fleet by soaring over defenses and infesting unfortunate souls with nascent Rippers.
This kit allows you to build one Parasite of Mortrex, a formidable creature armed with clawed limbs and a barbed ovipositor. This mobile incubation organism houses hundreds of Ripper pods and possesses a range of horrifying abilities, making it a disruptive force on the battlefield. By adding this unique biomorph to your Hive Fleet, you gain access to new and unpredictable tactical options that will keep your foes guessing.
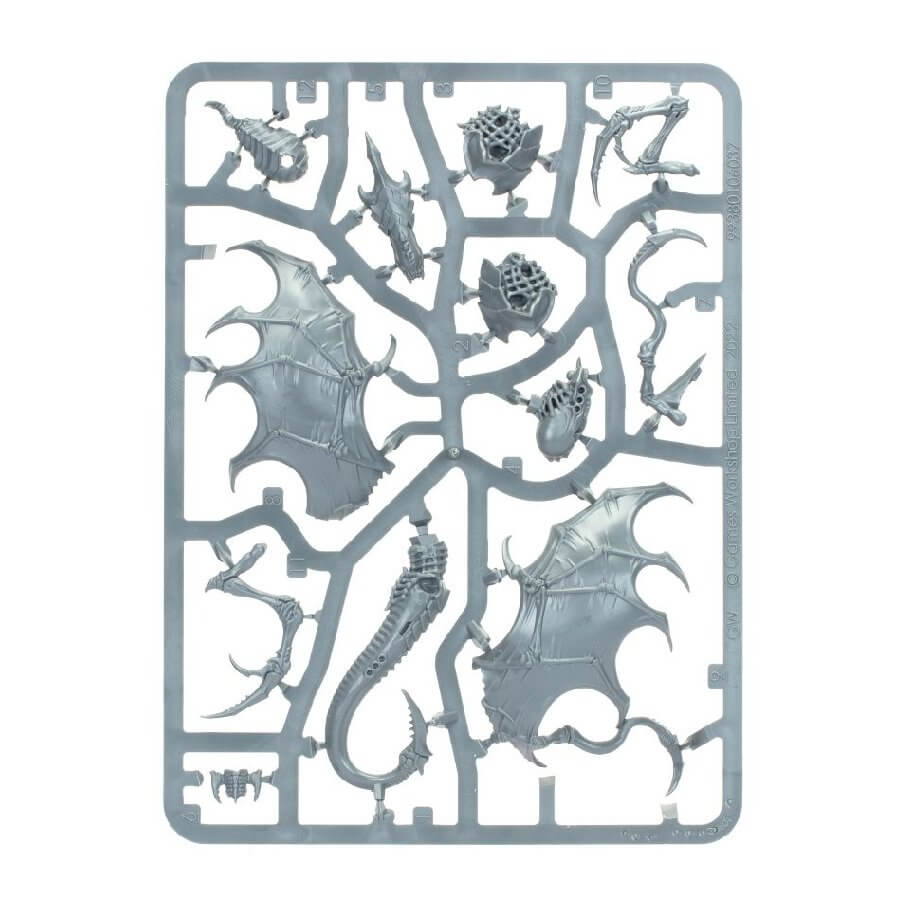
What’s in the Parasite of Mortrex box
- x12 plastic components that make this mobile incubation organism that is housing hundreds of Ripper pods.
- x1 Citadel 40mm Round Base.
How to paint the Parasite of Mortrex set
- Step 1: Prime the model (optional)
Priming the model provides a base coat that helps the paint adhere better. If you choose to prime, follow the instructions on the primer can. Use a spray primer or apply it with a brush. For this miniature we suggest you use a white primer. Let it dry completely before moving on to the next step. - Step 2: Base coat
Start by applying the base coat, which is the primary color for each area of the model. Thin your paint slightly with water to achieve a smoother application. Use a larger brush for this step. For the body, use Dorn Yellow as the base color, for the wings, use Rakarth Flesh, for the carapace, use Naggaroth Night and for the claws, use Mephiston Red. - Step 3: Layering
Layering adds depth and highlights to your model. Thin your paint further for layering, creating a semi-transparent effect. Apply lighter shades of the base color to the raised areas of the model to simulate highlights. For instance, for the body, you can layer Wrack White on top. - Step 4: Washes
Washes are thin, darker paints that settle into the recesses of the model, creating shading and depth. Apply a wash using a smaller brush, ensuring it flows into the recesses. For example, for the wings and the carapace, use Agrax Earthshade to create shading and depth. - Step 5: Dry brushing
Dry brushing helps bring out texture and detail on the model. Use an old brush with stiff bristles for this technique. Dip the brush into a small amount of paint, then remove most of it by wiping it on a paper towel. Lightly brush the model’s surface, focusing on the raised areas. You can dry brush Deepkin Flesh on the wings to highlight the texture. - Step 6: Detailing
Now it’s time to add smaller details to make the model stand out. Use a fine brush for this step. Paint in the eyes, teeth, and any other intricate elements. Use contrasting colors to make these details pop. For example, you can use Yriel Yellow for the eyes and Ushabti Bone for the teeth. - Step 7: Basing (optional)
If you wish to enhance the overall presentation, you can create a base for your model. Glue the model to a suitable base, such as a scenic one or a plain base painted to represent the environment. Add elements like rocks, grass, or sand to make it more visually appealing. - Step 8: Varnishing (optional)
To protect your painted model, you may consider applying a varnish. This will help prevent chipping and keep the paint intact. Follow the instructions on the varnish can and allow it to dry completely.