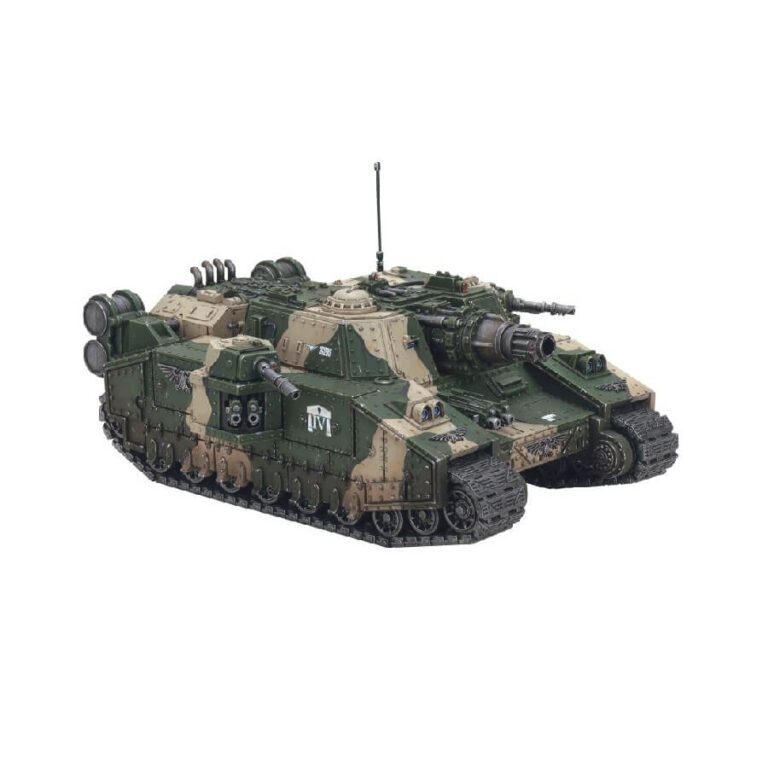
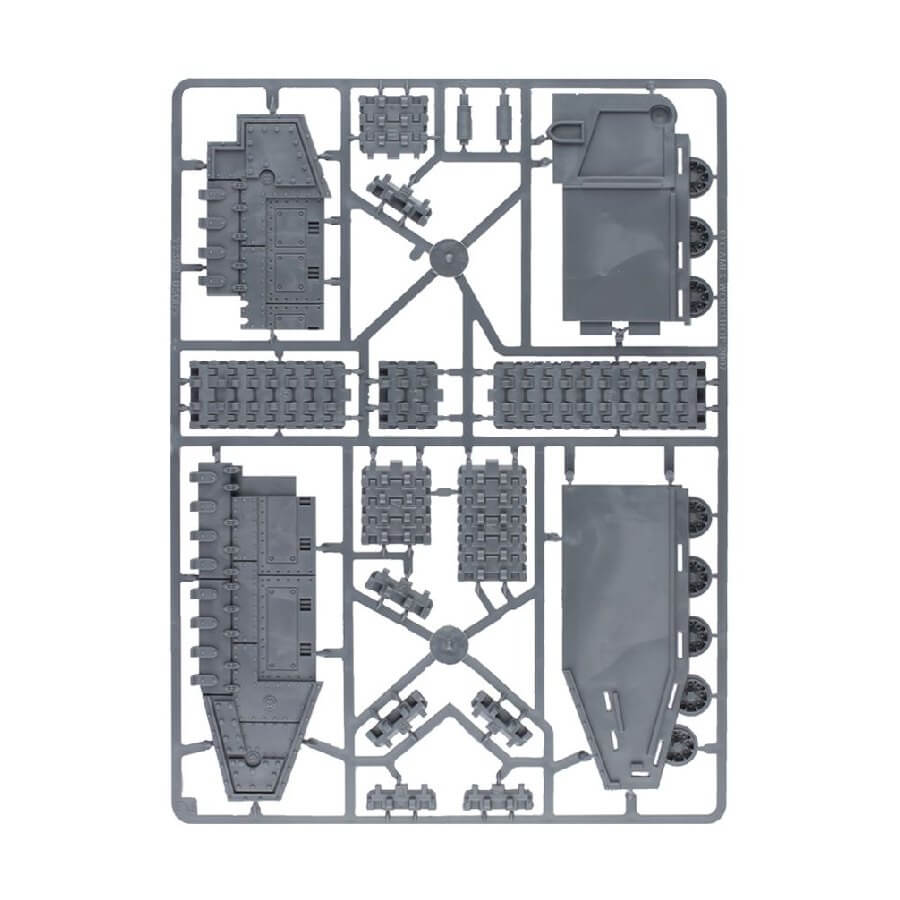
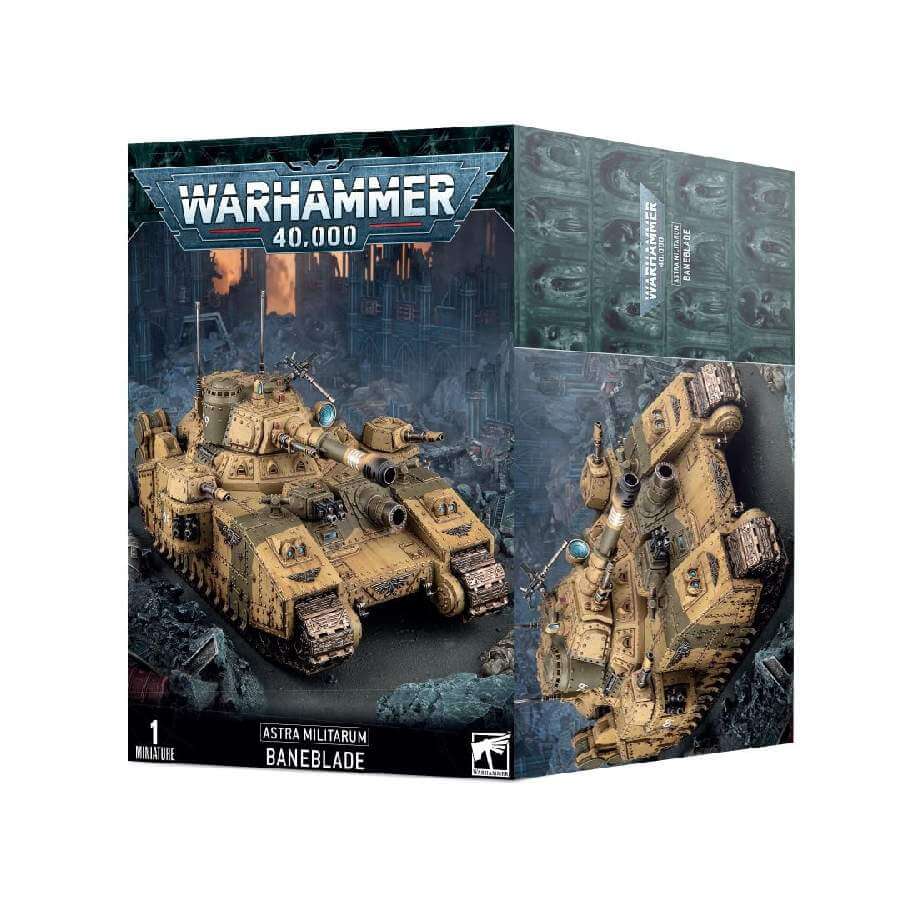
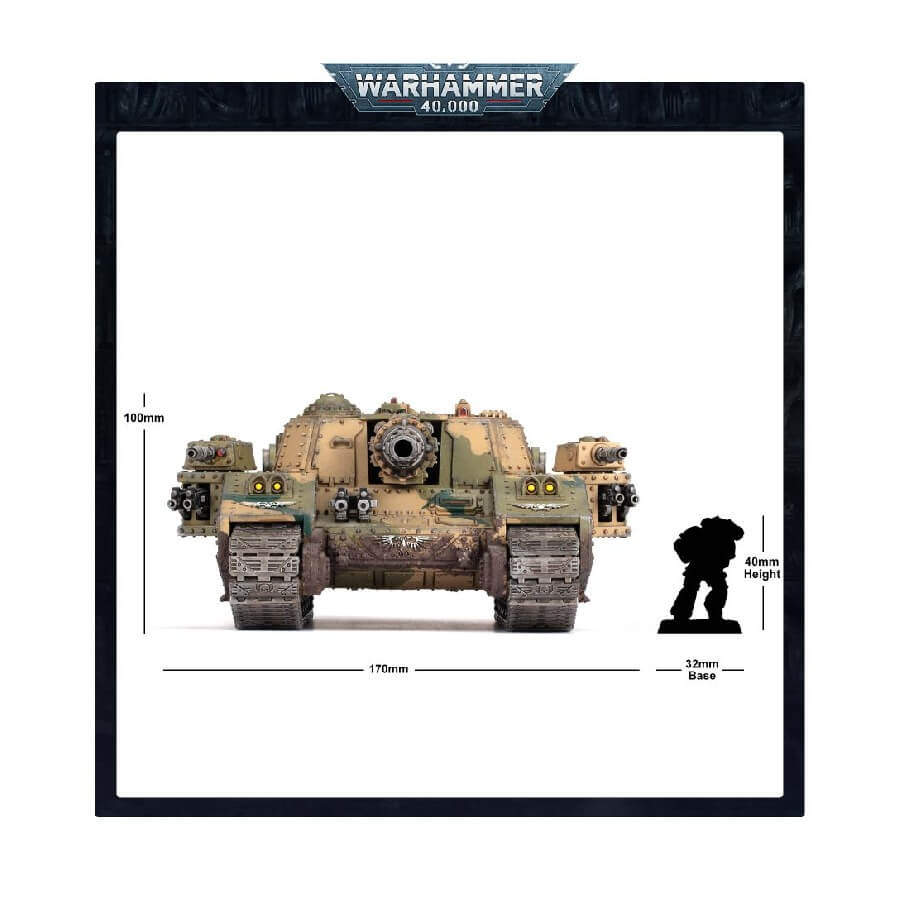
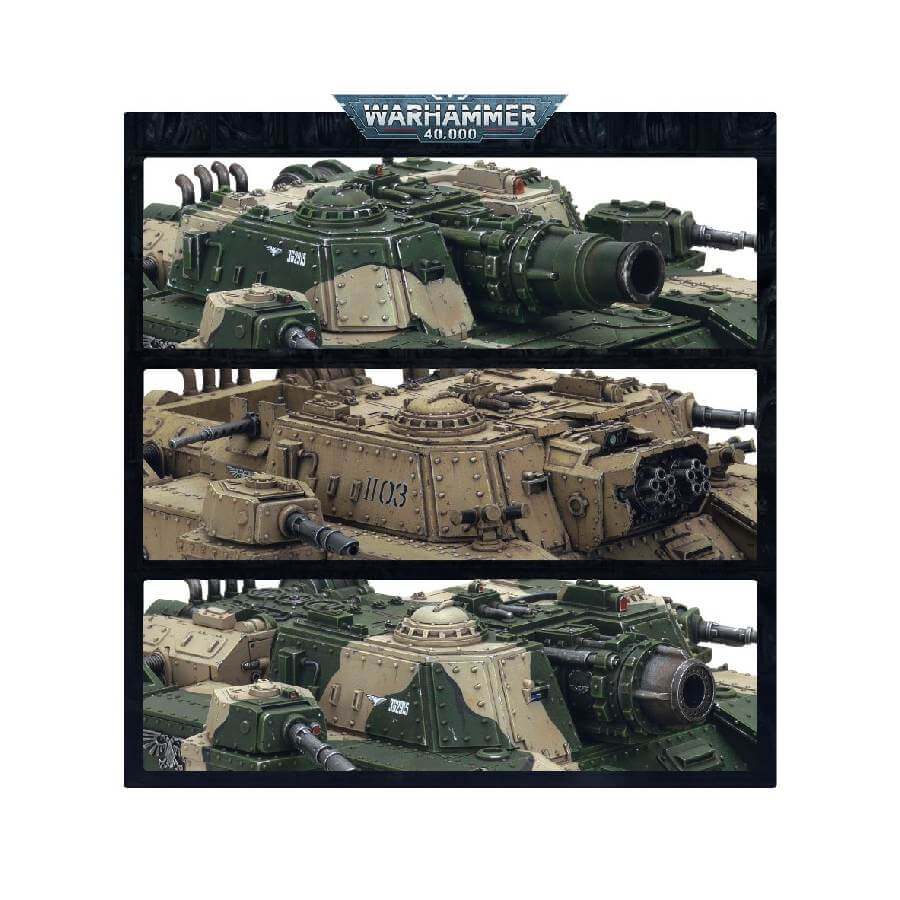
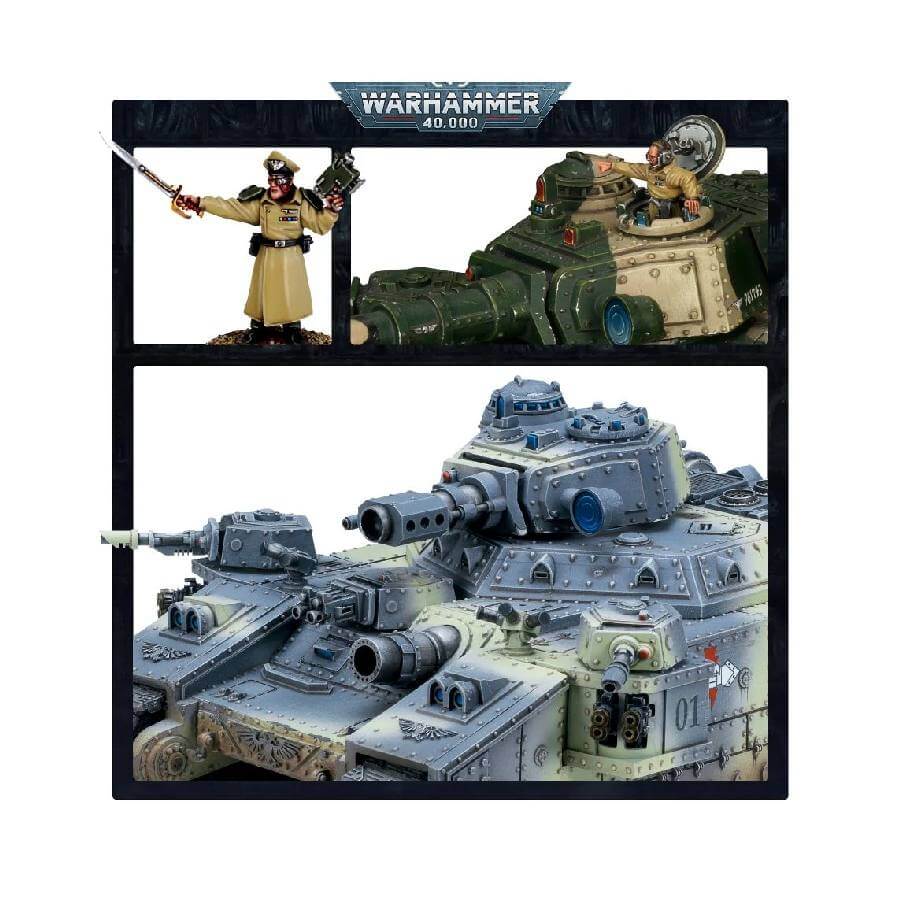
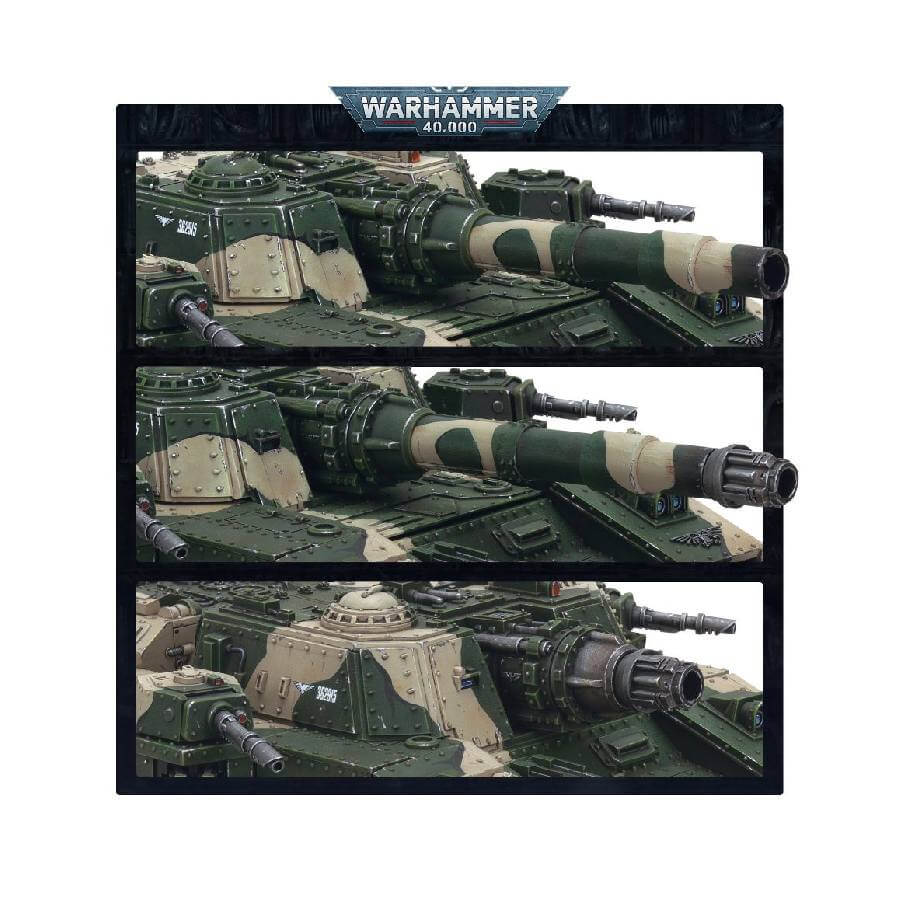
This massive multipart plastic kit constructs the Doomhammer, a formidable Astra Militarum super heavy tank capable of absorbing immense damage. Armed with a magma cannon on the turret, 2 lascannons on side turrets, twin heavy bolters on a forward hull turret, and 2 twin heavy flamers in sponson mounts, it packs a significant punch. You can customize it further by replacing sponson flamers with twin heavy bolters or adding extra sponsons with lascannons and either twin heavy bolters or twin heavy flamers. The troop-carrying capacity and firing deck for embarked units are also noteworthy.
The kit offers cosmetic options like extra stowage, additional armor plating, tow hooks, fuel, and choices for gunners and tank commanders in the hatches, including different heads. You’ll have plenty of leftover plastic for your bits box.
This massive kit can alternatively build a variety of other super-heavy tanks:
- Baneblade – armed with a baneblade cannon for maximum versatility
- Banesword – armed with a quake cannon to punish vehicles and fortifications at extreme range
- Shadowsword– armed with a tank-slagging volcano cannon
- Stormsword – armed with a bunker-busting stormsword siege cannon
- Banehammer – armed with a tremor cannon to slow down an aggressive opponent
- Stormlord – armed with a vulcan mega-bolter and large troop-carrying capacity
- Hellhammer – armed with a hellhammer cannon for close-quarters warfare
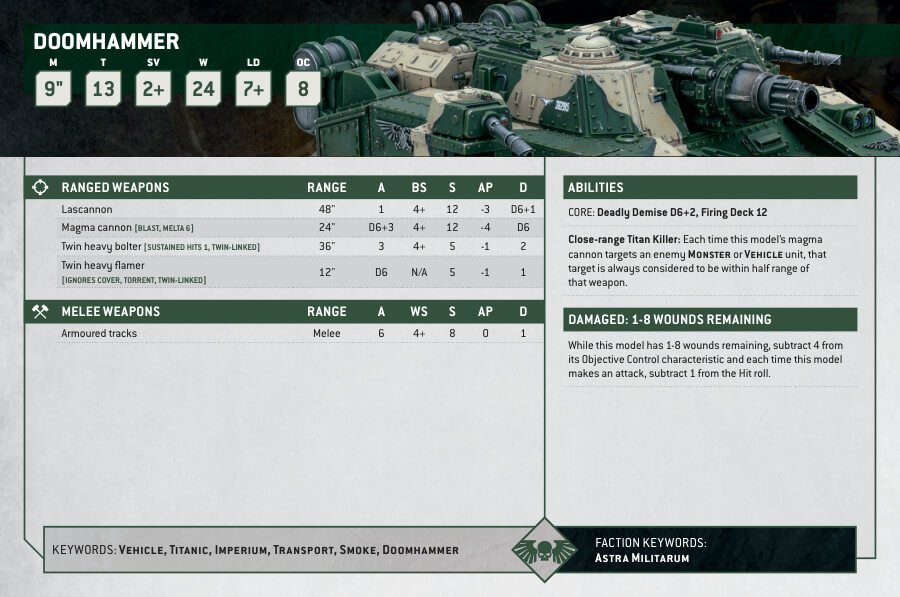
Doomhammer Datasheets
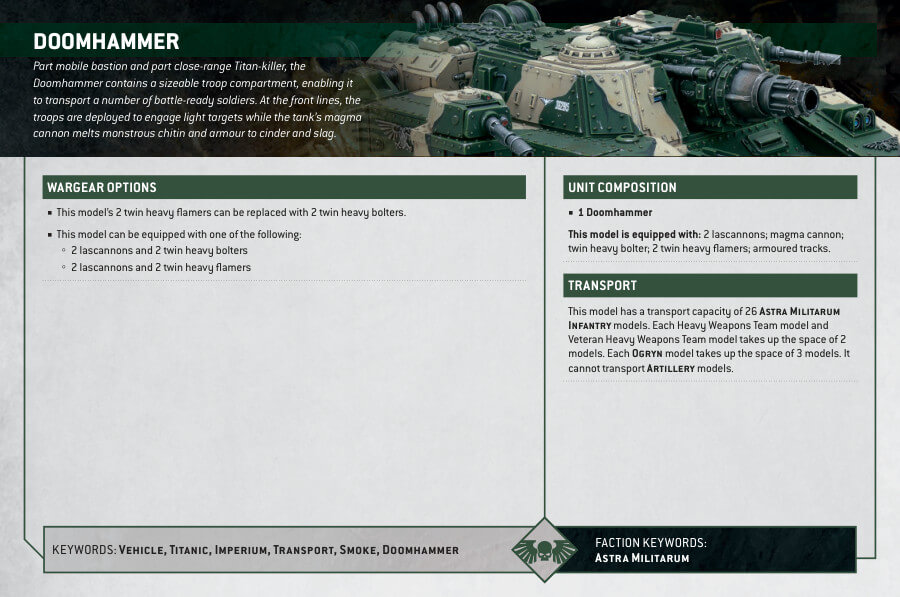
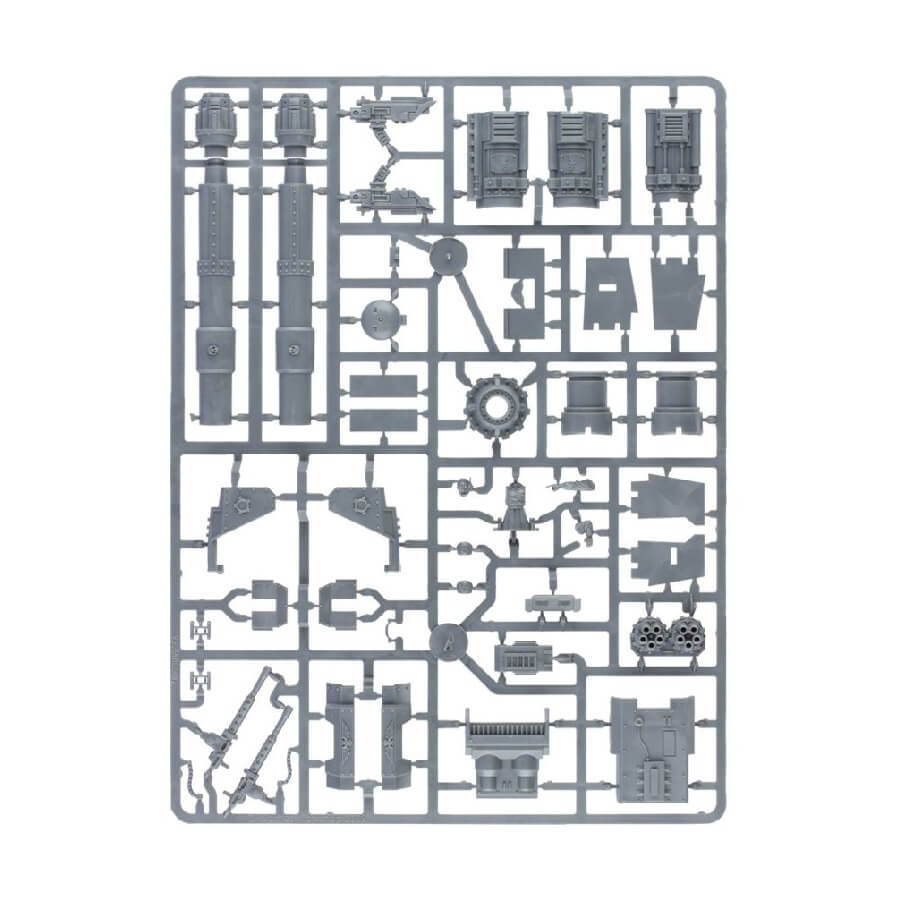
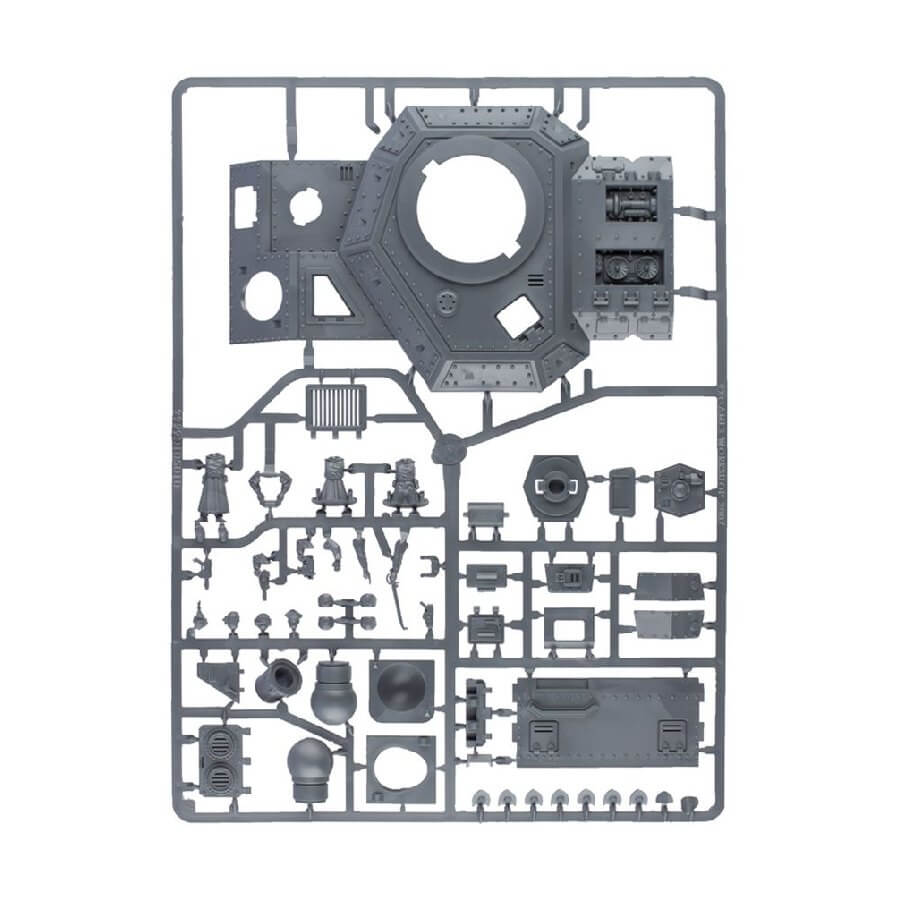
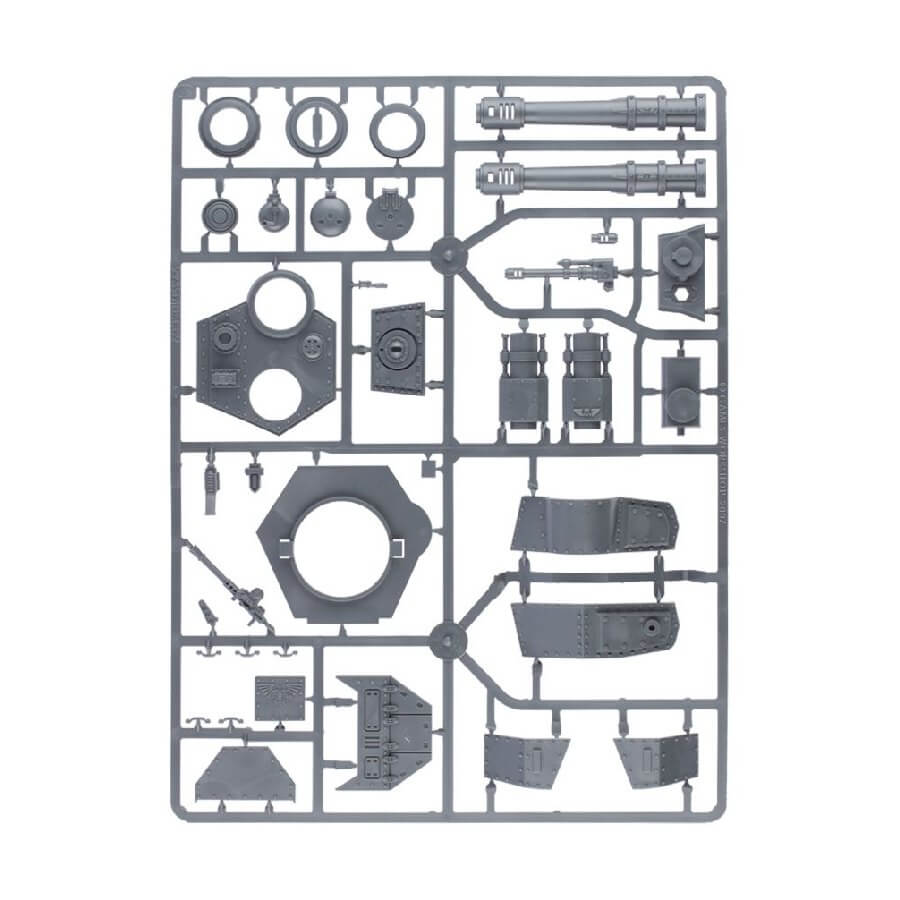
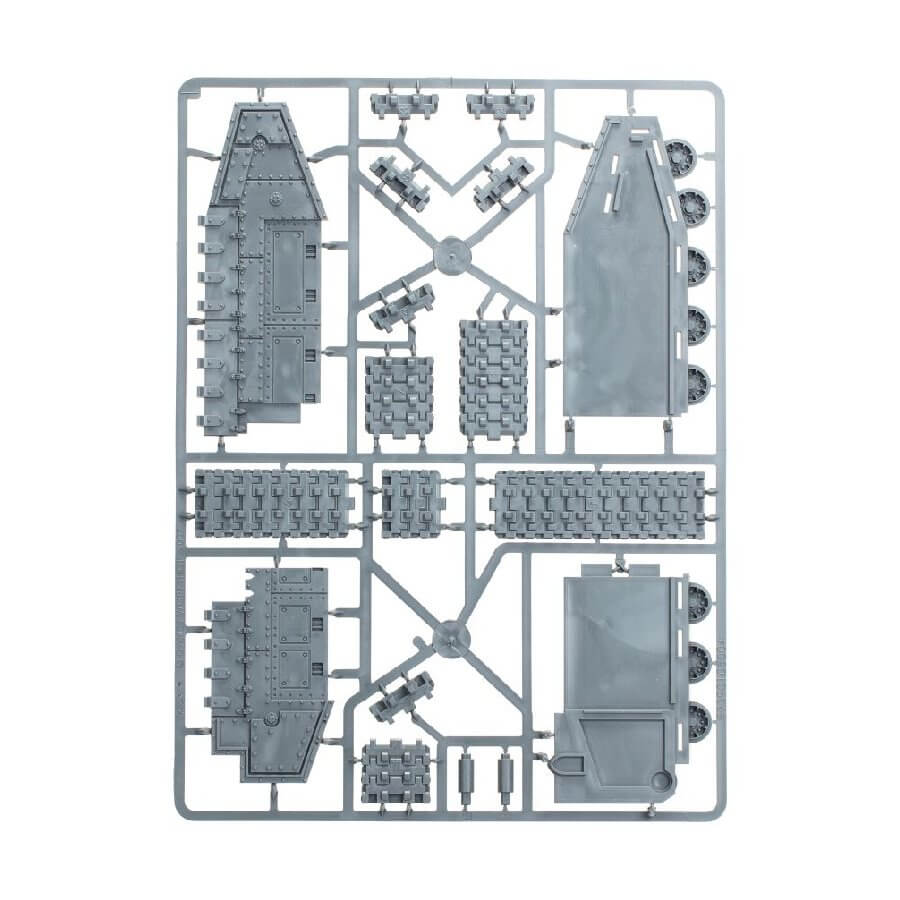
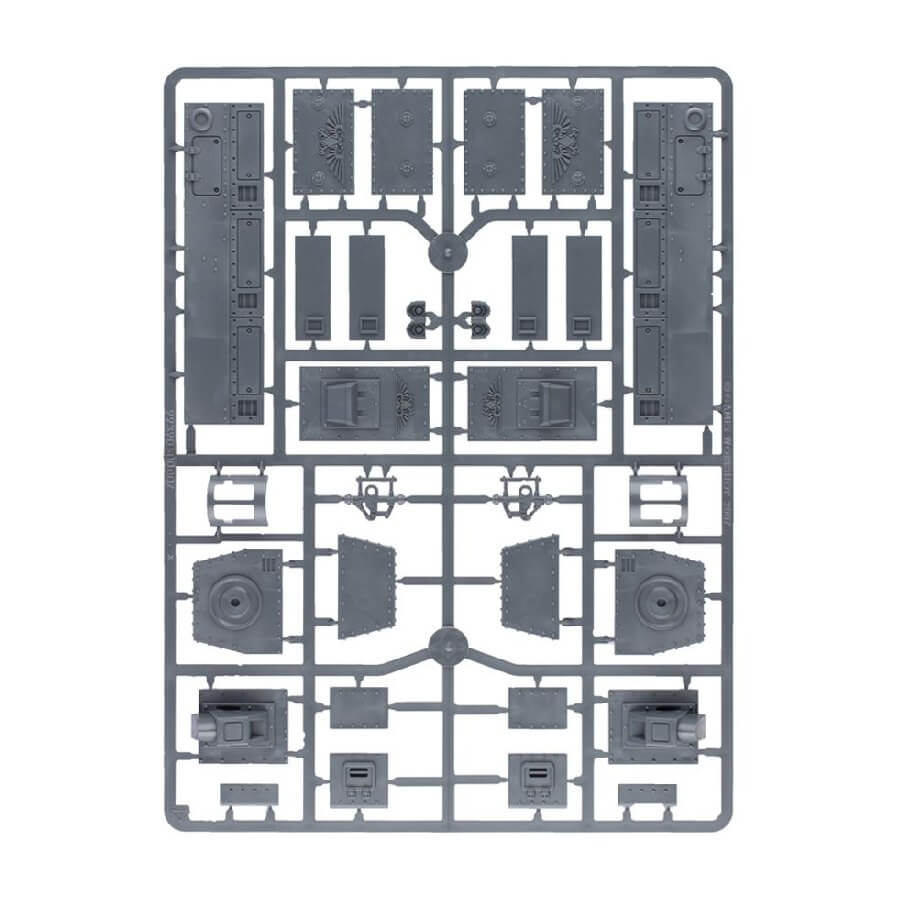
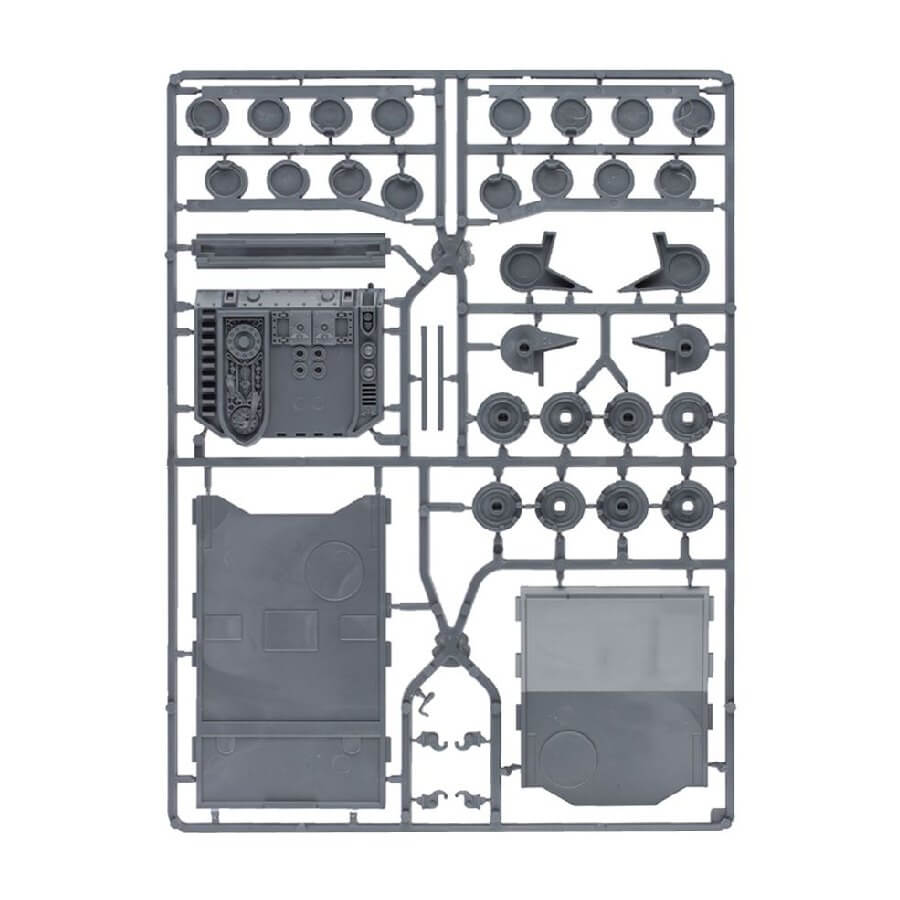
What’s in the Doomhammer box
- x381 plastic components to buid this impressive tank.
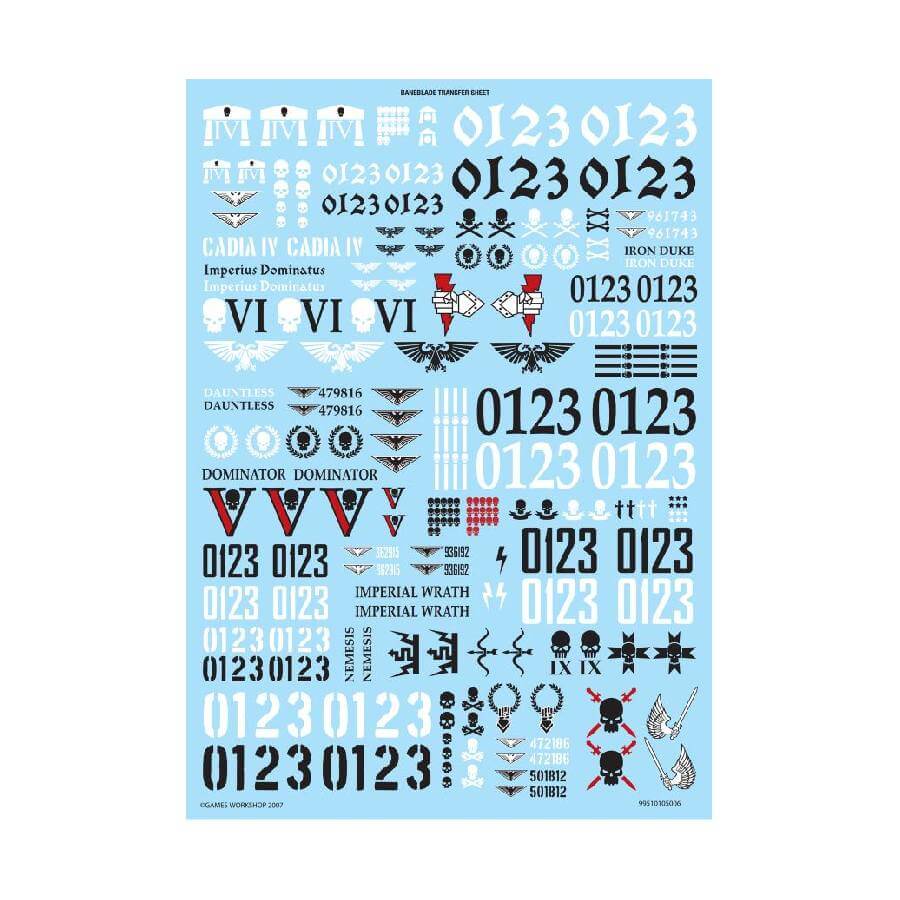
- x1 Baneblade Transfer Sheet with 253 transfers.
How to paint the Doomhammer Set
- Step 1: Prime the Model
Before you start painting, make sure to prime your Doomhammer model. Priming helps the paint adhere better and provides a consistent base. Use a gray or black primer spray and apply a thin, even coat over the entire model. Let it dry completely. - Step 2: Basecoat the Tank
Choose a base color for the tank, such as a dark green or brown. For example, you can use Caliban Green or Waaagh! Flesh. Use a medium-sized brush and apply the basecoat evenly over the tank’s surface, ensuring to cover all areas. Apply multiple thin coats for better coverage. Allow each coat to dry before applying the next one. - Step 3: Highlight the Tank
To add depth and emphasize the details on the tank, it’s time to highlight. Select a lighter shade than the base color, like Warpstone Glow or Loren Forest. Using a smaller brush, gently apply the highlight color to raised edges and contours of the tank. This technique called dry brushing adds texture and creates shadows. Build up the highlights gradually with a light touch. - Step 4: Paint the Details
Focus on painting the smaller details of the tank, such as weapons, symbols, and other accents. For metallic parts like the cannons, you can use Leadbelcher or Runelord Brass. Choose contrasting colors for insignias and accents to make them stand out. For example, you can use Evil Sunz Scarlet for symbols on a predominantly green tank. Use a fine detail brush for precision. - Step 5: Apply Washes
Washes add shading and depth by settling into recessed areas. Choose a wash color that complements the tank’s scheme. For example, use Agrax Earthshade for green areas or Nuln Oil for darker colors. Dip a medium-sized brush into the wash and generously apply it to the areas you want to shade. The wash will flow into the recesses, enhancing definition and creating shadows. Let it dry completely. - Step 6: Weathering and Effects
To give your tank a battle-worn appearance, you can add weathering effects. Dry brush some Rhinox Hide or Skrag Brown lightly on edges and areas prone to wear. You can also use a sponge or a stippling brush to create chipped paint or rust effects with colors like Typhus Corrosion or Ryza Rust. Apply these effects sparingly and build them up gradually. - Step 7: Varnish the Model
Once you’re satisfied with the painting, it’s essential to protect it with a varnish. Apply a matte varnish using a large brush or spray to ensure an even finish. This step will protect the paint job and provide a nice, non-shiny appearance.
