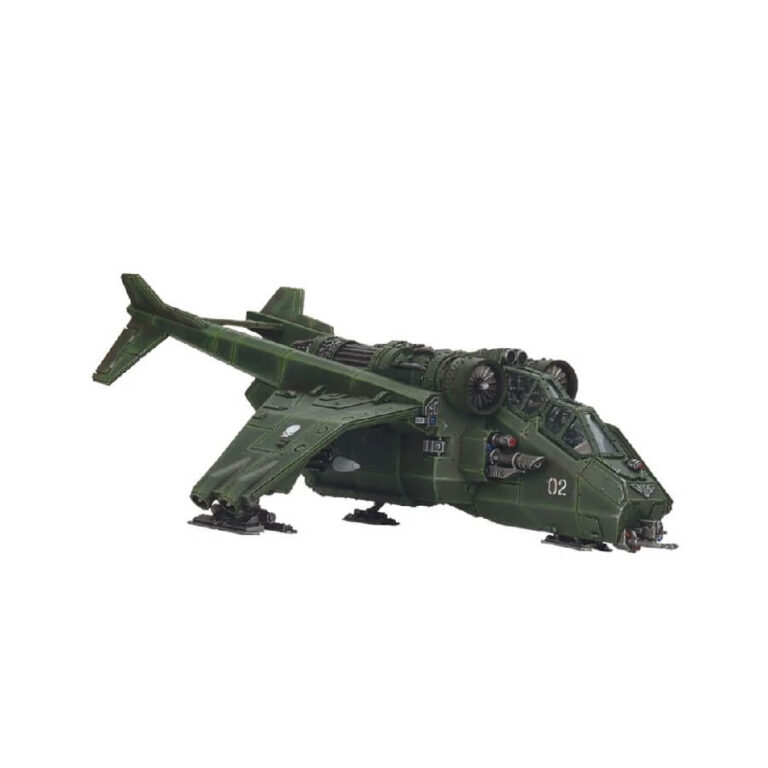
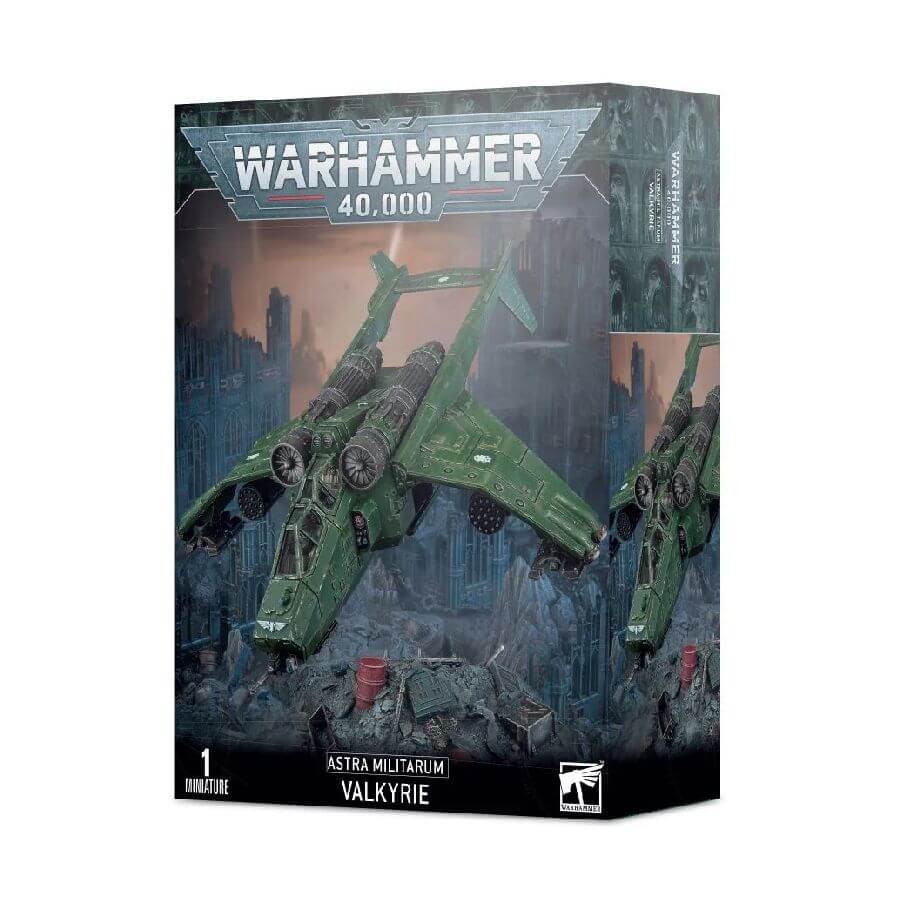
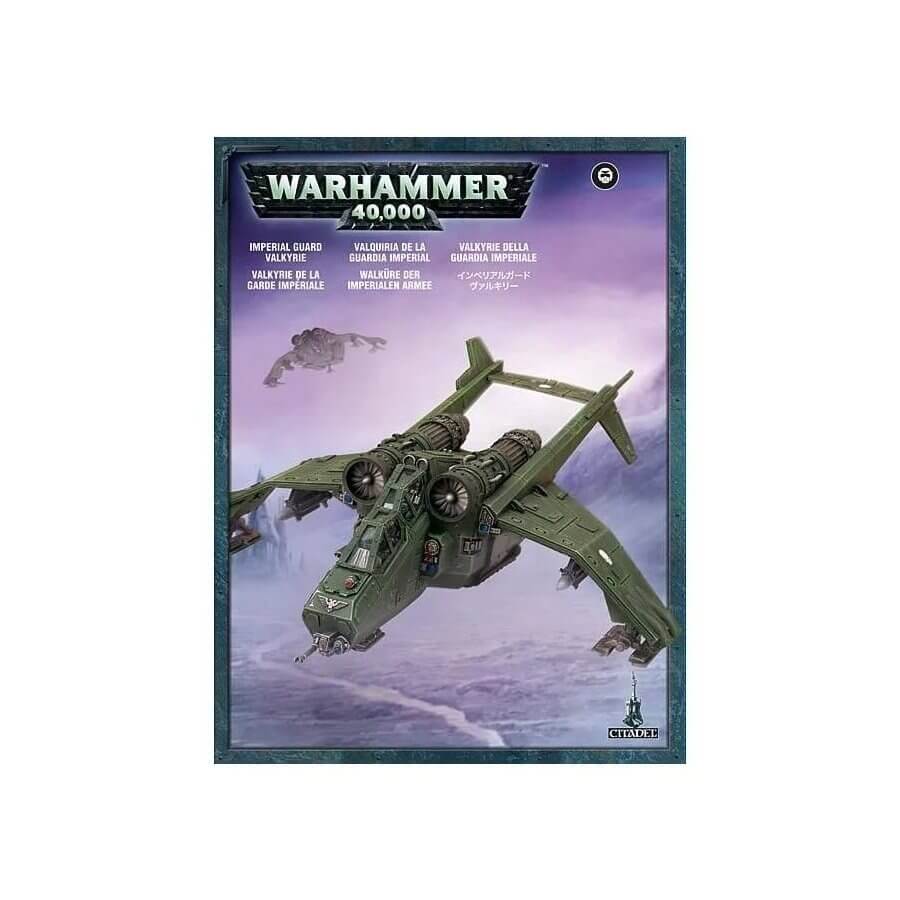
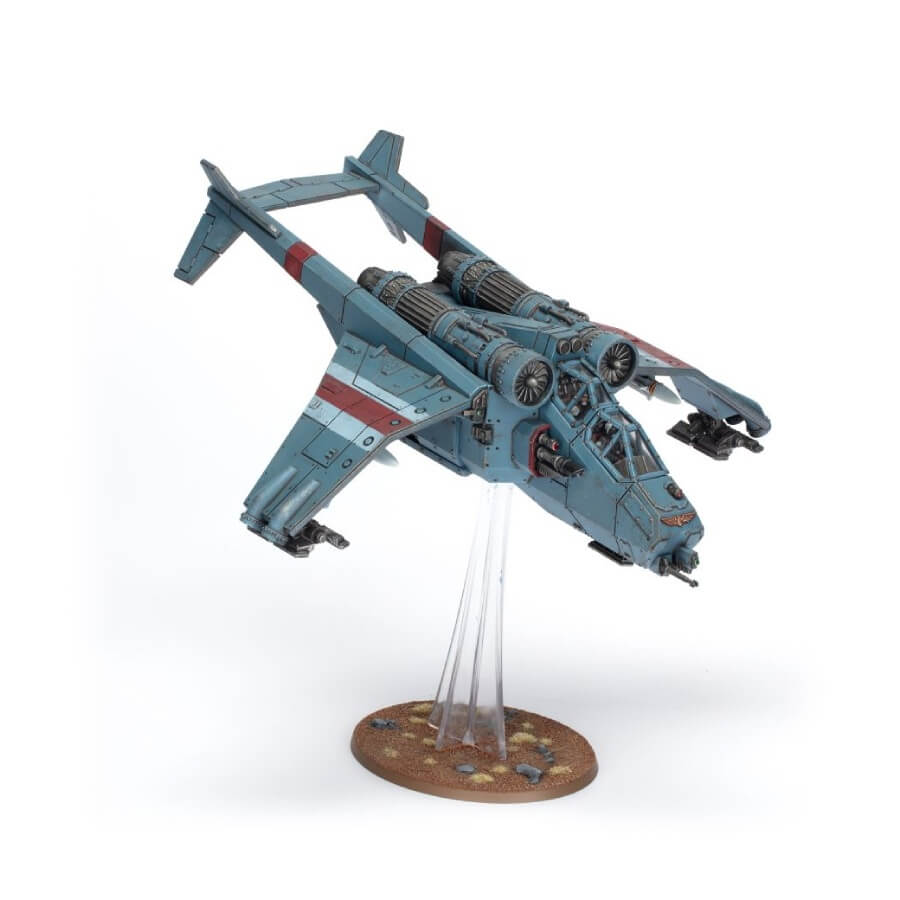
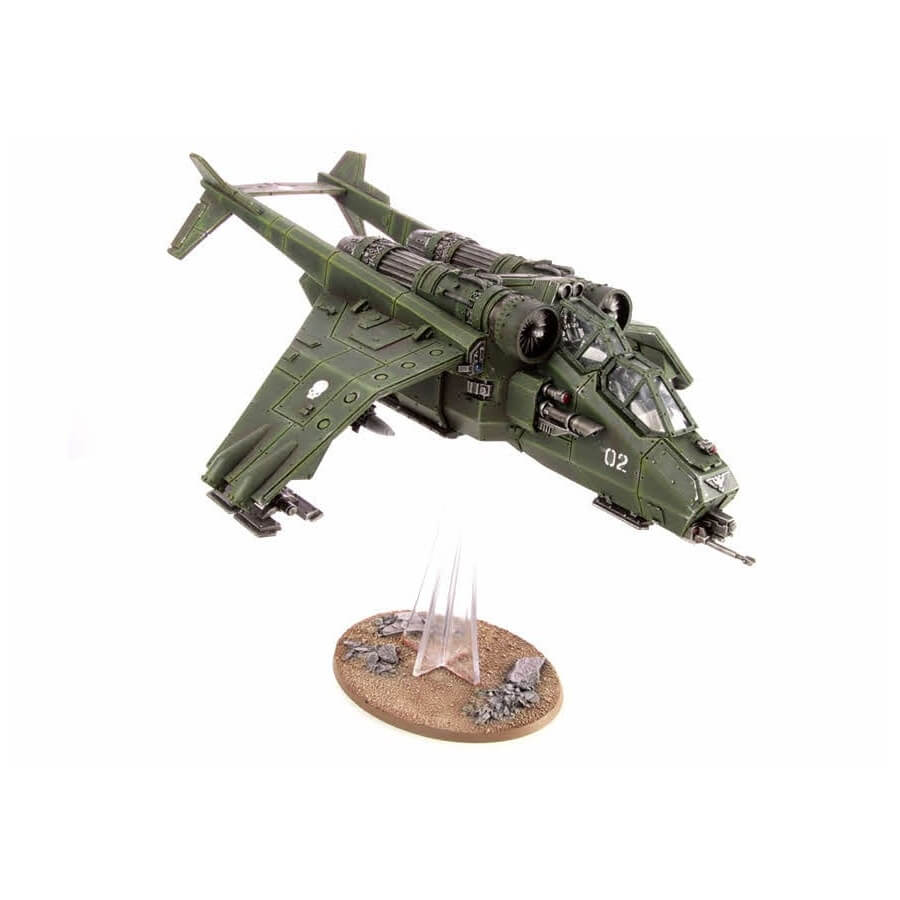
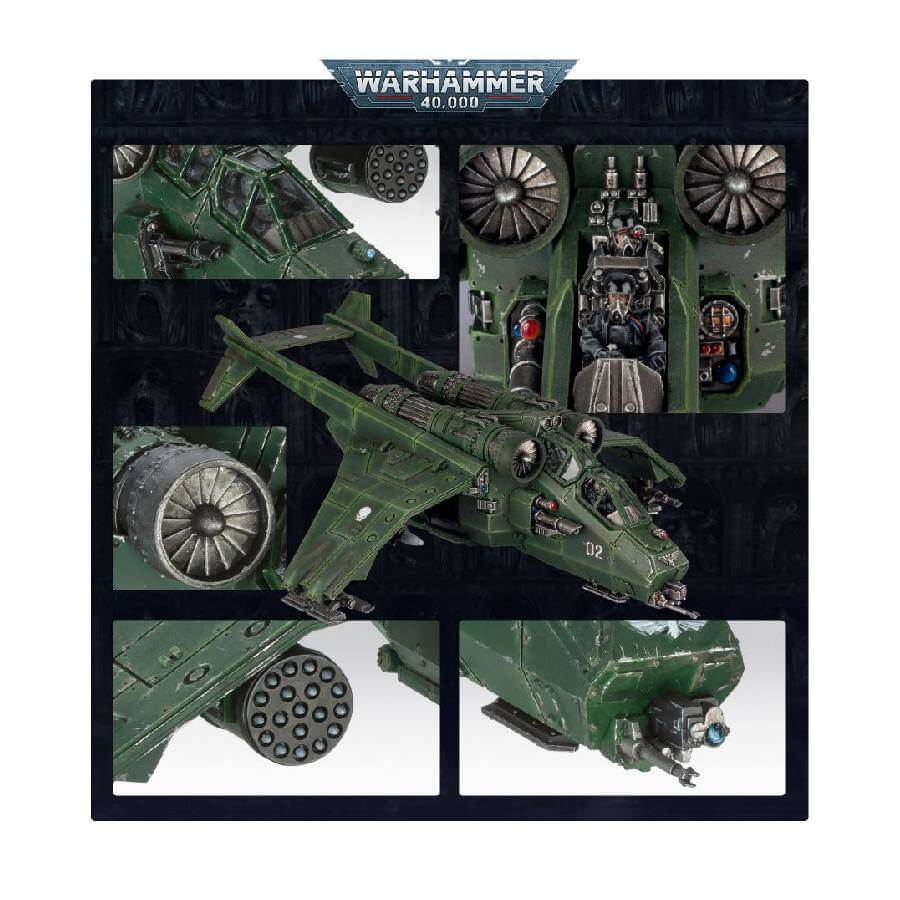
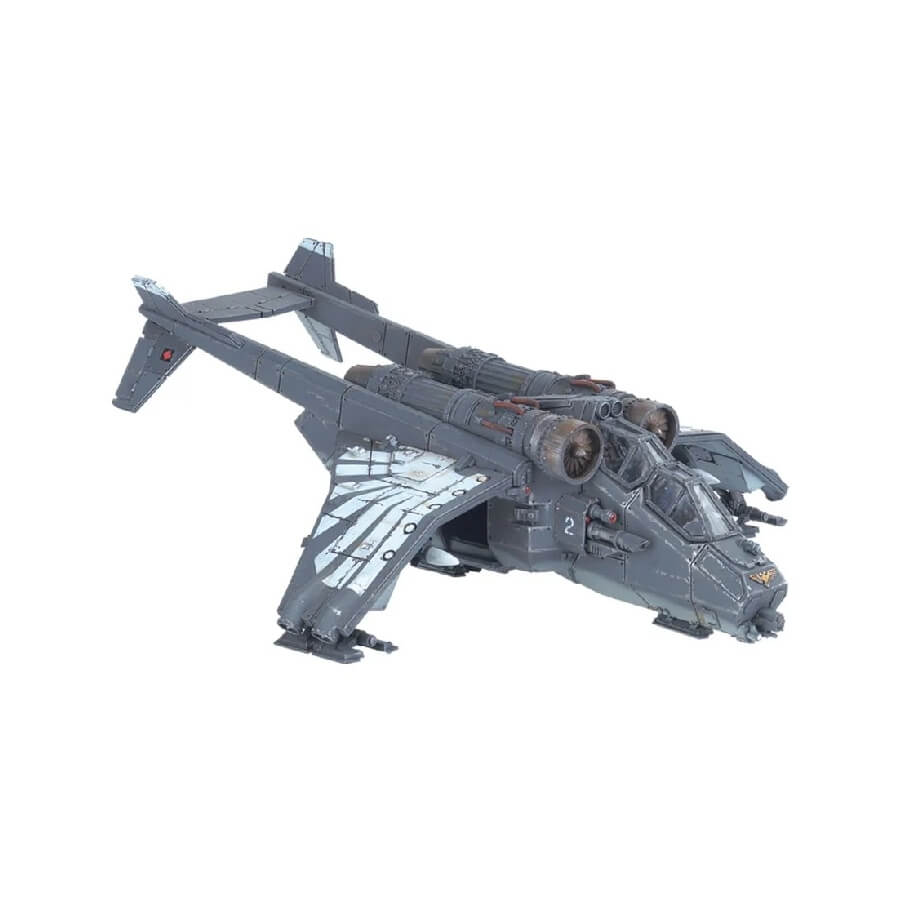
The Valkyrie is a versatile twin-engine attack aircraft that can transport Astra Militarum soldiers into battle while providing air support. It has a detailed interior, including optional heavy bolter door gunners and pilots with interchangeable heads. The kit comes with a choice of nose-mounted weapon, either a lascannon or multi-laser, and a pair of underslung hellstrike missiles or rocket pods mounted beneath its wings. Additional components are included to customize the Valkyrie, such as an aquila sigil and variant targeting systems. It also includes a clear flying stand that can be attached without glue and removed to represent landing.
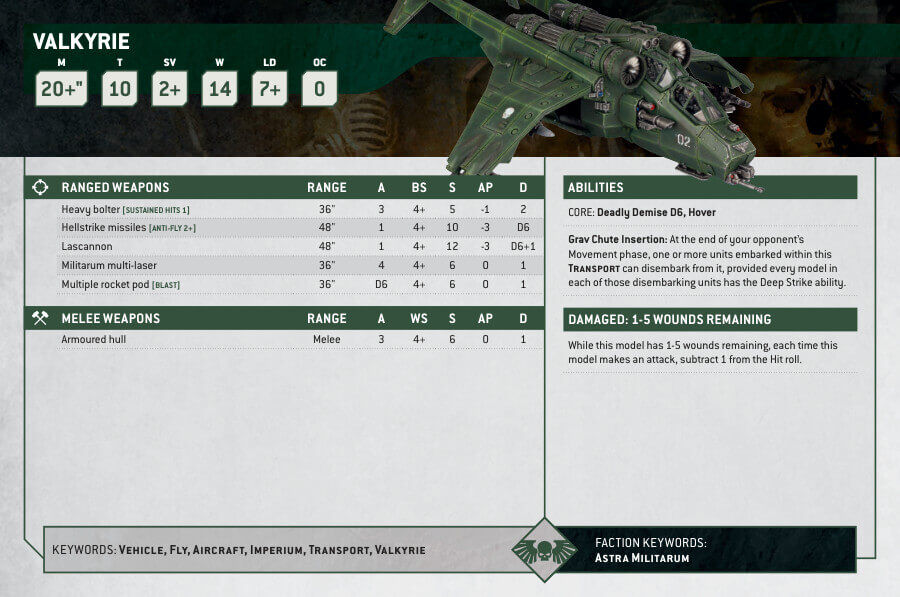
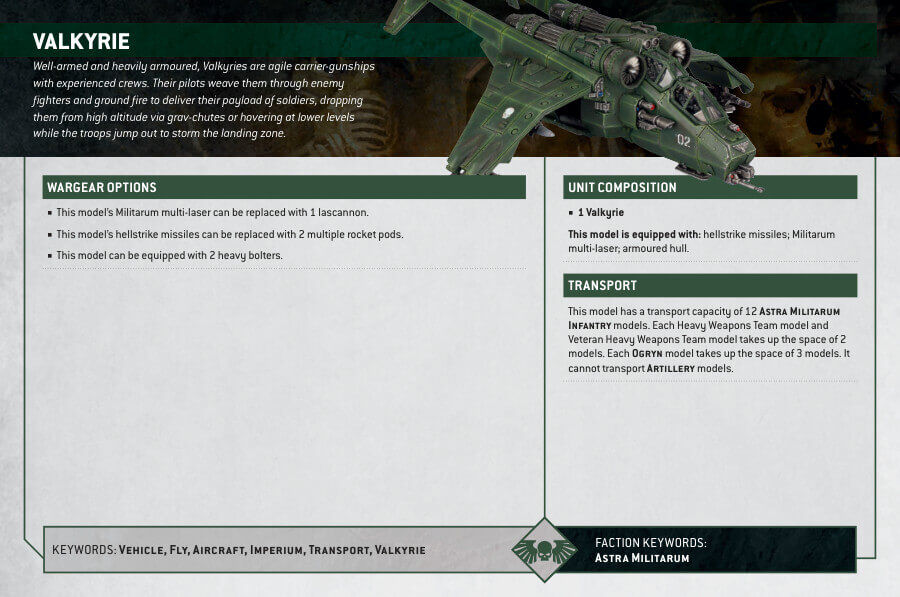
Valkyrie Datasheets
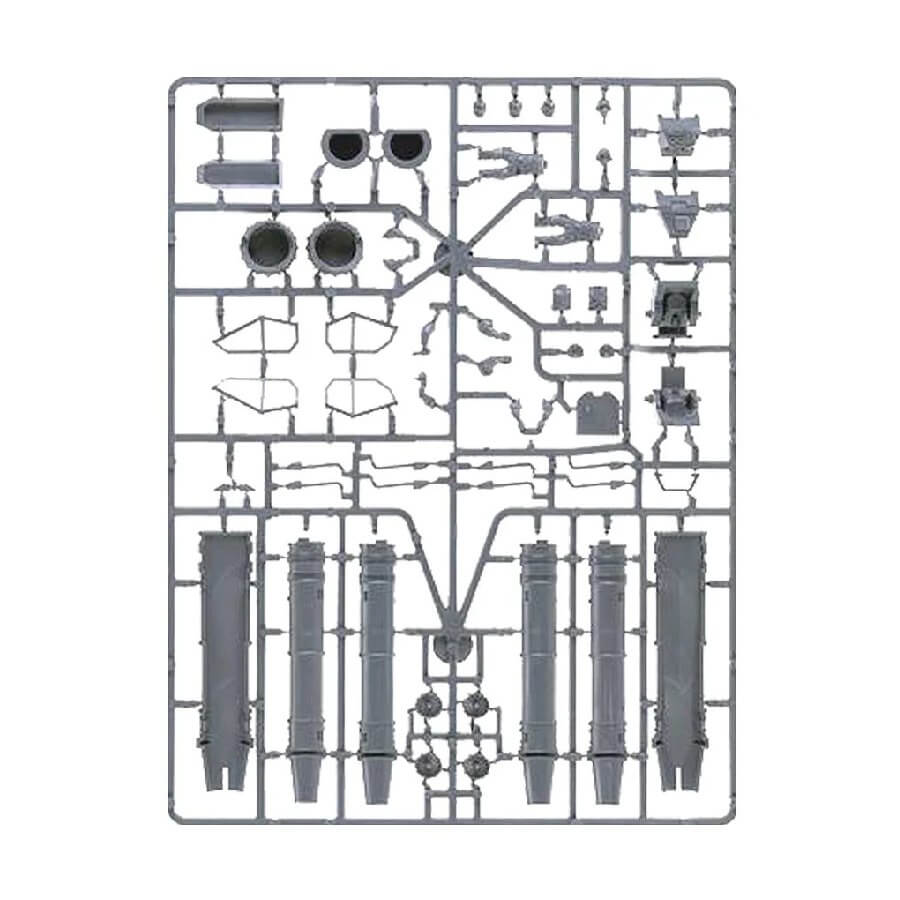
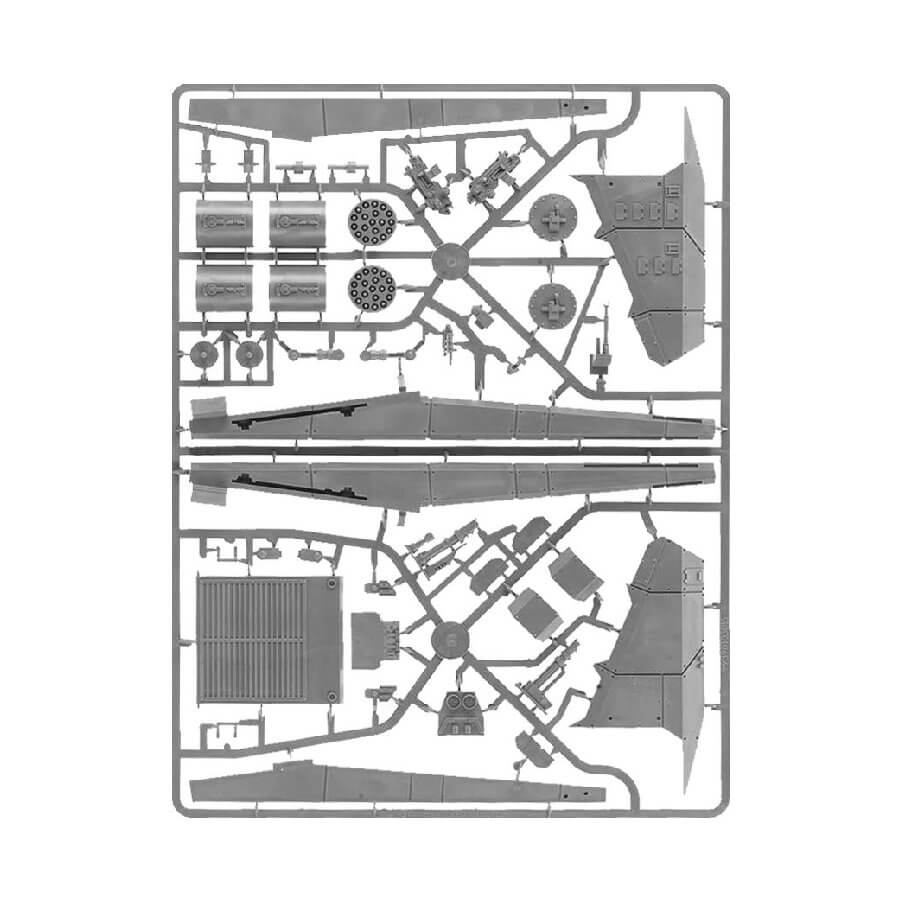
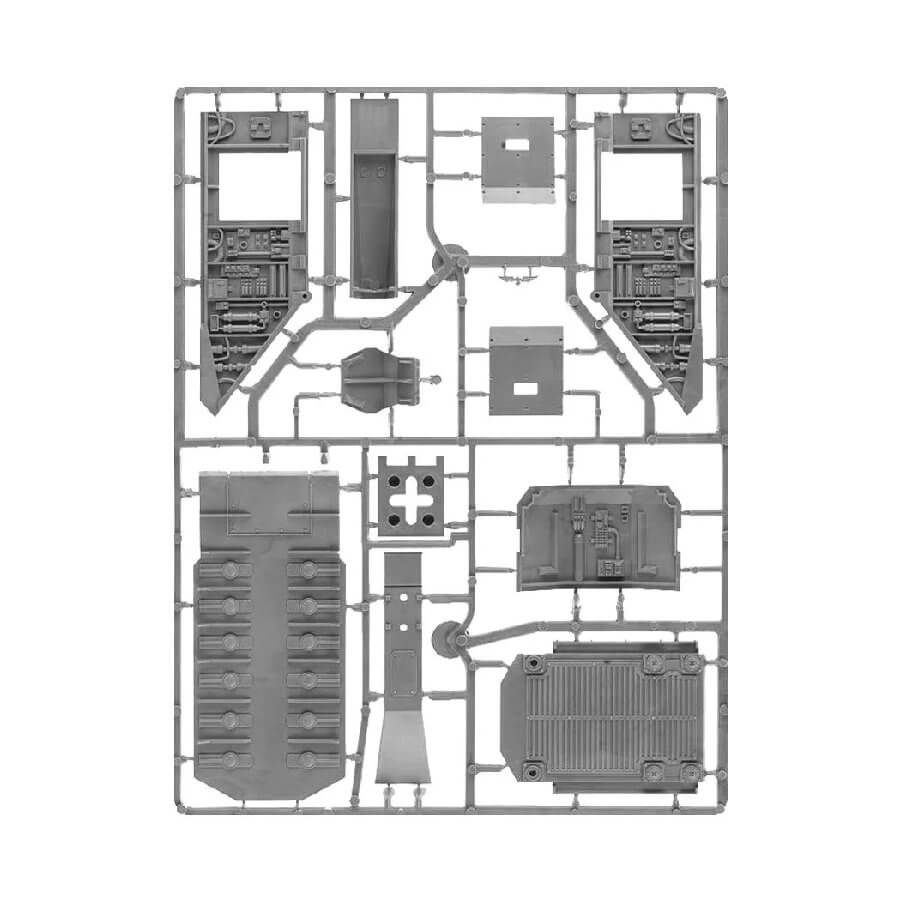
What’s in the Valkyrie box
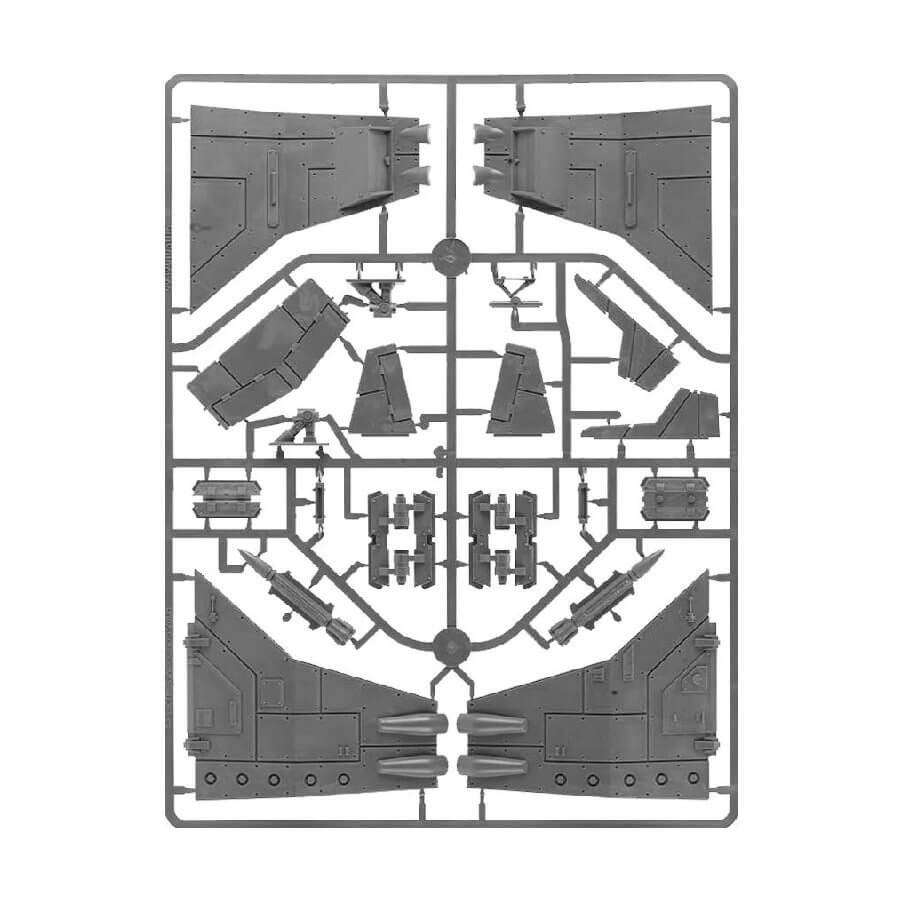
- x128 plastic components to assemble the Valkyrie.
- x1 Astra Militarum Vehicle Transfer Sheet with tactical markings and heraldry
- x1 clear flying stand to secure the Valkyrie in a heightened position – the stand can be attached gluelessly, allowing you to remove it to represent landing.
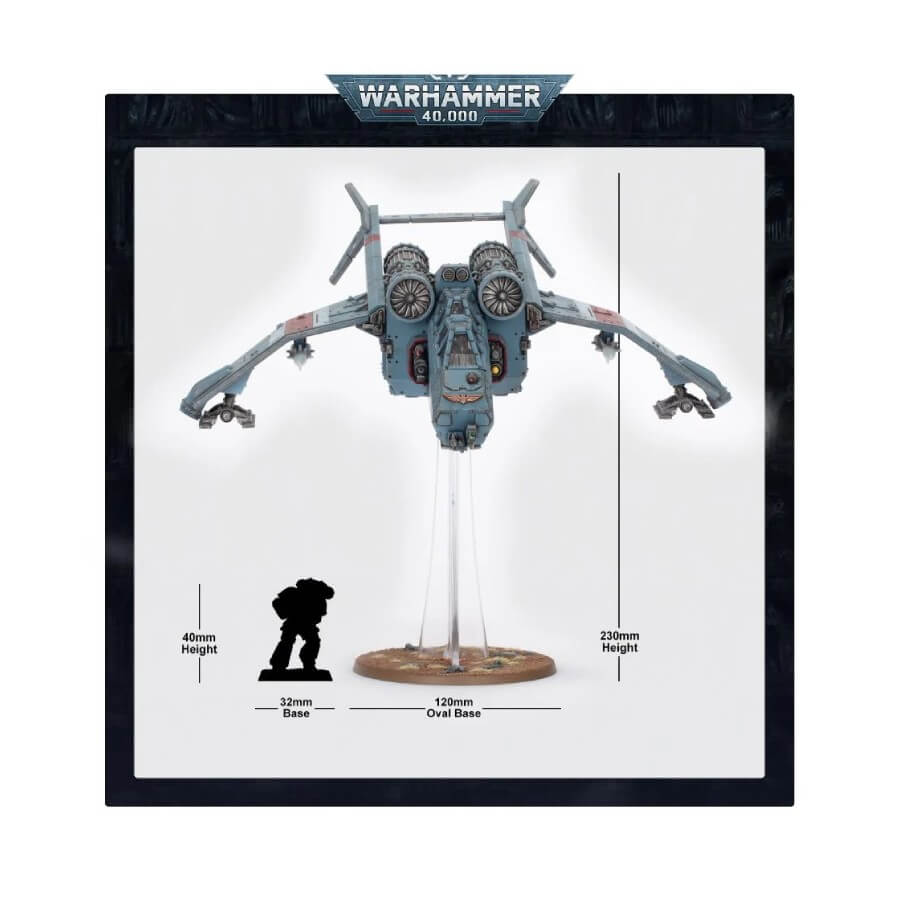
- x1 Citadel 120mm oval base.
How to paint the Valkyrie Set
- Step 1: Priming
Begin your painting journey by priming your Valkyrie with Chaos Black spray. This crucial step provides a sturdy foundation for the paint to adhere to. Make sure the primer is completely dry before proceeding. - Step 2: Painting the Hull
Focus on the hull of the Valkyrie. Paint it with Castellan Green, ensuring smooth and even coverage. This vibrant color will serve as the foundation for the rest of the paintwork. - Step 3: Shading the Hull
To add depth and realism to the hull, apply Agrax Earthshade as a shade. This shade will settle into the recesses, creating shadows and enhancing the textured appearance. - Step 4: Layering the Hull
Now, let’s make the green hull more vibrant. Layer it with Straken Green, focusing on raised areas and edges. This layering technique will create highlights and give the hull a dynamic look. - Step 5: Engines and Weapons
Moving to the engines and weapons, paint them with Abaddon Black. Ensure a solid, even base coat to set the stage for the upcoming layers. - Step 6: Highlighting Engines and Weapons
To make the engines and weapons stand out, layer them with Eshin Grey. Concentrate on the edges and raised areas to achieve a sharp, metallic appearance. Then, add further depth by layering with Dawnstone, highlighting the most prominent features. - Step 7: Adding Small Details
Don’t overlook the small details; they can make a big difference. Use White Scar to paint emblems and other intricate elements. Take your time to ensure precision in your work. - Step 8: Weathering (Optional)
For those who desire a weathered, battle-worn appearance, consider adding weathering effects. You can use paints like Typhus Corrosion or Ryza Rust to simulate wear and tear. Apply these sparingly to mimic rust and grime on certain areas. - Step 9: Varnishing
To protect your beautifully painted Valkyrie and give it a professional finish, apply a layer of matte or glossy varnish. This step safeguards your work and provides a protective coating, enhancing the longevity of your paint job.