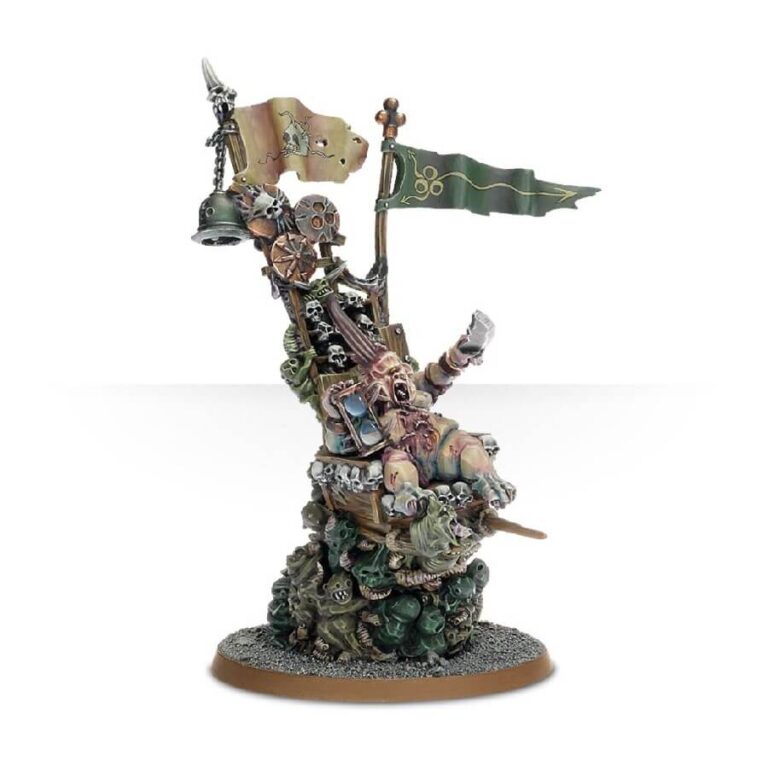
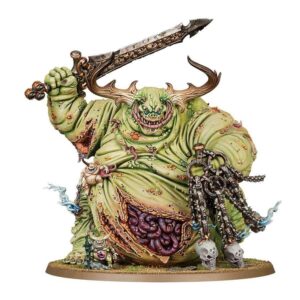
The model of Epidemius showcases an astonishing level of detail, immersing you in the grotesque world of Nurgle. From the fleshy skulls adorning the base of the palanquin to the macabre trophies gathered from various races – shields, banners, and an ichor-soaked bell atop the construct – every element exudes a sense of grim horror. Atop the palanquin, the Plague King himself sits upon a wooden seat, his exposed flesh a testament to the decay and corruption of Nurgle’s domain. Nurglings peek mischievously from between the skulls, while Epidemius grips a plaguesword in one hand and an hourglass in the other, symbolizing the relentless passage of time and the inexorable advance of Nurgle’s diseases.
Witness the terrifying attention to detail and bring forth the aura of decay and pestilence to your tabletop battles. Let Epidemius inspire awe and dread as he carries out his vital role within the realm of Chaos, reminding all who face him of the inevitable march of disease and the indomitable power of the Plaguelord.
What’s in the Epidemius box
- x11 resin components with which to make one Epidemius. You can use this kit for collections of both Warhammer and Warhammer 40,000 miniatures.
- x1 50mm square base
- x1 60mm round base
How to paint the Epidemius set
- Step 1: Assemble the Model
Carefully assemble the Epidemius model using plastic glue as per the instructions provided. Ensure that all the parts fit snugly together. - Step 2: Prime the Model
Apply a thin, even coat of primer to the model. This helps the paint adhere better and gives a smooth surface to work on. Use a light gray or white primer for better color accuracy. - Step 3: Basecoat the Model
Start by applying a basecoat to the different areas of the model. For Epidemius skin, use a mix of green and brown, such as Waaagh! Flesh and Rhinox Hide. Apply the basecoat with a brush, making sure to cover all the details. - Step 4: Layer the Model
Once the basecoat is dry, it’s time to add some depth and dimension to the model. Use lighter shades of green, like Warboss Green, and carefully apply thin layers to the raised areas, leaving the darker basecoat visible in the recesses. - Step 5: Highlight the Model
To further enhance the details, highlight the edges and prominent features of Epidemius. Use a lighter green shade, like Moot Green, and gently brush it along the edges of the model, focusing on areas that catch the light. This creates a subtle pop and adds definition. - Step 6: Paint the Details
Now, turn your attention to the smaller details on Epidemius, such as the tentacles, robes, and accessories. Use different colors to make them stand out. For example, paint the tentacles with a mix of pink and purple, like Pink Horror and Genestealer Purple. Use a small brush for precision. - Step 7: Wash the Model
To add depth and shading, apply a wash to the entire model. Use a dark shade, like Agrax Earthshade, and carefully brush it over the areas where shadows naturally occur, such as recesses and crevices. The wash will settle into these areas, creating a realistic shading effect. - Step 8: Apply Finishing Touches
Add the finishing touches to Epidemius. Use metallic paints, such as Leadbelcher, to paint any metal parts like weapons or chains. Apply a bright color, like Evil Sunz Scarlet, to any gems or eyes to make them stand out. Don’t forget to paint the base as well, using earthy tones or textured paint for added realism. - Step 9: Varnish the Model
Once the paint is dry, protect your hard work by applying a coat of varnish. This will help prevent chipping and damage during gameplay. Use a matte varnish for a more natural finish or a gloss varnish for a shiny appearance. Follow the instructions on the varnish bottle for best results.

