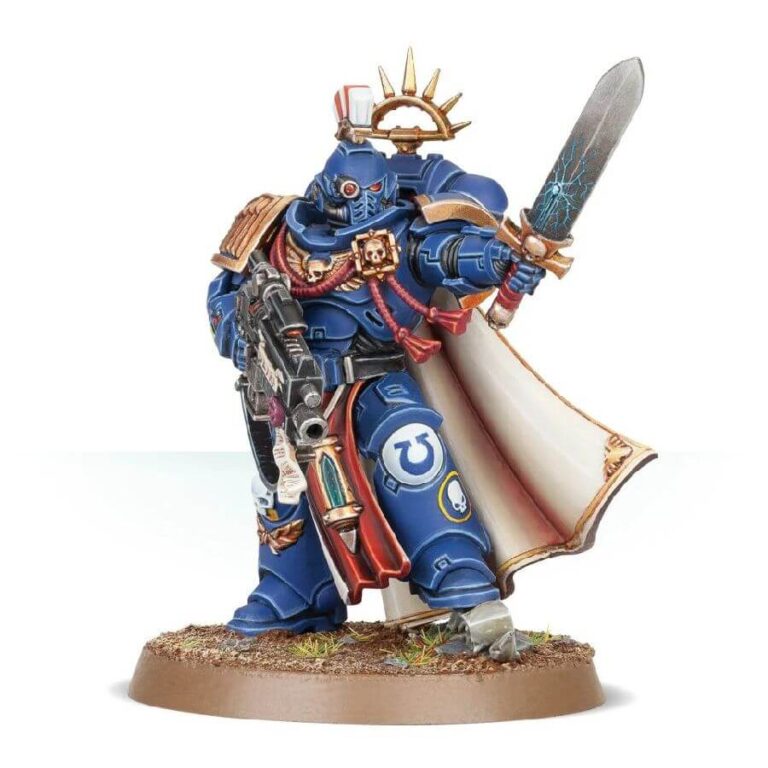
This versatile plastic kit provides all the necessary components to construct a Primaris Captain. The Mk X Tacticus armor sets these leaders apart, boasting enhanced size and power compared to their predecessors. The Captain wields a choice of either a master-crafted bolt rifle or a master-crafted stalker pattern bolt rifle, equipped with a box magazine and overcharger for devastating firepower. In his left hand, you have the option to model him brandishing a power sword or gesturing to direct his Space Marines towards their obliteration of the enemy.
Enhancing the Captain’s imposing presence is a billowing cloak that gracefully falls beneath his backpack, while an impressive iron halo crowns his head. Notable details include a meticulously sculpted Imperial eagle on the right shoulder pad and intricately crafted laurels adorning the leg plates. Furthermore, the left shoulder pad intentionally remains blank and smooth, providing a perfect canvas for you to easily add your preferred Chapter iconography.
The Primaris Captain kit also offers a choice between two distinct heads: one featuring the Captain bare-faced, exuding unwavering determination, and the other donning a helmet with a targeter positioned over one eye, displaying his tactical acuity.
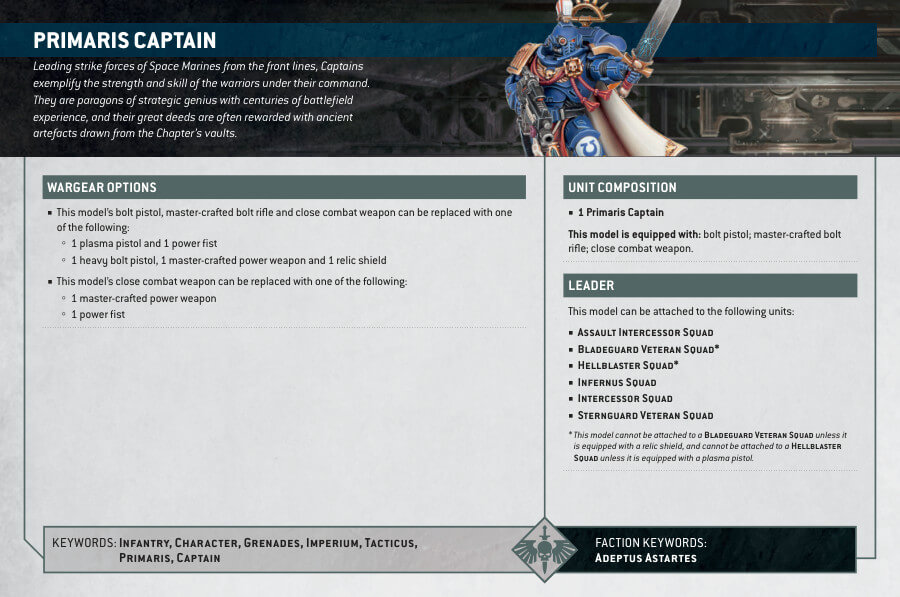
Primaris Captain Datasheets
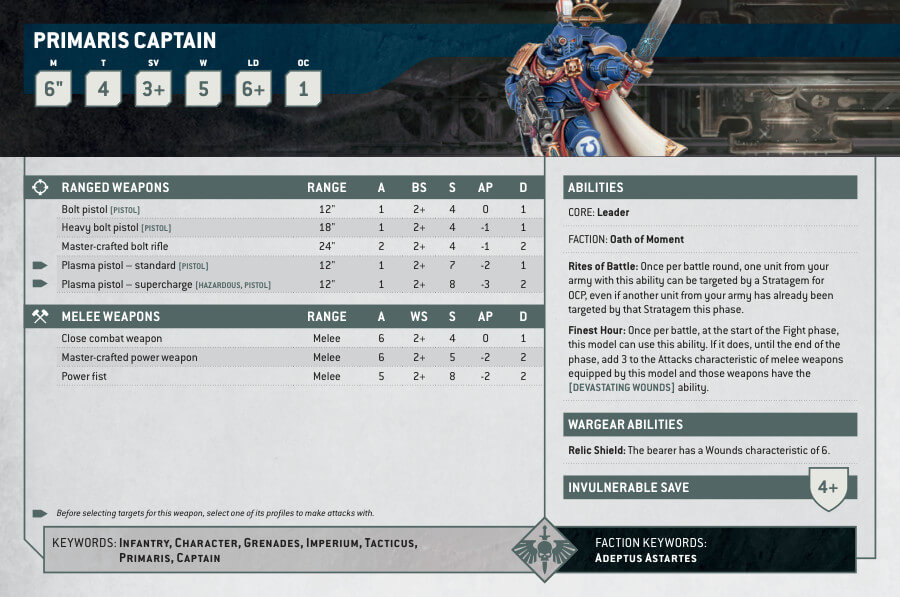
What’s in the Primaris Captain box
- x21 plastic components that make one Primaris Captain, a formidable Space Marine leader, clad in the advanced Mk X Tacticus power armor, wielding a master-crafted bolt rifle or power sword with unwavering resolve, inspiring his troops with his strategic brilliance and unwavering determination.
- x1 Citadel 40mm Round base
- x1 Ultramarines-Character Transfer Sheet, which features Captain, Chaplain, Librarian and Lieutenant iconography.
How to paint the Primaris Captain set
- Step 1: Basecoating
Using a medium-sized brush, apply a basecoat of Macragge Blue to the armor of the Primaris Captain. Apply thin layers to ensure smooth and even coverage. - Step 2: Detailing
Using a smaller brush, paint the trim of the armor, such as the pauldrons and helmet, with a bright gold color like Retributor Armour. Take your time to carefully paint these details. - Step 3: Iconography
Using a fine detail brush, paint the Ultramarines chapter symbols on the shoulder pads and any other desired iconography with a bright white color like White Scar. This will give the model the distinct markings of the Ultramarines. - Step 4: Weapons and Equipment
Paint the weapons and equipment of the Primaris Captain, such as the bolter and power sword, with Leadbelcher for a metallic look. Use Balthasar Gold for any gold accents on the weapons, such as the hilt of the power sword. - Step 5: Visor and Optics
Paint the visor and any optical lenses on the model with a deep blue color like Kantor Blue. This will add a realistic touch to the eyes of the model. - Step 6: Purity Seals
Using a fine detail brush, carefully paint the purity seals on the model with a beige or parchment color like Zandri Dust. Add small touches of color to the seals, such as red for wax seals or blue for ink. - Step 7: Highlighting
Using a lighter shade of blue, such as Calgar Blue, gently highlight the edges and raised areas of the armor to create depth and definition. Apply these highlights sparingly for a subtle effect. - Step 8: Wash
Apply a wash of Nuln Oil or a similar dark wash to the entire model. This will darken the recesses and add shadows, enhancing the overall look of the model. - Step 9: Basing
Paint the base of the model with a suitable color, such as a brown or grey tone, and add texture using sand or small rocks. Optionally, you can paint the rims of the base with a contrasting color to add a finished touch. - Step 10: Varnish
Once the paint has dried, apply a protective varnish to the model to safeguard the paint job and give it a professional finish.

