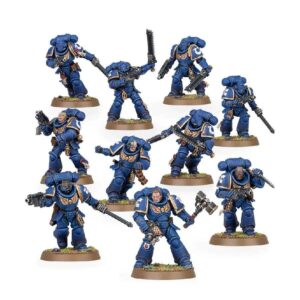
Step 1: Prime Your Models
To start, you’ll want to prepare your Terminator Squad models for painting. The key here is to use Macragge Blue spray paint as your primer. This initial step may seem simple, but it’s crucial. The primer provides a solid base for the subsequent layers of paint to adhere to. Be sure to apply the primer evenly, covering all the surfaces of your models. Allow it to dry completely before moving on to the next step.
Step 2: Paint the Black Details
Now, let’s focus on the black details of your Terminator Squad. Abaddon Black is the paint you’ll use for this step. Take your time and be precise as you carefully paint all the black elements, which include their weapons and any other black parts of their armor. Ensuring even coverage is important to achieve a professional finish.
Step 3: Paint the White Details or Heads
For this step, you’ll work on the white details or the heads of your Terminators. If your models have helmets, use Corax White or White Scar to paint them. However, if any of your Terminators lack helmets, you’ll need to paint their heads. In this case, opt for skin tones like Kislev Flesh or Cadian Fleshtone. Take care to apply the paint evenly and with attention to detail, as these areas are focal points of the models.
Step 4: Paint the Grey Details
Moving on to the grey details, such as emblems or rocks, these should be painted with Ulthuan Grey. This step introduces contrast to your models, making the details stand out and enhancing the overall look of your Terminators.
Step 5: Paint Metallic Details
With Leadbelcher in hand, it’s time to tackle the metallic details of your Terminators. This includes their weapons and any other metal parts of their armor. Take your time to ensure a clean and precise application. These details will catch the light and add depth to your models.
Step 6: Paint Gold Details
For the gold details, like the chest eagle and other ornaments, reach for Retributor Armour. This paint should be applied carefully to highlight these features. The gold accents add a touch of regality to your Terminators, making them truly stand out.
Step 7: Shading and Layering
Now, let’s add some depth and dimension to your models. To achieve this, use shades like Nuln Oil or Agrax Earthshade in the recessed areas. Additionally, you can employ layering techniques, using paints like Calgar Blue, to highlight raised edges and create a more intricate and visually appealing appearance for your Terminators.
Step 8: Paint the Bases
Consider the bases of your models. Painting them can greatly enhance the overall presentation of your Terminator Squad. Earthy tones like Steel Legion Drab work well for creating a realistic base. Alternatively, you can experiment with texture paints like Astrogranite Debris to give your bases a textured, battle-worn look. Feel free to add small rocks or debris to further enhance the battlefield atmosphere.
Step 9: Varnish for Protection
To safeguard the effort you’ve put into painting your Terminator Squad, it’s important to apply a protective layer of Munitorum Varnish. This step ensures that your paint job remains intact during battles and looks impressive on display. Make sure to allow the varnish to dry completely before showcasing your expertly painted Terminators in all their glory.