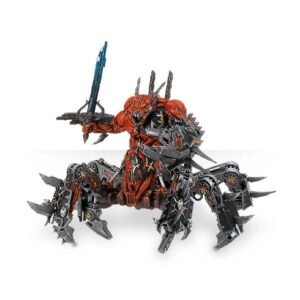
The Avatar of Khaine, an ancient deity in physical form, epitomizes the fiery essence of Khaela Mensha Khaine, the Bloody-Handed God of the Aeldari. Unfazed by enemy fire, he advances relentlessly, relishing in cruel laughter as his weapon, the Wailing Doom, mercilessly rends flesh and sates its thirst for blood. The Avatar’s presence ignites a savage fury within the Asuryani, eradicating fear and hesitation, replacing them with an insatiable thirst for slaughter. In these moments, the Aeldari embody the glorious and fearsome conquerors of a bygone era.
This versatile kit enables the construction of one Avatar of Khaine, offering a choice of three distinct heads: a classic helmet adorned with a plume and headdress, a more martial helm featuring an ornate crest, or a bare head with a wild mane and flowing topknot. Additionally, the Avatar’s divine weapon, the Wailing Doom, can be assembled in one of three forms: a colossal sword, a vicious axe, or a sweeping spear, each adorned with eldritch runes of immense power.
What’s in the Avatar of Khaine box
- x53 plastic components that make the Avatar of Khaine, a manifestation of the Bloody-Handed God, a relentless and fearsome warrior who wields the devastating Wailing Doom, inspiring an unstoppable fury in the Aeldari as he carves through enemies with ruthless precision.
- x1 Citadel 80mm round base.
How to paint the Avatar of Khaine set
- Step 1: Prime the Miniature
Apply a thin and even coat of primer to the Avatar of Khaine model. Use a grey primer to provide a solid base for the paint and enhance the dark appearance of the armor. - Step 2: Basecoat the Armor
Start by applying a basecoat of black paint to the armor areas of the miniature. For example, you can use Abaddon Black. Apply multiple thin coats for smooth and even coverage. - Step 3: Paint the Red/Orange Elements
Focus on painting the red/orange elements on the armor, such as flames or decorative patterns. Use colors like Evil Sunz Scarlet or Fire Dragon Bright. Apply thin layers to build up the color gradually and ensure the black basecoat still shows through in areas for a realistic effect. - Step 4: Shade the Armor
To add depth and definition, shade the black armor using a shade like Nuln Oil or Agrax Earthshade. Apply the shade selectively to the recessed areas, crevices, and around the red/orange elements. Use a smaller brush for more controlled application. Let the shade dry completely. - Step 5: Highlight the Armor
Highlight the black armor to create contrast and bring out the details. Use a dark gray color like Mechanicus Standard Grey or Dawnstone. Apply this color to the raised edges and contours of the armor. Focus on creating thin, controlled lines for a crisp and defined look. - Step 6: Paint the Details
Pay attention to painting the additional details of the model, such as the face, gems, and ornaments. Use appropriate colors, such as Retributor Armor for golden details like the sword or White Scar for the hair and scrolls. Take your time and use a small brush for precision. - Step 7: Paint the Base
Complete the model by painting the base to match your desired theme. Use suitable colors and textures, such as Stirland Mud for an earthy base or Astrogranite Debris for a rocky appearance. Add additional details like grass tufts or small rocks to enhance the base. - Step 8: Varnish the Miniature
To protect your paint job and add a professional finish, apply a thin and even coat of varnish over the painted Avatar of Khaine. Choose Stormshield for a non-shiny look or Ardcoat for a more vibrant appearance. Ensure the miniature is completely dry before applying the varnish.
To further assist you in painting the epic Avatar of Khaine, we have also left you a video tutorial here. The tutorial provides step-by-step instructions and visual demonstrations, making it easier for you to follow along and bring this mighty model to life on your tabletop.

