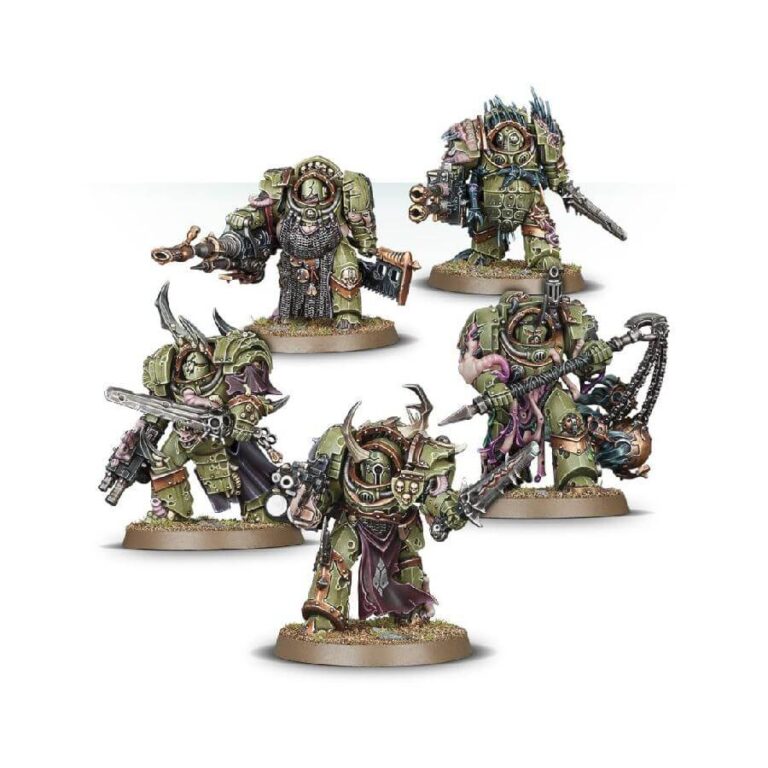
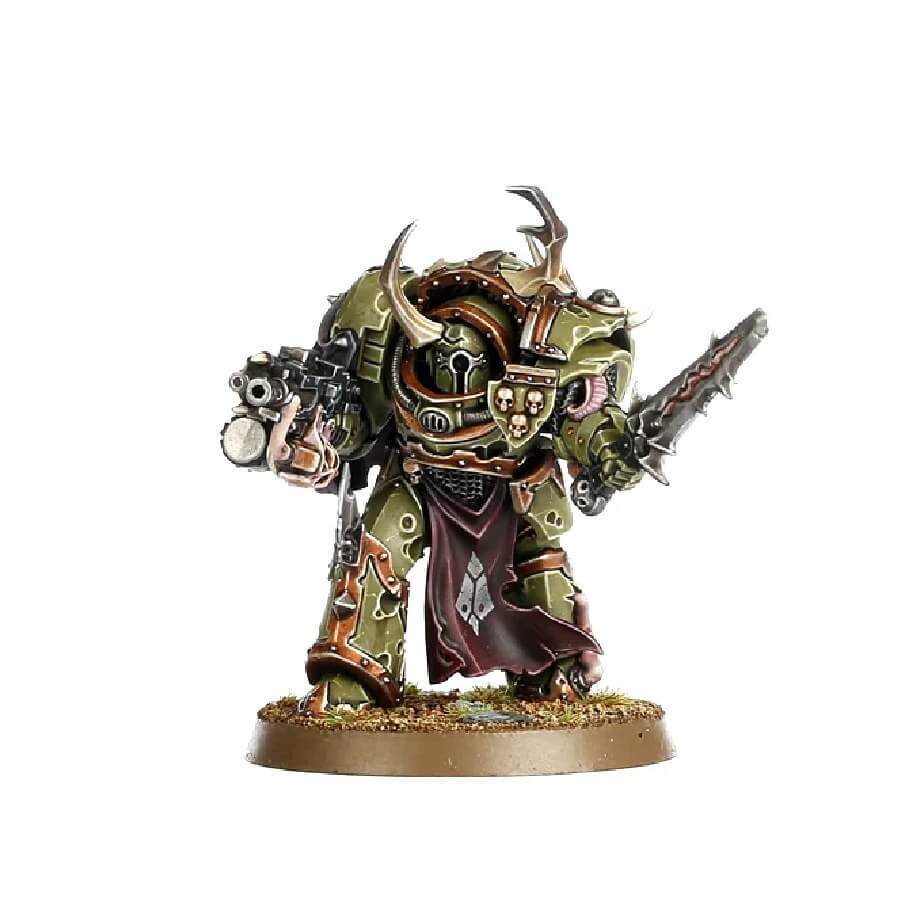
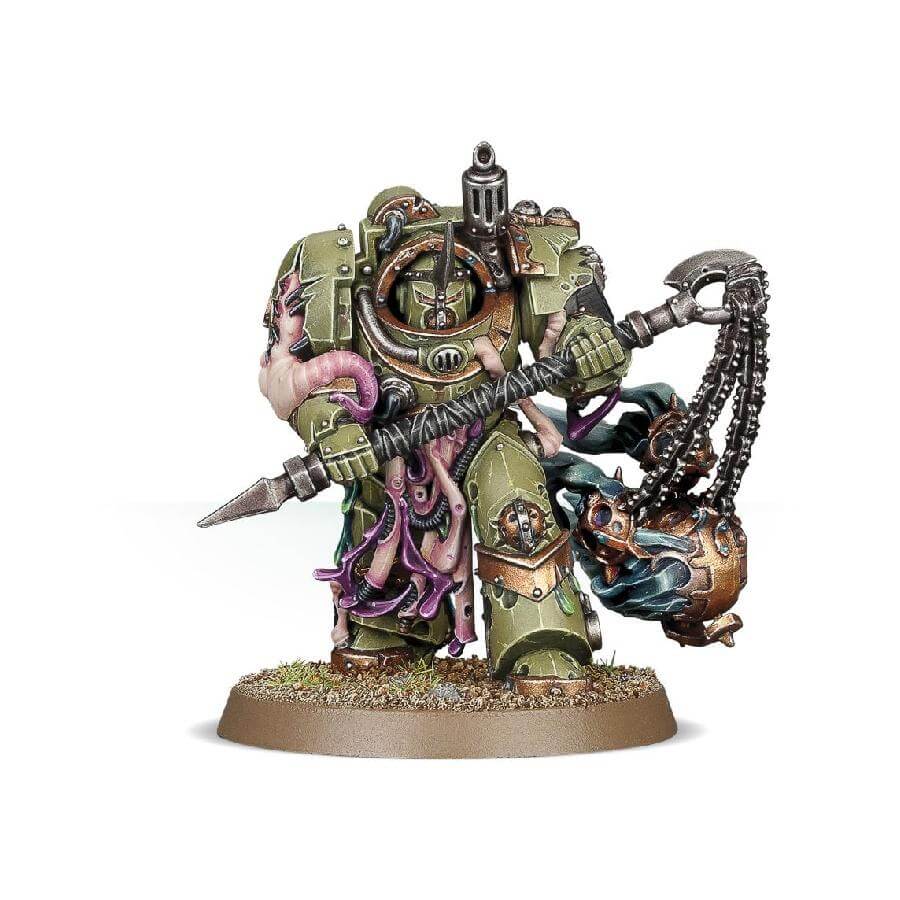
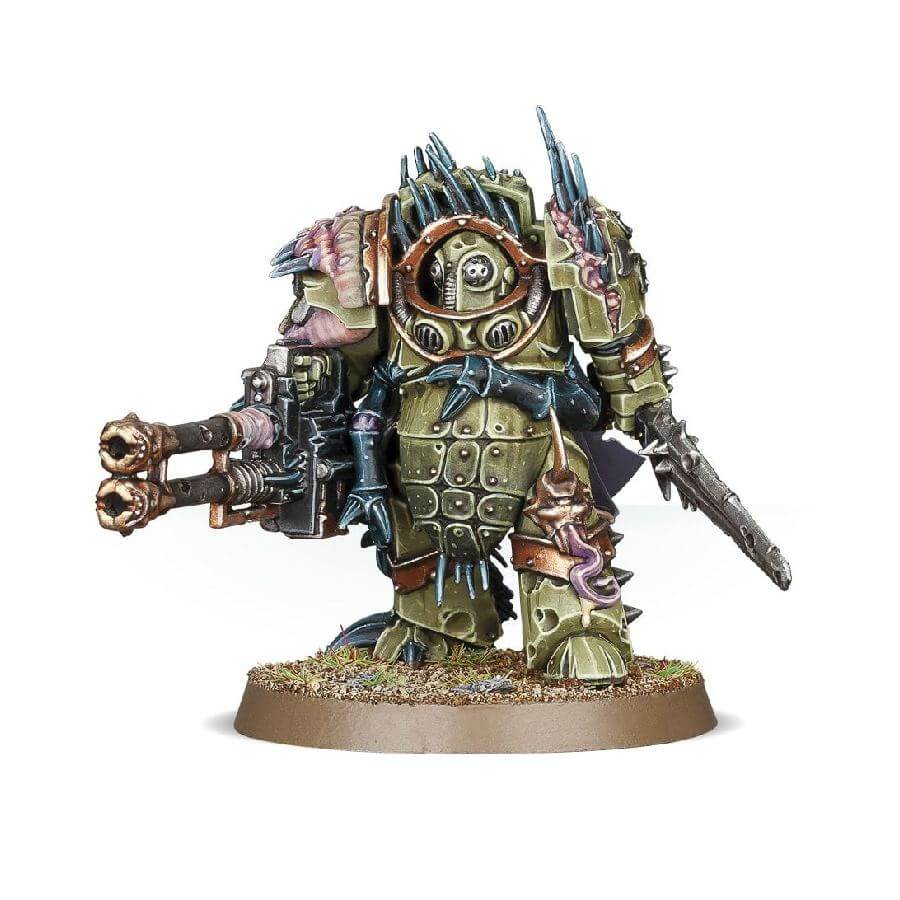
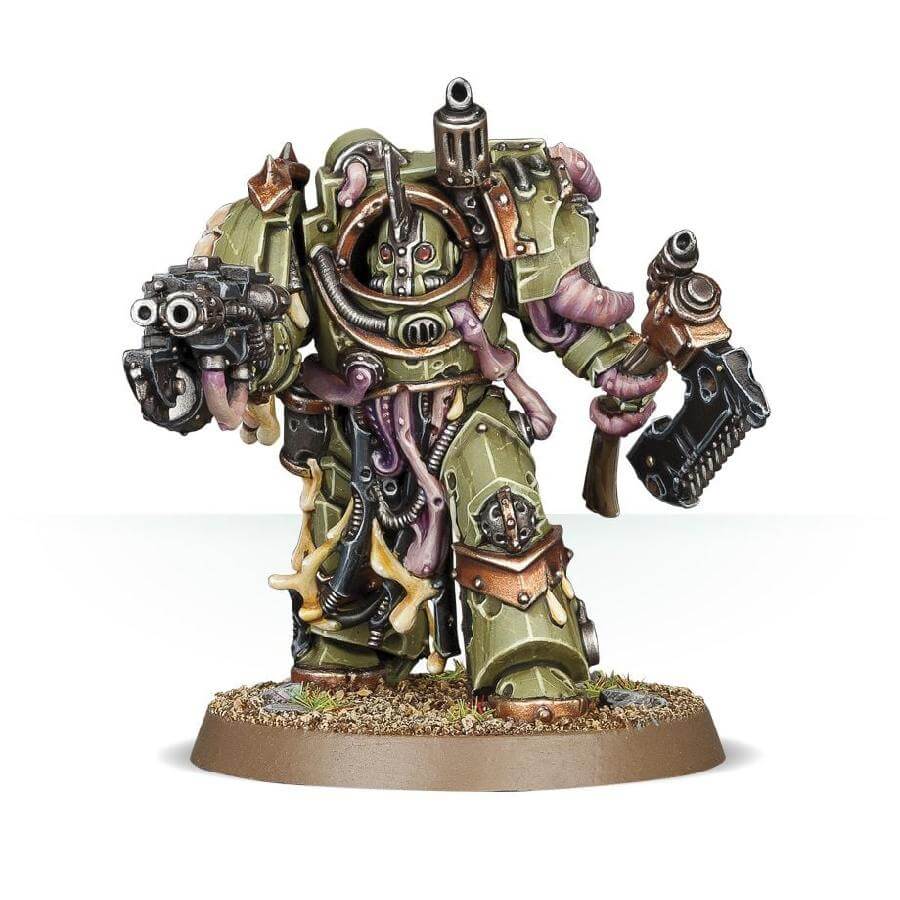
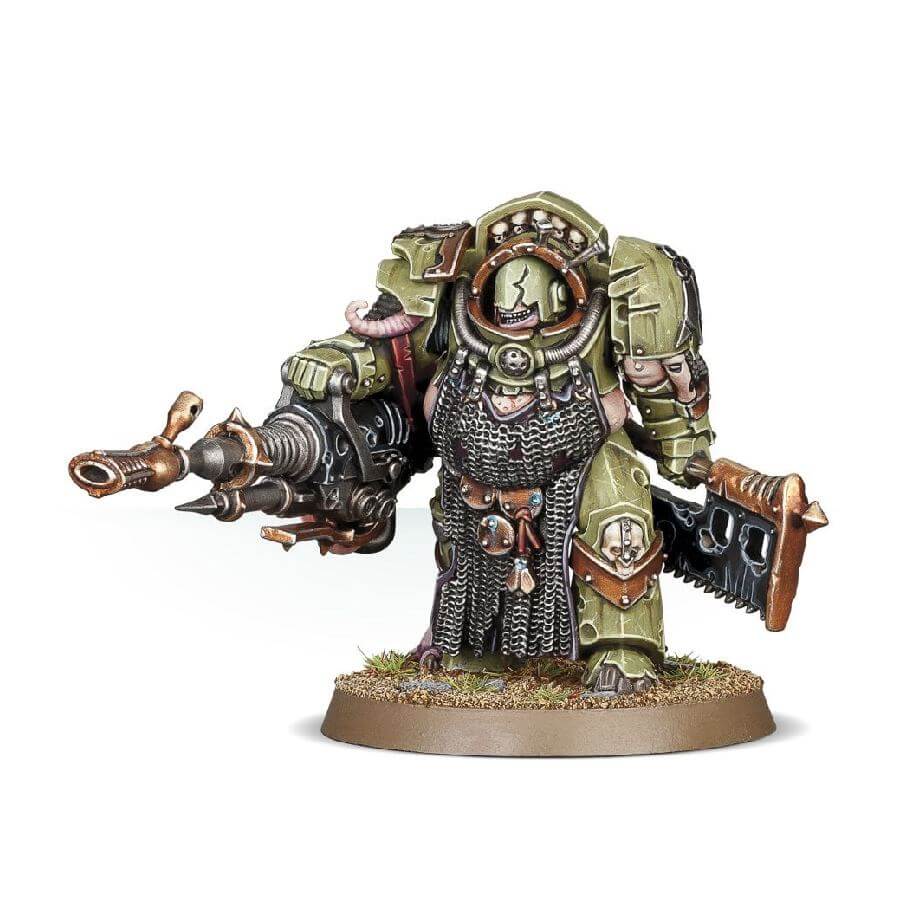
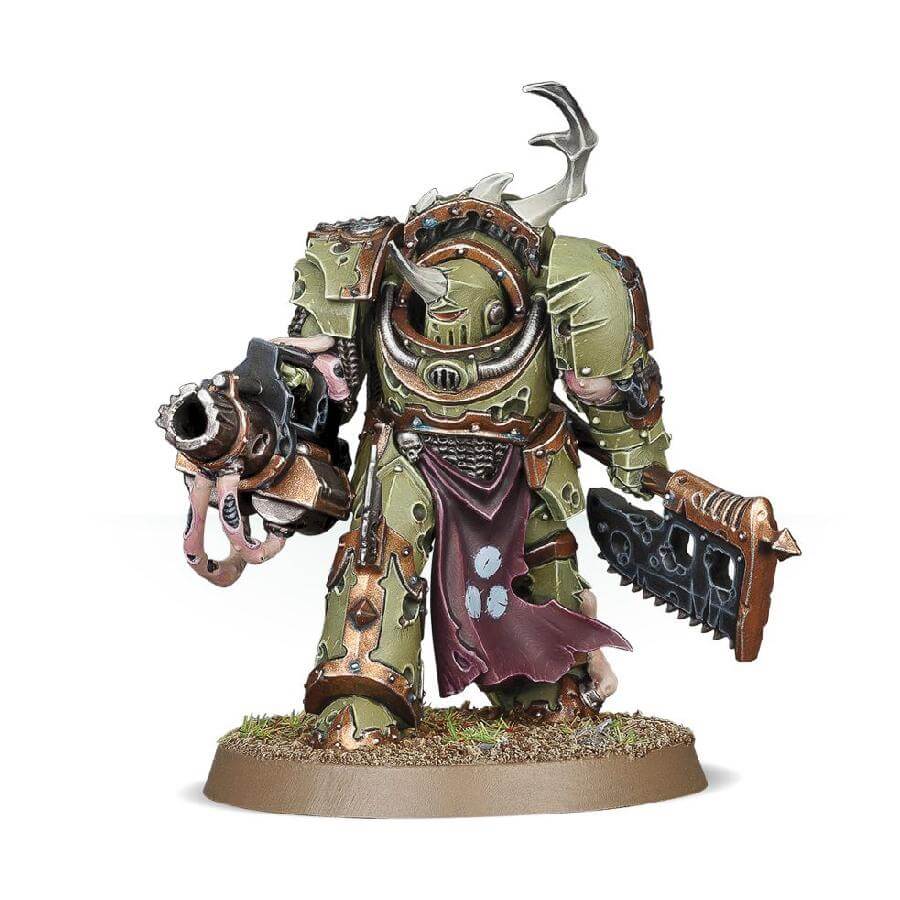
Deep within the shadows of the warp-tainted realm, where the light of hope wanes and despair takes root, the Blightlord Terminators arise. Clad in ancient, corroded armor, their presence alone is a testament to the grim determination of the Death Guard, a legion forever dedicated to spreading the plague-ridden rot of Nurgle.
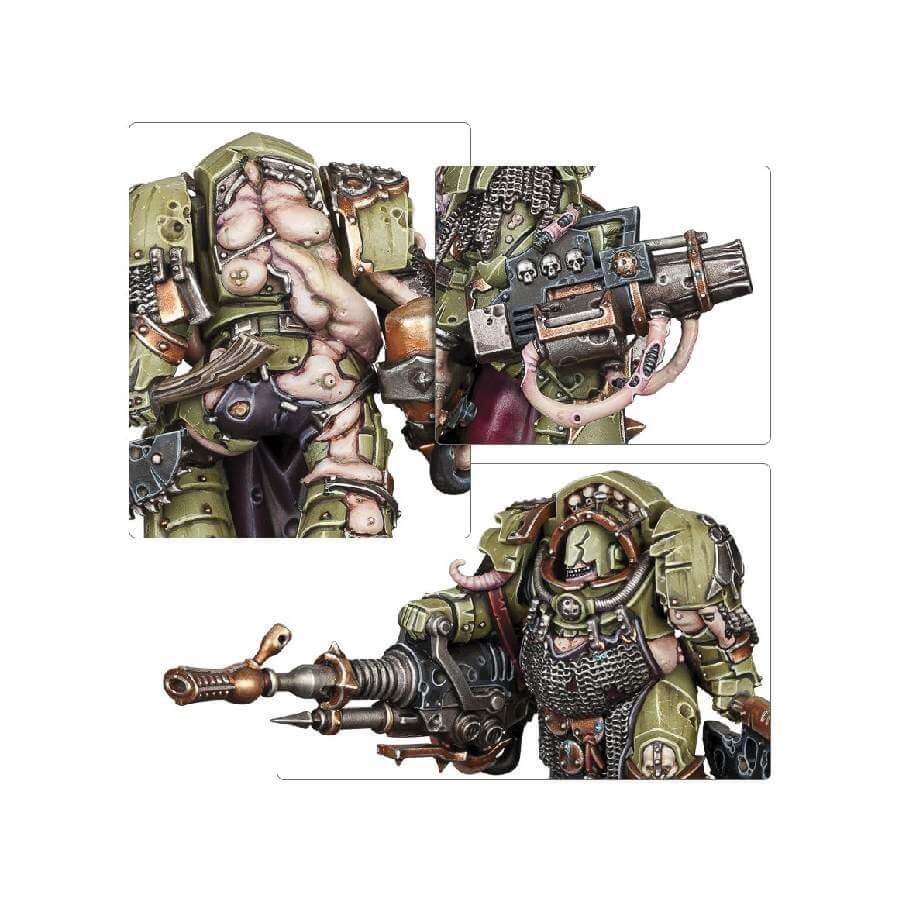
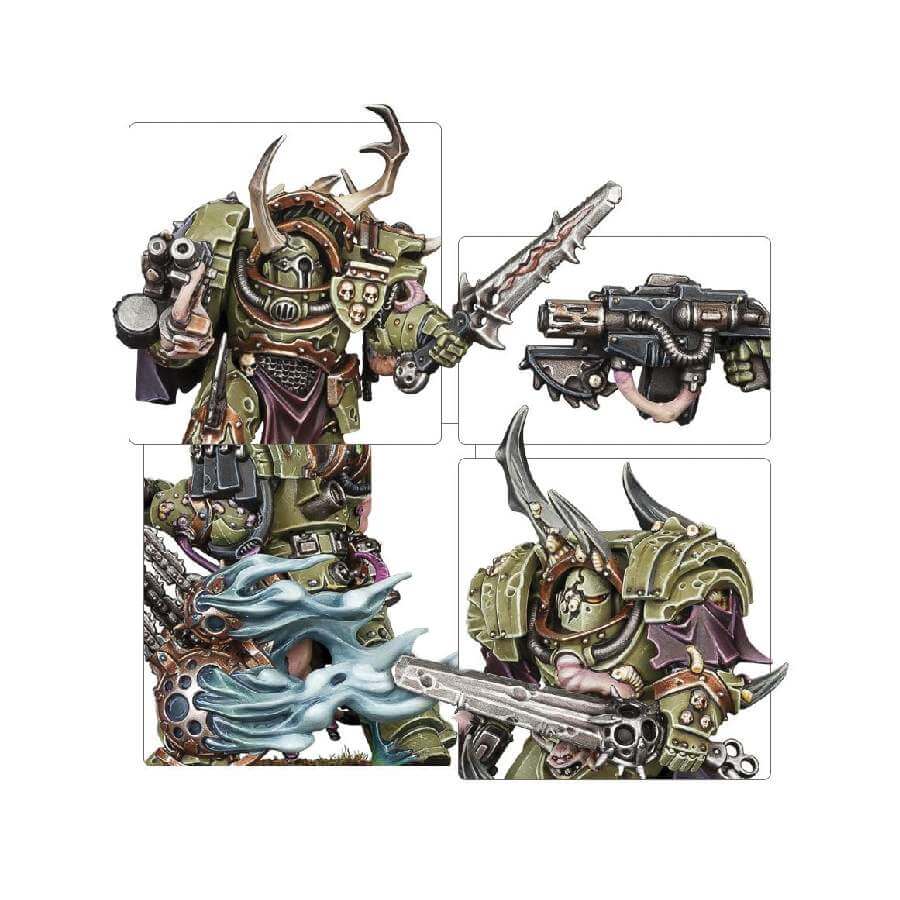
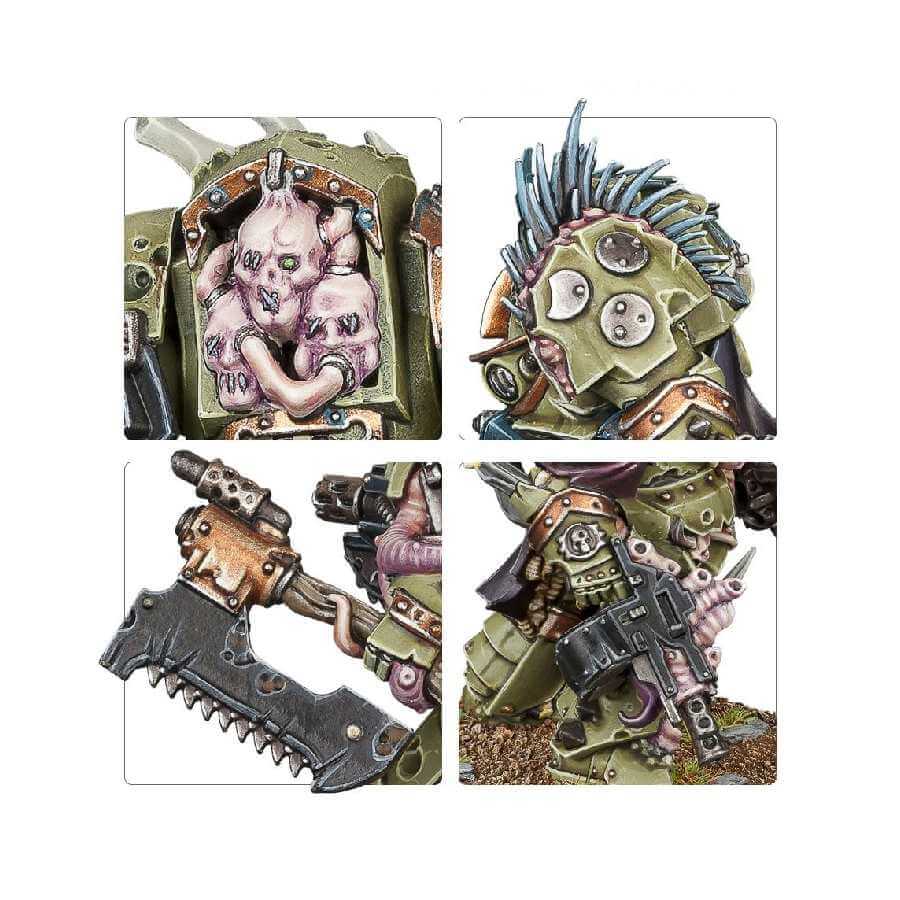
Each Blightlord Terminator carries an array of fearsome weaponry, from blighted combi-bolters spewing poisonous rounds to manreaper scythes, their rusted blades seething with the virulent energies of decay. Their resilience is unmatched, as their putrid flesh is fortified by both unnatural regeneration and the unnatural power of the warp itself.
Also available in this box set:
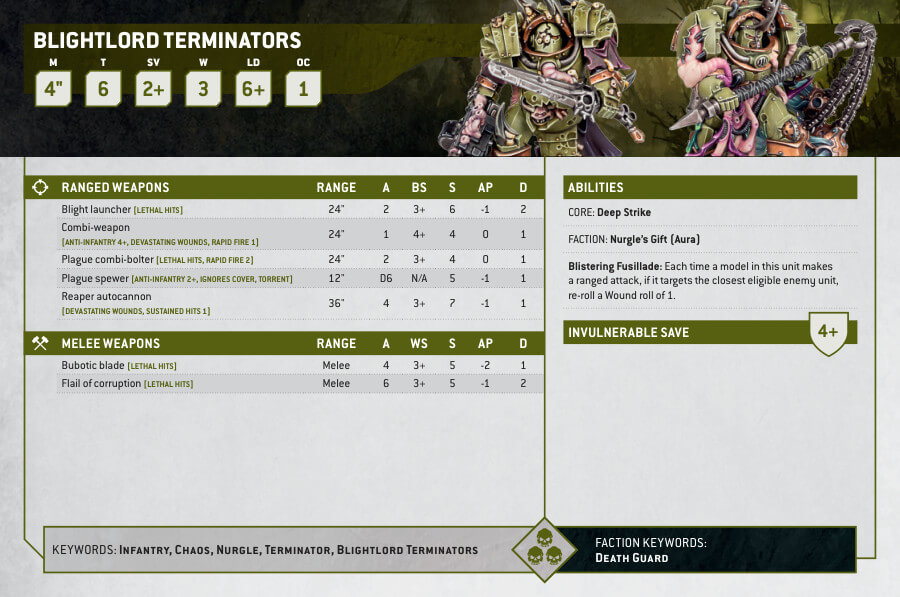
Blightlord Terminators Datasheets
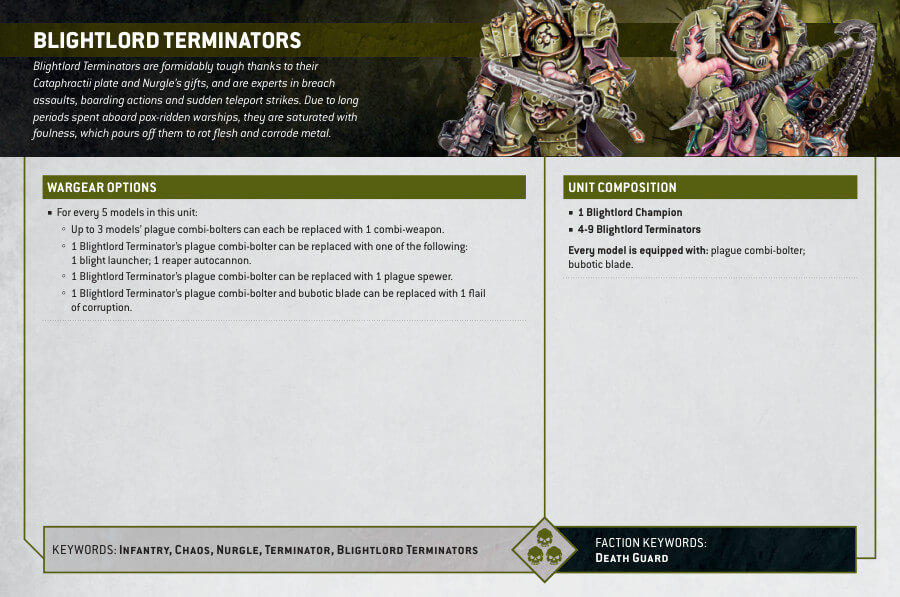
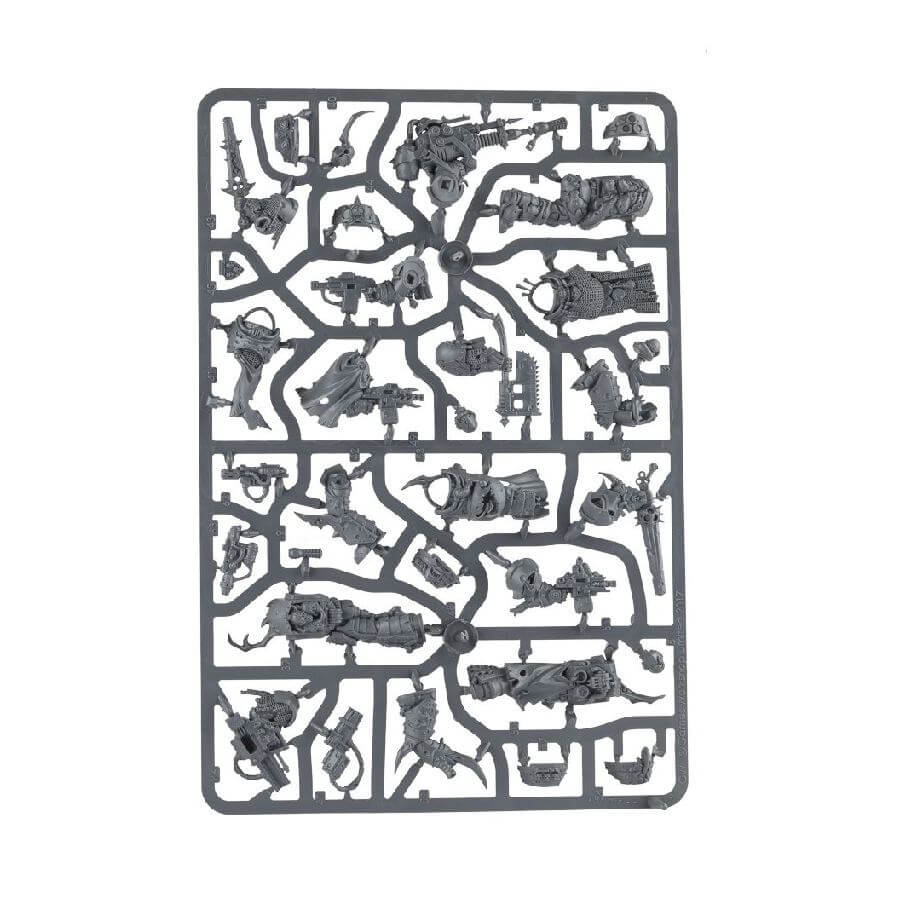
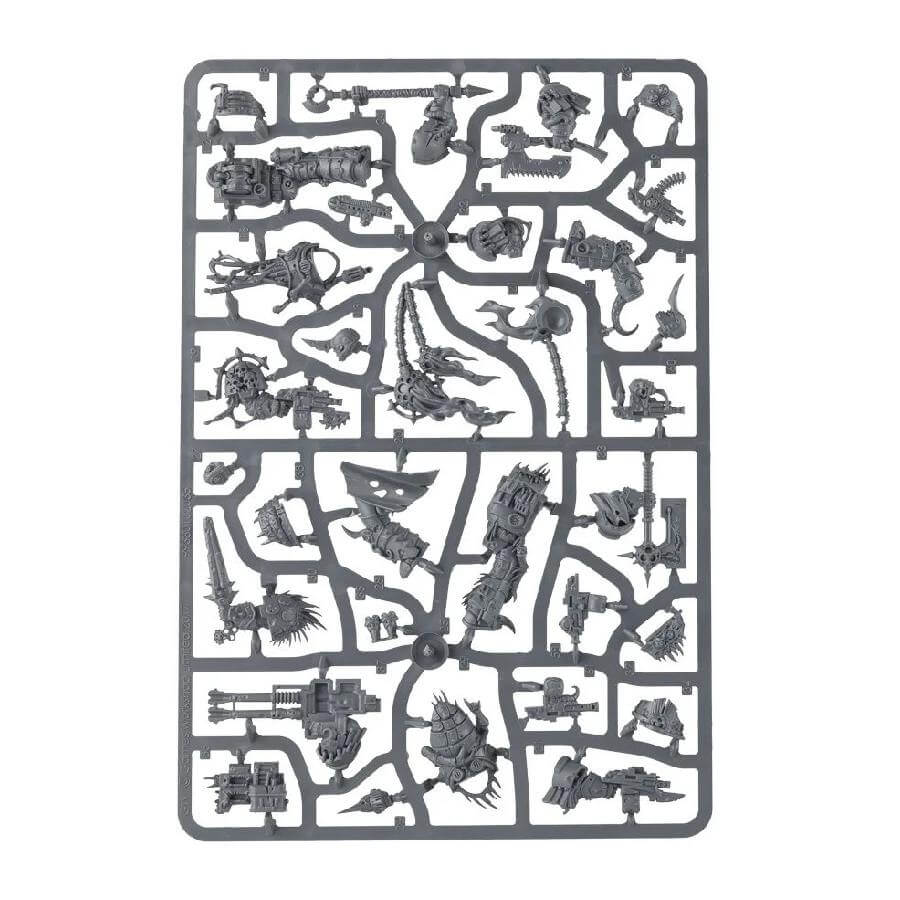
What’s in the Blightlord Terminators box
- x64 plastic components that make 5 Blightlord Terminators.The kit also includes the following weapon options for them:
- x4 combi-bolters
- x3 bubotic axes
- x3 baleswords
- x1 reaper autocannon
- x1 plague spewer
- x1 blight launcher
- x1 flail of corruption
- x1 combi-weapon (with a choice of combi-plasma, combi-flamer or combi-melta)
- x5 Citadel 40mm Round bases
How to paint the Blightlord Terminators set
- Step 1: Assembling and Priming
Assemble your Blightlord Terminators as per the manufacturer’s instructions. Make sure all parts are properly glued and any mold lines are removed. Once assembled, apply a suitable primer spray to the models. A grey or black primer is commonly used for Death Guard models. - Step 2: Basecoat
Start by applying a basecoat of Death Guard Green to the armor sections of the Blightlord Terminators. Use a medium-sized brush and apply thin layers to achieve smooth coverage. Make sure to leave recesses and details unpainted. - Step 3: Metallic Elements
Next, paint the metallic elements such as weapons and trim with a color like Balthasar Gold. Use a smaller brush for better control and precision. Take your time and carefully apply the paint, covering the desired areas. - Step 4: Accent Colors
Apply accent colors to specific areas, such as hazard stripes or filth. For example, you can use Rakarth Flesh for the flesh, Mephiston Red for the eyes, or a mix of colors for the filth. Keep in mind the overall aesthetic of the Death Guard and apply the accent colors sparingly for a more realistic effect. - Step 5: Washes
Apply washes to the different areas of the model to enhance depth and add shading. For the Death Guard Green armor, use Agrax Earthshade to darken recesses and create a weathered appearance. Apply the wash selectively, ensuring it settles into the recesses and crevices. - Step 6: Highlights and Drybrushing
Using a lighter shade of Death Guard Green (such as Kroak Green) or a mix with white, carefully highlight the edges and raised areas of the armor. This step adds dimension and brings out the details. Additionally, use a drybrush technique with Tyrant Skull or a similar light bone color to lightly dust the edges of the armor, emphasizing the weathered look. - Step 7: Fine Details
Focus on painting smaller details such as lenses, purity seals, and insignia. Use colors that contrast with the main color scheme to make them stand out. For example, paint the lenses with a bright color like Moot Green, and the parchment on purity seals with Ushabti Bone. - Step 8: Basing (Optional)
If you wish to add a finishing touch to your models, consider basing them. Apply texture paint or use a mix of sand and PVA glue to create a textured base. Once dry, paint the base with suitable colors to match your preferred theme, such as a corrupted, diseased ground or a desolate battlefield. - Step 9: Protection (Optional)
To protect your painted models and ensure their longevity, you can apply a varnish spray as a final step. This helps to seal the paint, guard against chipping, and adds a protective layer to the miniature.
