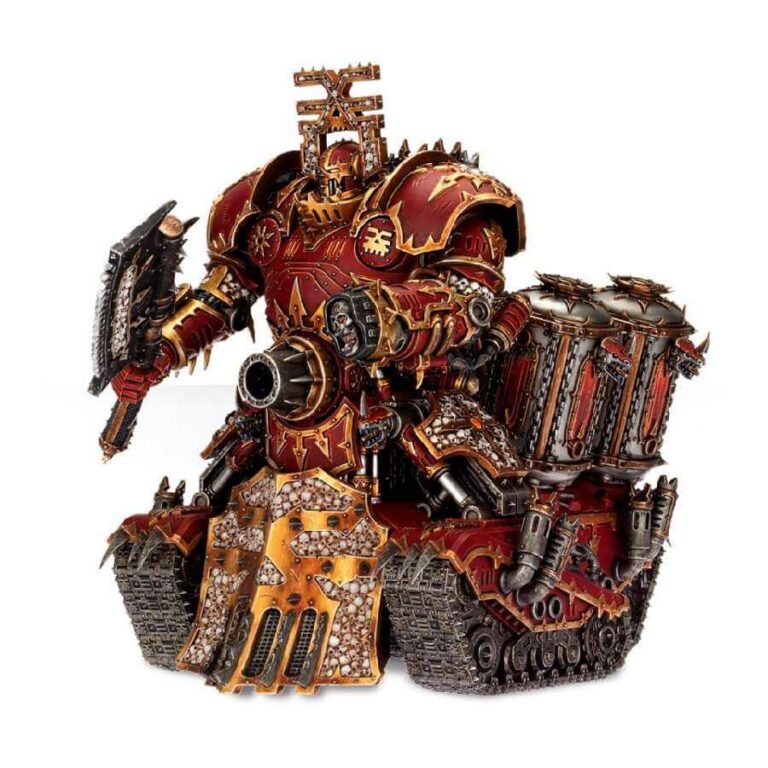
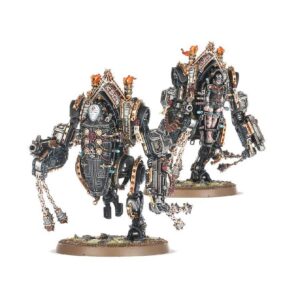
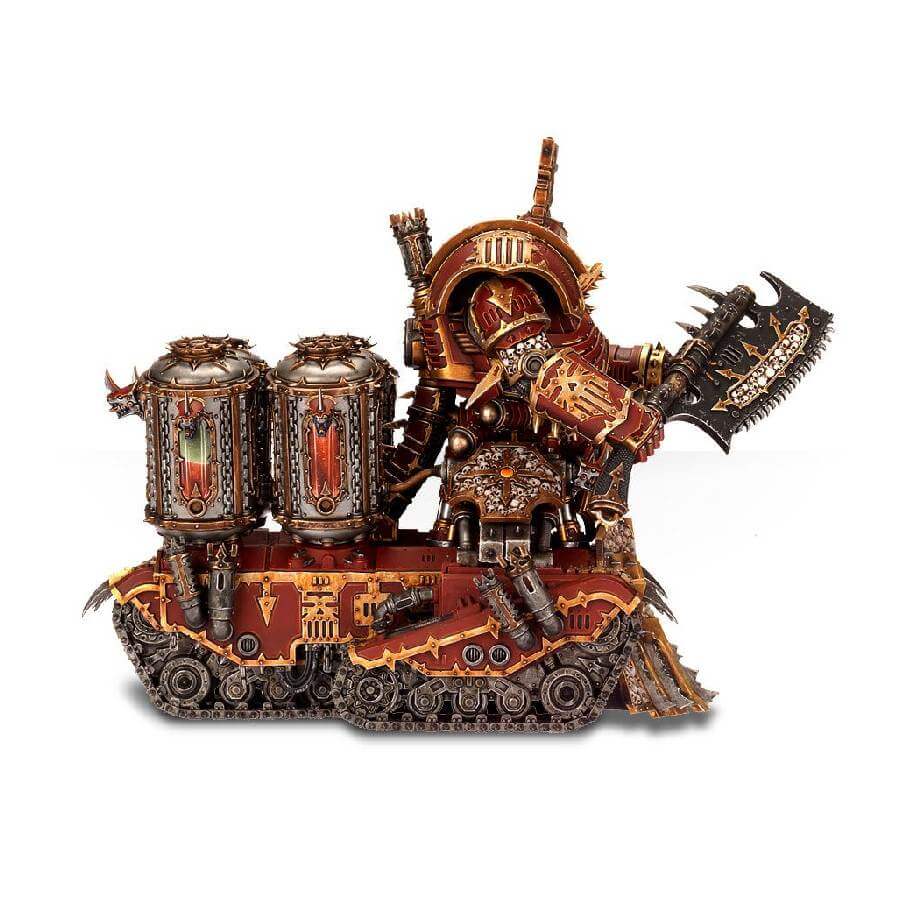
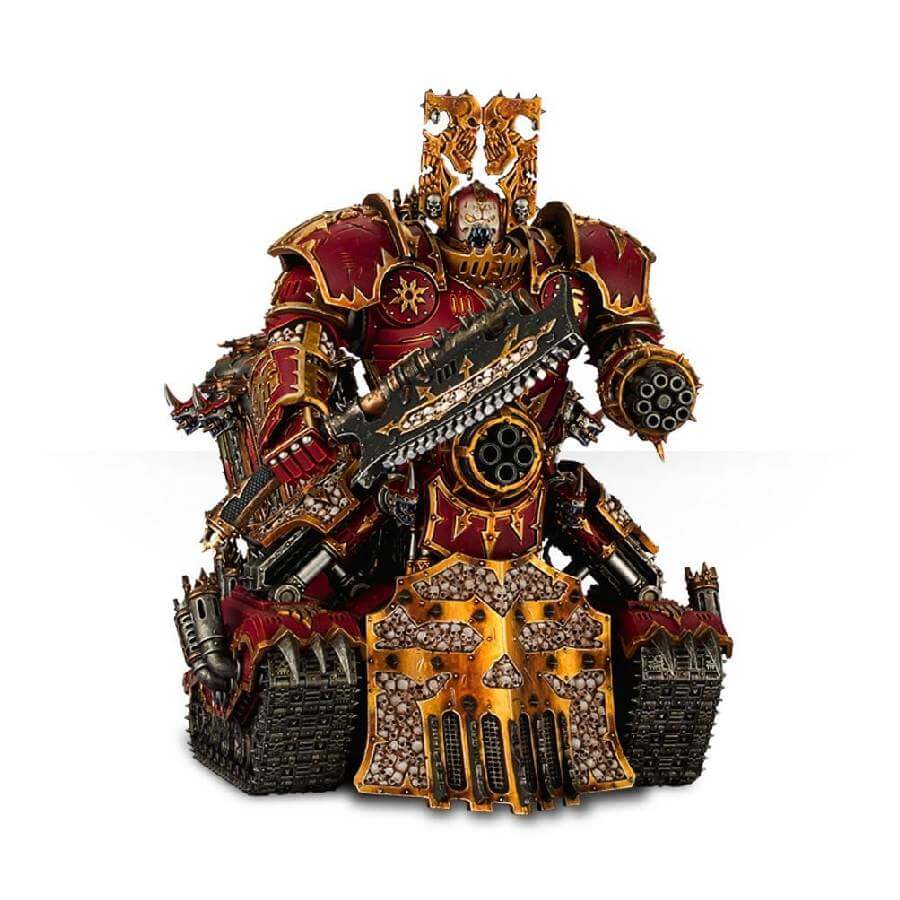
The colossal Knight Desecrator, a formidable choice for Chaos Space Marines and World Eaters, wields a massive cleaver to harvest skulls for the Skull Throne and boasts an array of arm-and-hull mounted guns to subdue all adversaries.
Standing almost 6″ tall and over 7″ in length, it is a true monolith of destruction.
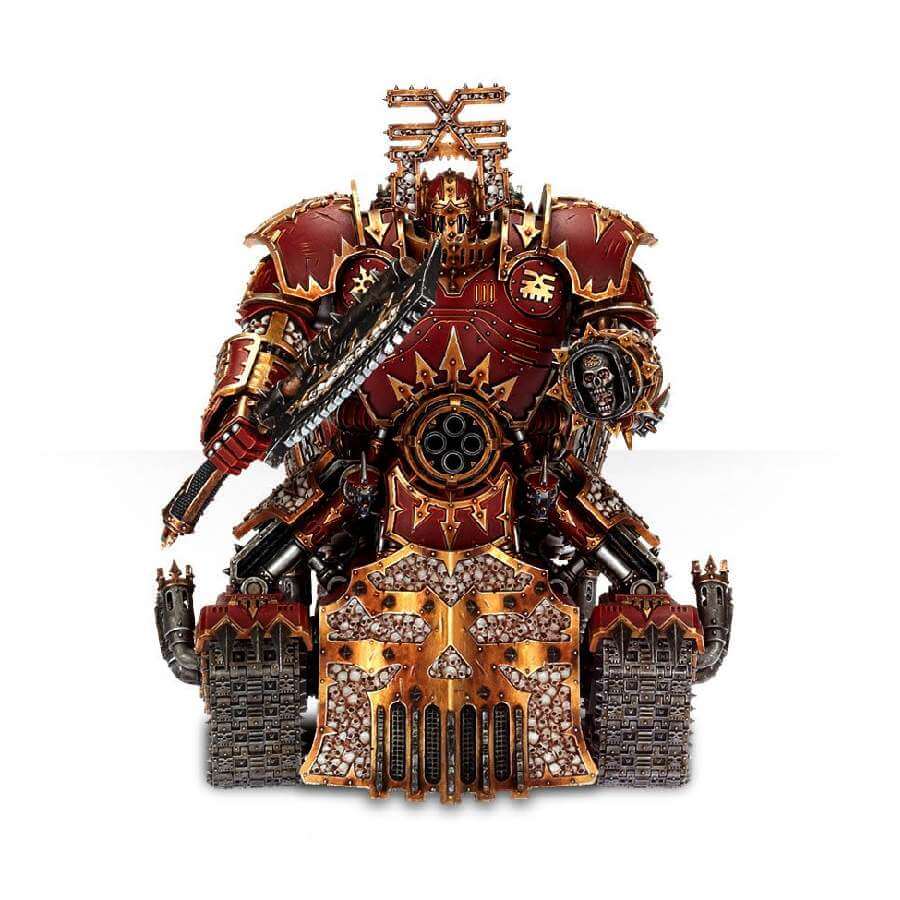
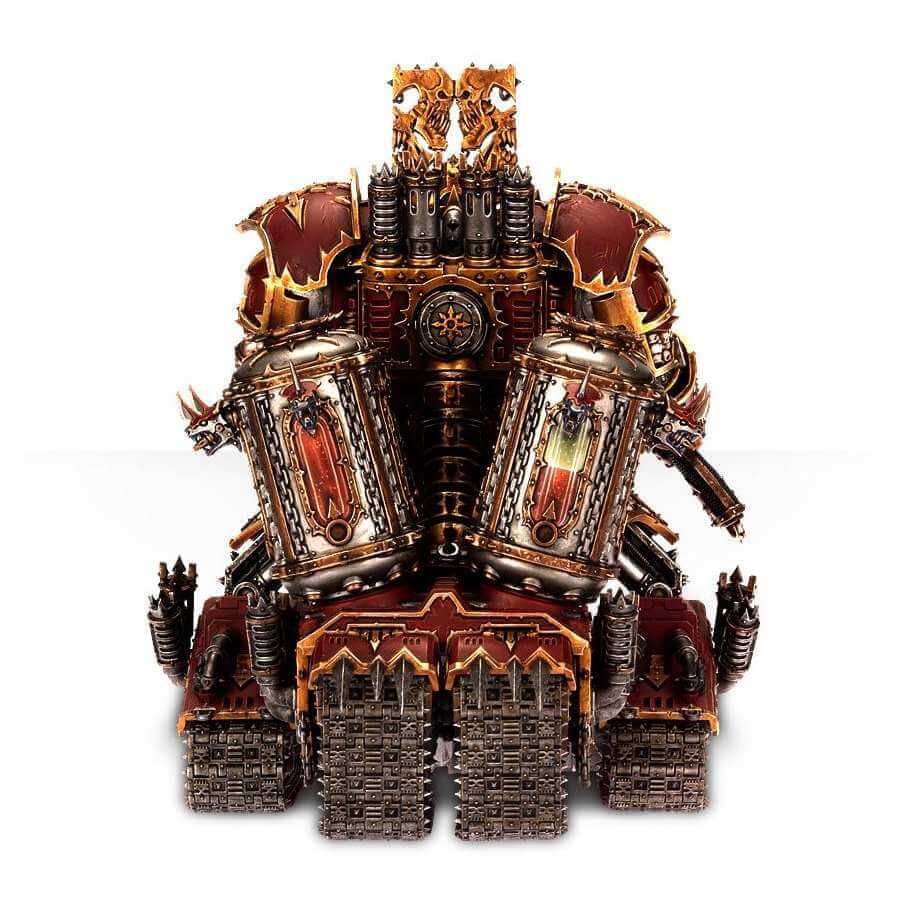
The Khorne Lord of Skulls is equipped with a formidable many-toothed great cleaver, capable of obliterating foes with brutal force. Its left arm offers a choice between devastating firepower options – the infantry-shredding hades gatling gun or the explosive skull hurler.
Additionally, it features three different belly-mounted weapons: the daemongore cannon, ichor cannon, or gorestorm cannon, each providing unique destructive capabilities.
This kit showcases intricate and hellish mechanical details, allowing for a range of poseable options with its adjustable head and arms. Furthermore, it includes two head-crest options and two head designs – a fully enclosed helm and a twisted daemonic visage – providing customization opportunities to truly make this Lord of Skulls your own.
Prepare to unleash this monstrous daemon engine upon the battlefield, as it crushes, cleaves, and hurls destruction with unstoppable fury.
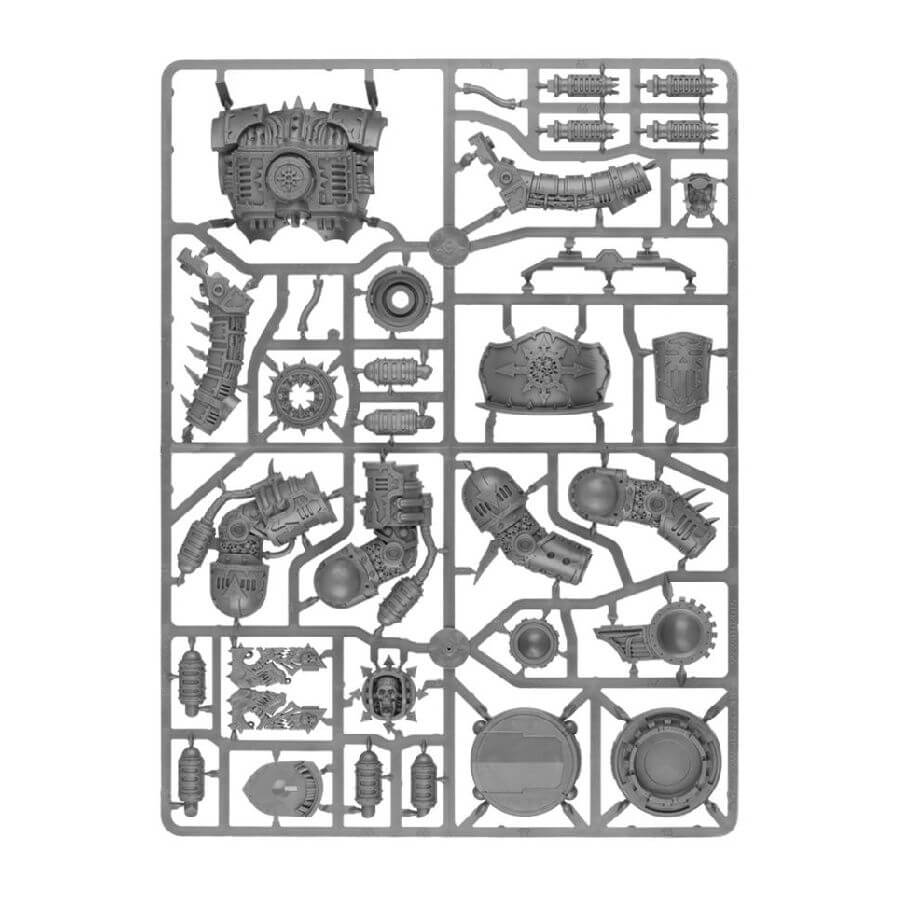
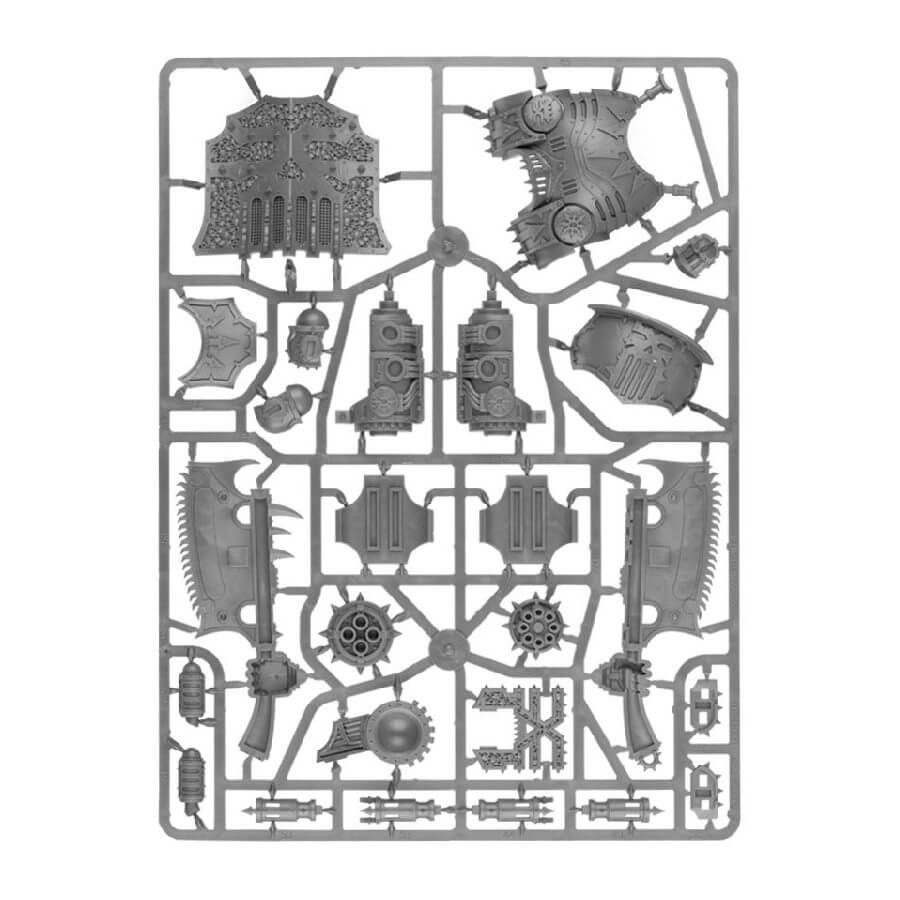
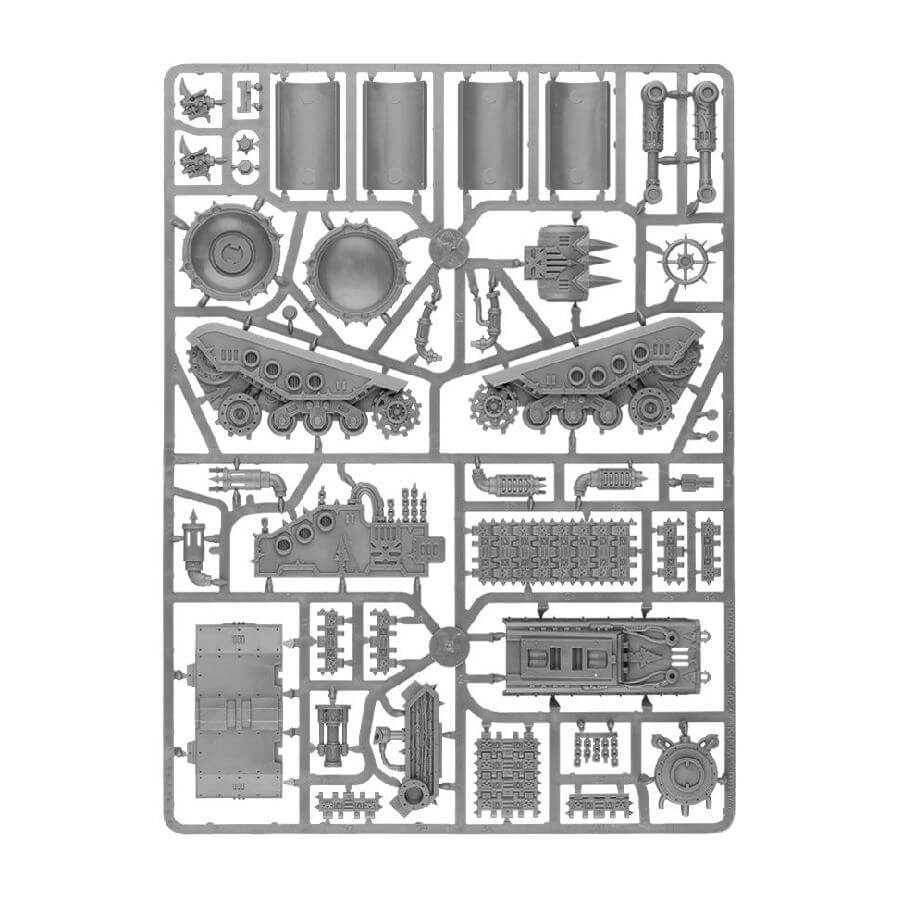
What’s in the Khorne Lord of Skulls box
- x99 plastic components that make this Destroyer of Khorne
- x2 Chaos Space Marine Transfer Sheets featuring a variety of Chaos symbols and Traitor Legion icons.
How to paint the Khorne Lord of Skulls set
- Step 1: Basecoat the model
Apply a basecoat of Chaos Black to the entire Khorne Lord of Skulls model. This will provide a solid foundation for the subsequent layers of paint. - Step 2: Apply metallic colors
Use Leadbelcher to paint the metallic areas of the model, such as the cleaver, guns, and mechanical details. For a weathered effect, you can dry brush with Runelord Brass or apply Agrax Earthshade to add depth and texture. - Step 3: Paint the armor plates
Choose a suitable color, like Khorne Red or Mephiston Red, and carefully paint the armor plates on the Khorne Lord of Skulls. Ensure even coverage and smooth application. For additional shading, you can wash the recesses with Nuln Oil. - Step 4: Detail the skulls and bones
With Ushabti Bone or Screaming Skull, carefully paint the skulls and bone-like elements on the model. Take your time to highlight the raised areas, creating depth and definition. To make the skulls look weathered, you can apply a wash of Agrax Earthshade. - Step 5: Paint the blood effects
Using Mephiston Red, carefully paint the areas where blood would be splattered or dripping. This can include the cleaver, weapons, and wounds. For a realistic blood effect, layer with Carroburg Crimson, and finish with a touch of Evil Sunz Scarlet on the freshest blood. - Step 6: Highlight the edges
With a fine brush, apply a light dry brush of Runefang Steel to the edges of the armor plates and metallic areas. This will create a striking contrast and enhance the visual impact of the model. - Step 7: Paint the details
Now, focus on smaller details like cables, rivets, and other mechanical parts. Use suitable colors such as Abaddon Black, Mechanicus Standard Grey, or Balthasar Gold to paint these intricate elements. - Step 8: Weathering effects
For a weathered appearance, you can add weathering effects using a sponge or brush. Apply patches of Rhinox Hide or Dryad Bark on areas prone to wear and tear, and lightly dab with a sponge or brush to create a worn texture. - Step 9: Finishing touches
Once all the paint is dry, you can add final touches such as dry brushing the base with a lighter color like Karak Stone or applying grass tufts or small rocks to enhance the model’s presentation. - Step 10: Varnish for protection
To protect your hard work, apply a layer of varnish to the painted model. Choose between a matte, satin, or gloss varnish based on your preferred finish.