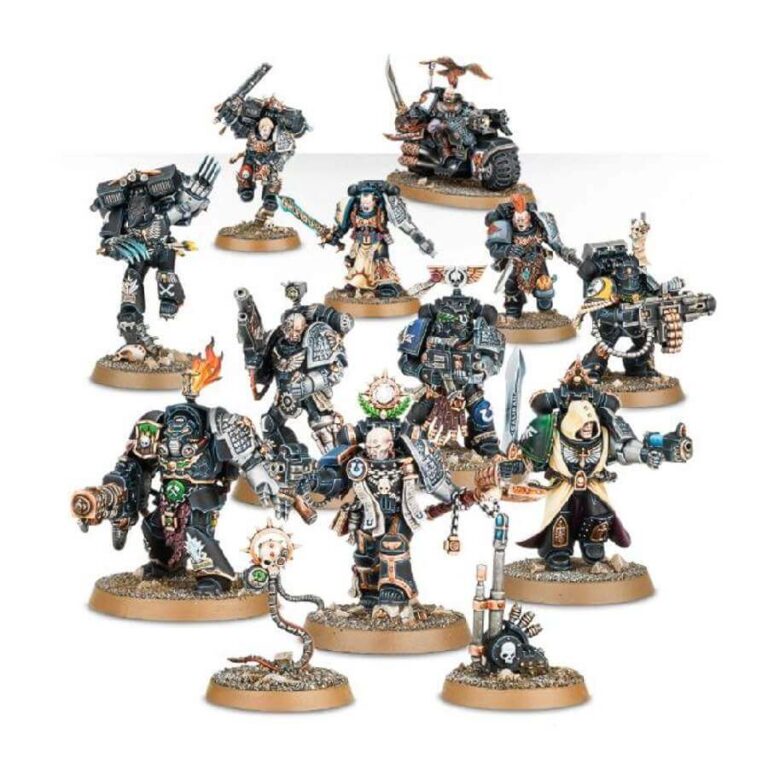
Kill Team Cassius was created by Ortan Cassius, a renowned Chaplain of the Ultramarines. Their mission was to investigate the mysterious happenings on the mining planet Ghosar Quintus, where threats to the Imperium’s dominance had been detected. This hand-picked squad of elite warriors was chosen for their unwavering loyalty, impressive arsenal, and unrelenting determination to eradicate any xenos filth that threatened the Imperium.
Led by the legendary Watch Captain Artemis, Kill Team Cassius consisted of the most skilled operatives from the Deathwatch, each with their own unique abilities honed through years of battle against the deadliest foes in the galaxy. Their weapons were the finest the Imperium had to offer, and their teamwork was flawless, making them a force to be reckoned with.
Their mission was a perilous one, as they would have to navigate through treacherous terrain and face unknown dangers to uncover the truth behind the disturbances on Ghosar Quintus. But with their expert training and unwavering dedication to their cause, Kill Team Cassius was more than ready for the challenge.
Their resolve to defend the Imperium and its people was unyielding, and they would stop at nothing to achieve victory over their enemies. The fate of the galaxy rested on their shoulders, and they were ready to face any challenge that came their way.
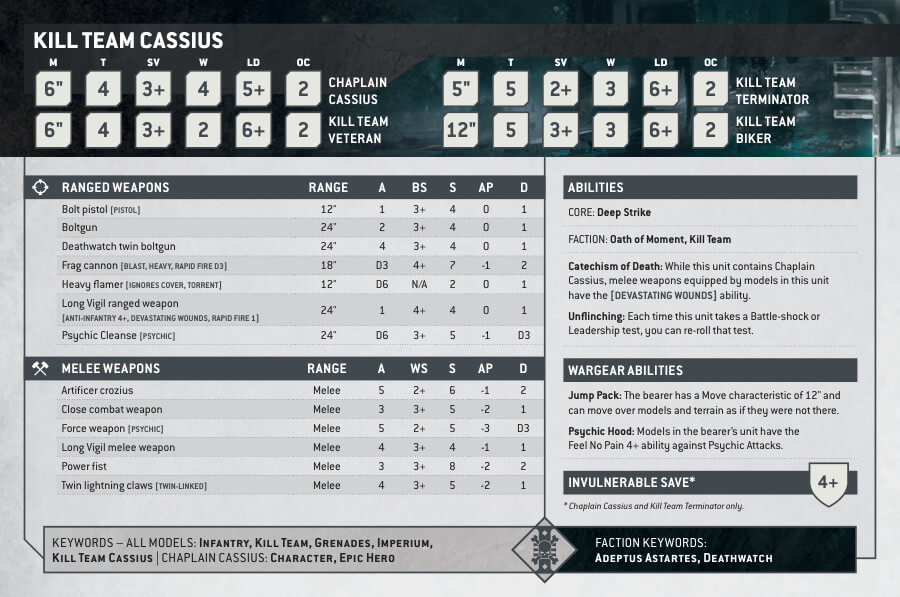
Kill Team Cassius Datasheets
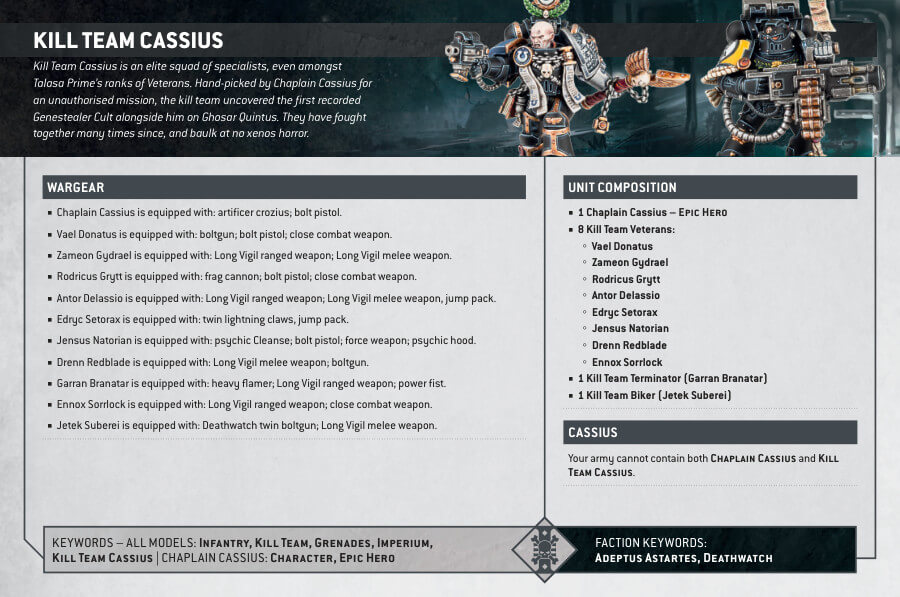
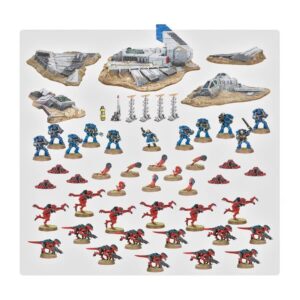
What’s in the Kill Team Cassius box
- x73 plastic components that make 11 highly detailed Deathwatch Space Marines, each armed with an array of deadly weaponry and designed to be customizable with a variety of accessories. The members include:
- Ortan Cassius, a revered Ultramarines Chaplain, equipped with a crozius arcanum and a plasma pistol.
- Vael Donatus, an Ultramarines Sternguard Veteran armed with a boltgun and a variety of special ammunition types.
- Zameon Gydrael, a Company Champion wielding a power sword and a storm shield, making him a formidable opponent in close combat.
- Rodricus Grytt, an Imperial Fists Devastator carrying a heavy bolter and a missile launcher, perfect for providing long-range support.
- Antor Delassio, a Flesh Tearer Assault Marine Sergeant, equipped with a chainsword and a jump pack, making him a versatile and mobile fighter.
- Edryc Setorax, a Raven Guard Vanguard Veteran, equipped with lightning claws and a jump pack, making him a deadly melee combatant.
- Jensus Natorian, a Blood Ravens Codicer Librarian, with psychic powers that can be used to turn the tide of battle.
- Drenn Redblade, a Space Wolves Blood Claw armed with a bolt pistol and a chainsword, ideal for close-quarters combat.
- Garran Branatar, a Salamander Terminator, clad in Terminator armor and armed with a thunder hammer and a storm shield, making him an extremely resilient fighter.
- Ennox Sorrlock, an Iron Hands Sternguard Veteran armed with a combi-grav and a variety of special ammunition types.
- Jetek Suberei, a White Scars Biker Sergeant, mounted on a powerful bike and armed with a bolt pistol and a chainsword, making him a fast and deadly hit-and-run attacker.
- x1 teleport homer and x1 servo skull, which can be used to support the squad in a variety of ways.
- x1 Citadel 75x46mm Oval base
- x1 Citadel 40mm Round base
- x2 Citadel 25mm Round bases
- x10 Citadel 32mm Round bases
How to paint the Kill Team Cassius
- Step 1: Base Coating
Begin by applying a base coat of Abaddon Black to the entire armor of your Kill Team Cassius models. Ensure thorough coverage and let it dry completely. - Step 2: Layering – Armor and Cloth
To create depth in both the armor and cloth, begin layering them with Dark Reaper for the armor and Khorne Red for the cloth. Concentrate on raised areas and edges to establish highlights. Apply multiple thin layers for a smooth transition. - Step 3: Layering – Parchment
If your models have parchment or scrolls, paint them Zandri Dust and then layer with Ushabti Bone. Apply this in thin layers to maintain texture. - Step 4: Layering – Skin
Paint the exposed skin areas with a suitable flesh-tone paint, like Kislev Flesh. Apply multiple thin layers to achieve a realistic skin tone. Shade the recesses with Reikland Fleshshade for depth. - Step 5: Metallic Details
Proceed to paint the metallic details, such as weapons and armor components, with Ironbreaker. Layer the edges and raised parts for a shiny metallic look. - Step 6: Gold Details
For gold accents like ornamental elements and insignias, use Retributor Armour. Layer it for a rich gold finish. - Step 7: Silver Details
Paint silver details, such as weapons or accessories, with Runefang Steel. Highlight the edges for a bright silver shine. - Step 8: Red and Yellow Details
Apply Mephiston Red to areas that require a red color, like eye lenses, insignias, or weapon details. Use Averland Sunset for yellow details, like warning stripes or markings. Layer if needed for intensity. - Step 9: Flame Details
If your models have flame details, paint them Troll Slayer Orange as the base. Then layer with Fire Dragon Bright and finish with a touch of White Scar for a fiery effect. - Step 10: Shading – Armor, Cloth, Parchment, and Skin
To add depth to the armor, cloth, parchment, and skin, apply Nuln Oil for armor, Carroburg Crimson for cloth, Agrax Earthshade for parchment, and Reikland Fleshshade for skin. Ensure it settles in the recesses for shadows and contrast. - Step 11: Highlighting – Armor and Cloth
To highlight the armor and cloth, use Thunderhawk Blue for the armor and Wild Rider Red for the cloth. Apply it sparingly to edges and raised parts, emphasizing wear and tear. - Step 12: Highlighting – Parchment
For parchment, dry brush with Screaming Skull to bring out the texture and aged look. - Step 13: Highlighting – Skin
Highlight the skin with Kislev Flesh, focusing on features like the nose, cheekbones, and knuckles. - Step 14: Basing
To complete the models, create a suitable base. Use texture paints like Astrogranite Debris for a rocky appearance. Dry brush with Dawnstone for highlights. Add details like grass tufts or rocks if desired. - Step 15: Varnishing
Protect your hard work by applying a coat of Munitorum Varnish. This not only safeguards the paint job but also gives a finished, matte look to your Kill Team Cassius models.

