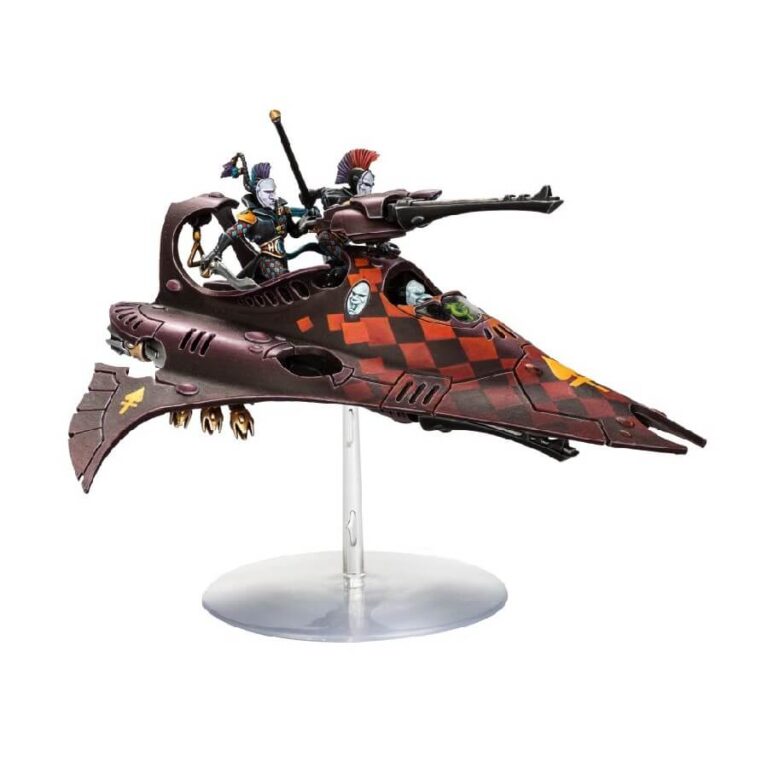
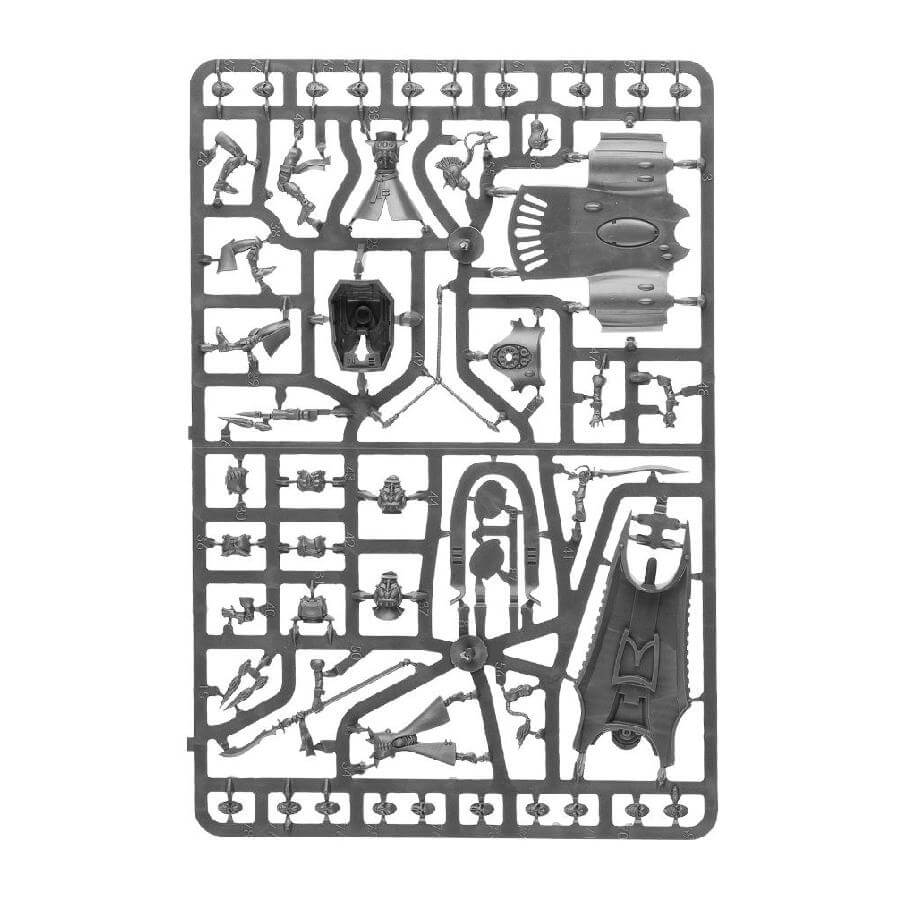
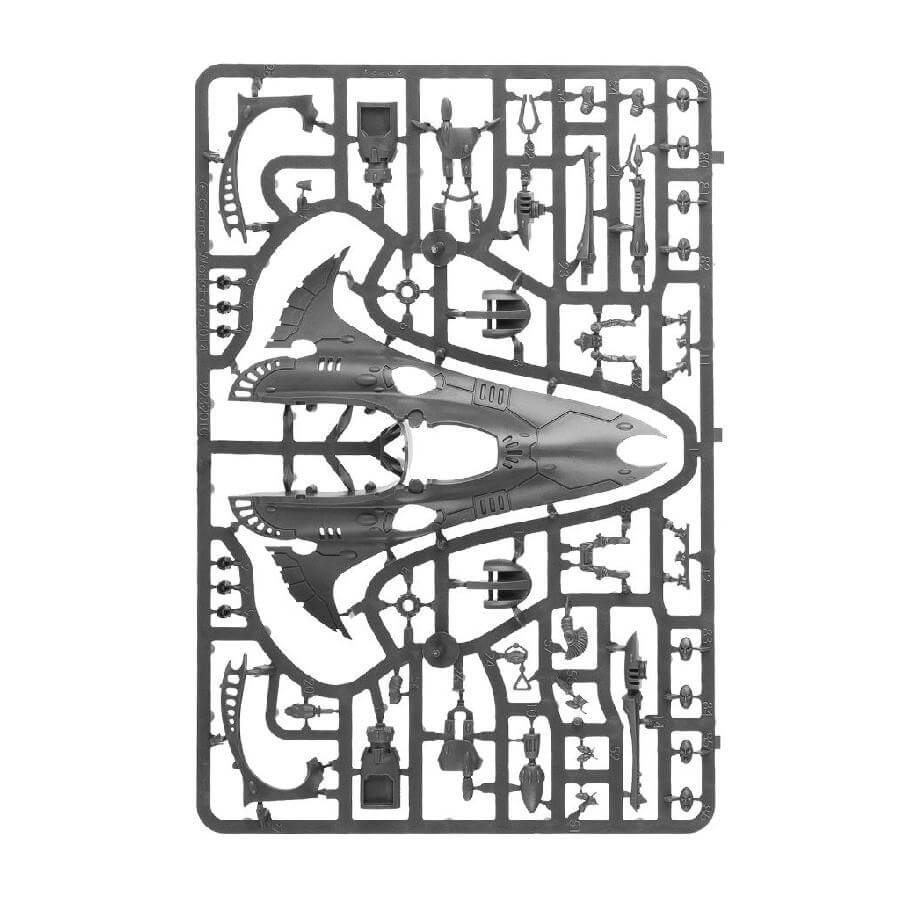
In this box, you’ll find everything needed to construct one of these 2 Aeldari vehicles: either a Starweaver or a Voidweaver, both utilizing the same versatile chassis. The final outcome depends on your choice of crew and weapon mounts.
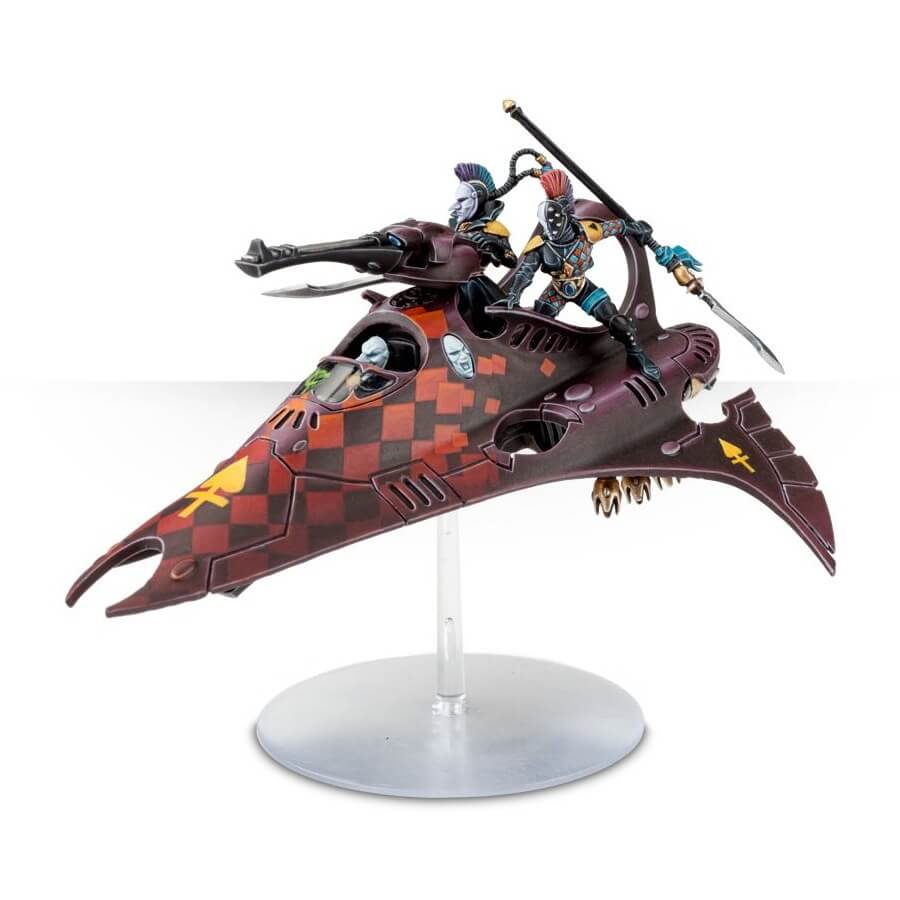
The Starweaver is equipped with two shuriken cannons and three banks of mirage launchers. Additionally, it features a rappelling line that can be attached to the back of the vehicle. The rear of the Starweaver can be modeled with two crew members wielding star bolas, swords, or zephyrglaives, while two arms are designed to hold onto the vehicle itself.
On the other hand, the Voidweaver is a mobile gun platform, armed with two shuriken cannons. One cannon is under-slung beneath the front of the vehicle, while the second is rear-facing and mounted on the platform at the top. The Voidweaver offers a choice between a pintle-mounted haywire cannon or a prismatic cannon, with the option to add three banks of mirage launchers. A separate gunner model is included, which can be assembled either standing or attached to the top shuriken cannon or pintle-mounted weapons.
Regardless of the variant you choose to assemble, both bikes come with the option to include nine pairs of masks on the vehicle’s side. Additionally, there are five heads, each featuring space to attach one of ten individually designed masks for both the pilots and crew, along with two completely masked heads. Furthermore, two clear canopies are provided, which can be glued on to fully enclose the cockpit or used to cover the lower section only.
What’s in the Starweaver box
- x94 plastic components with which to make 1 Harlequin Starweaver or Voidweaver.
- x1 Citadel large flying base.
- x1 Harlequins transfer sheet.
How to paint the Starweaver set
- Step 1: Prime the Miniature
Start by priming the Starweaver miniature with either Chaos Black or White Scar primers, depending on your desired color scheme. Black primer gives a darker and more dramatic look, while white primer provides a brighter appearance. - Step 2: Base Coat – Vehicle Body
Choose a base color for the main body of the Starweaver. For example, you can use a deep blue like Kantor Blue or a dark purple like Xereus Purple. Apply multiple thin coats to achieve a smooth and even coverage. - Step 3: Base Coat – Gun Turrets and Details
Select a color for the gun turrets and other details on the Starweaver. For instance, you can use Leadbelcher for the gun barrels and metallic parts, and Mephiston Red for any accent details. - Step 4: Shade the Vehicle Body
Apply a shade like Nuln Oil or Drakenhof Nightshade to the recessed areas of the vehicle body. This will add depth and shadows, enhancing the overall appearance. - Step 5: Shade the Gun Turrets and Details
Use a wash like Nuln Oil or Carroburg Crimson to shade the gun turrets and other details. This will create contrast and make the metallic parts look more realistic. - Step 6: Highlighting
Highlight the raised areas of the vehicle body with a lighter shade of your base color. For example, use Caledor Sky to highlight the edges of the blue vehicle body, or Genestealer Purple for the purple version. - Step 7: Highlighting Gun Turrets and Details
Highlight the gun turrets and details with a lighter metallic color, such as Ironbreaker. This will make the metallic parts stand out and give them a shiny appearance. - Step 8: Cockpit and Crew
Paint the cockpit windows with a color like Mephiston Red or Fire Dragon Bright to simulate the glow from within. For the crew, you can use colors like Pallid Wych Flesh for their skin and Abaddon Black for their outfits. - Step 9: Optional Details
Feel free to add extra details to personalize your Starweaver. You can paint the symbols and patterns on the vehicle’s sides using contrasting colors like Yriel Yellow or Moot Green. - Step 10: Preserve Your Masterpiece
Now that you’ve completed painting your Starweaver, it’s time to protect your hard work and showcase it with pride. Apply a coat of Citadel Munitorum Varnish to safeguard your miniature from wear and tear, as well as to maintain its vibrant colors.