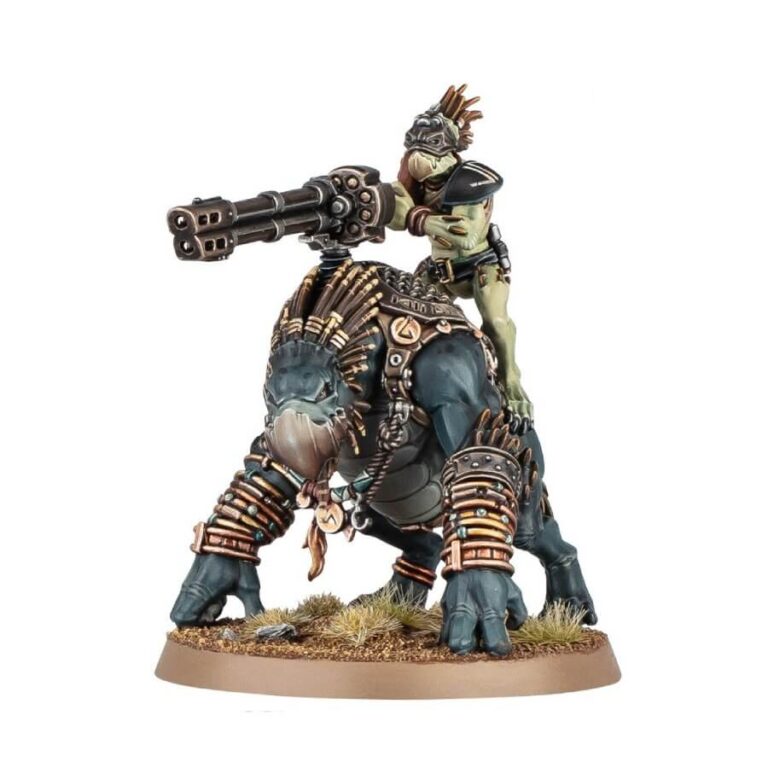
Amidst the diverse tapestry of alien alliances, the T’au have cultivated a unique harmony, embracing collaboration with various races. Among these, the enigmatic Kroot stand out – hailing from the verdant realm of Pech, a forested haven nestled in the north-west reaches of the sprawling T’au Empire. Their remarkable traits and prowess make them intriguing partners.
The sinewy strength of the Kroot is awe-inspiring, woven with robust fibrous strands that boast a power-to-mass ratio surpassing that of humans. This astonishing musculature underpins their remarkable agility and combat finesse. In the heat of battle, the Kroot ingeniously lash their sizeable Kroot guns to the brawny shoulders of the Krootox, a creature both mighty and imposing. This tactical ingenuity transforms the Krootox into a mobile weapon platform, amplifying the Kroot’s ferocity on the battlefield.
What’s in the (old) Krootox Rider box
- x7 resin components with which to make a T’au Empire Kroot Krootox and its Kroot rider.
- x1 Citadel 40mm round base.
Krootox Rider Old vs New Model
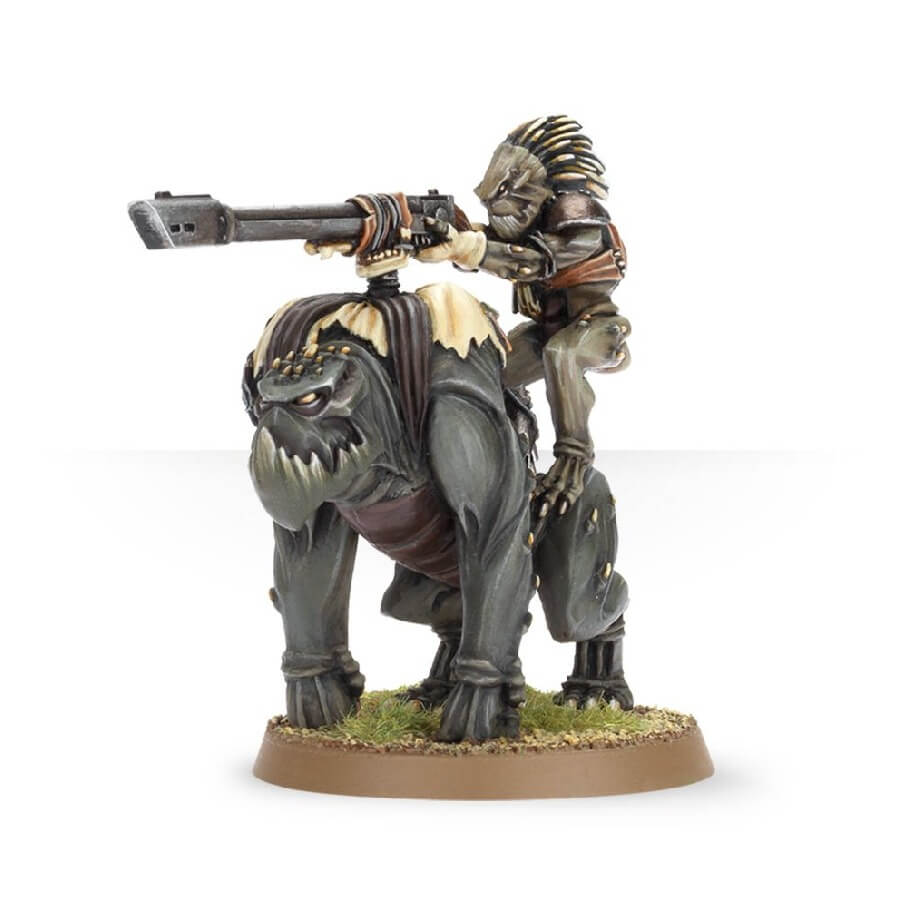
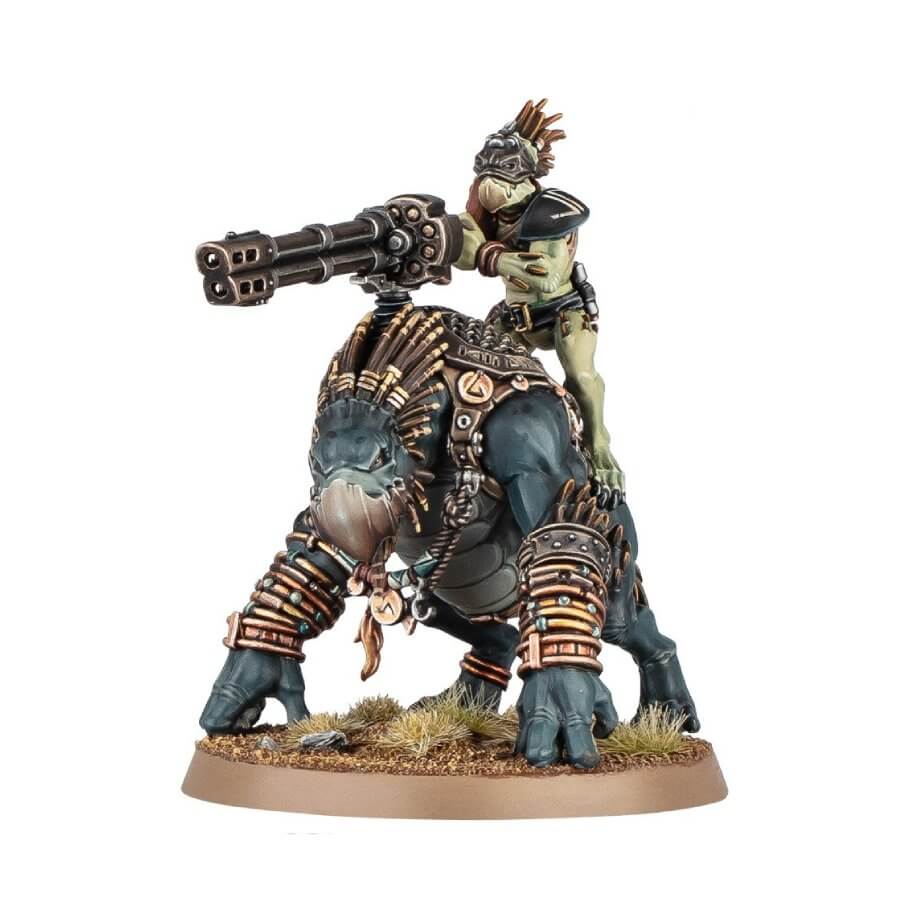
How to paint the Krootox Rider set
- Step 1: Base Coat for the Krootox
Begin by applying a base coat of deep green paint, like Waaagh! Flesh or Death Guard Green, to the Krootox’s skin areas. Ensure even coverage, focusing on a smooth application. - Step 2: Shading for Depth
Apply a wash such as Athonian Camoshade to the crevices and recesses of the Krootox’s skin. This technique adds depth and dimension to the model. - Step 3: Layering for Texture
Use a lighter green, like Warboss Green, to layer the raised parts of the skin. This adds texture and highlights, creating a natural appearance. - Step 4: Fine Details on the Skin
Use a fine brush to highlight details on the Krootox’s skin using a lighter green, such as Skarsnik Green. This adds character and interest. - Step 5: Armor and Accessories
Focus on the armor and accessories. Use earthy tones like Steel Legion Drab or Doombull Brown to paint these areas. - Step 6: Leather and Straps
Paint any leather parts or straps using a brown color like Dryad Bark. This adds contrast and breaks up the color scheme. - Step 7: Metallic Details
Paint metallic parts with a metallic shade like Leadbelcher. This gives a realistic metal appearance. - Step 8: Eyes and Mouth
Paint the eyes and mouth with bright colors like Yriel Yellow or Wild Rider Red. These details bring life to the model. - Step 9: Highlighting Metallics
Use a lighter metallic color, such as Runefang Steel, to highlight the edges of metallic parts. This adds depth. - Step 10: Basing (Optional)
For added realism, consider basing your miniature with textures like Stirland Mud or grass tufts.

