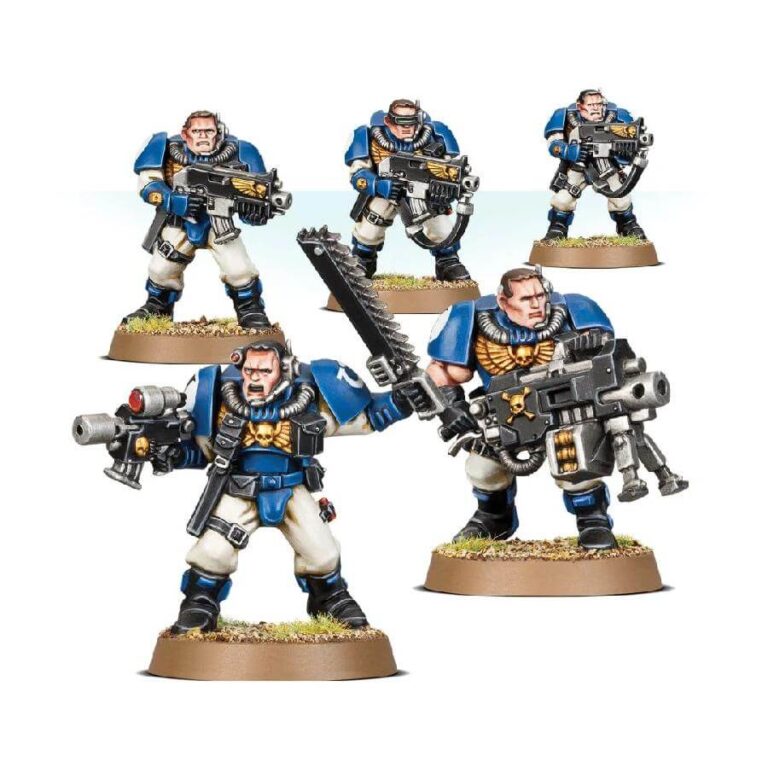
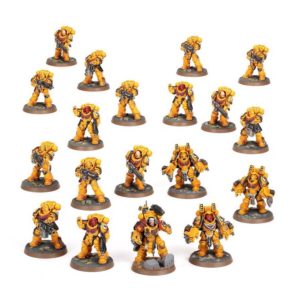
Scout Squads are the vanguard of any Space Marine force. They are skilled in reconnaissance, infiltration and sabotage and are often the first to engage the enemy. With their ability to strike hard and fast and then vanish without a trace, they are an invaluable asset to any Space Marine commander.
This 55-piece plastic kit is perfect for building a squad of 5 Space Marine Scouts. The kit includes one Sergeant with a choice of weapons and four Scouts, each armed with a bolter, bolt pistol and close combat weapon or Astartes shotgun. Alternatively, one of the Scouts can be armed with a heavy bolter instead. The kit also includes a range of heads and optional accessories, such as grenades and equipment pouches, allowing you to customise your models to your liking.
These models have been changed. This is how they will look now, more details once they release.
Scouts Datasheets
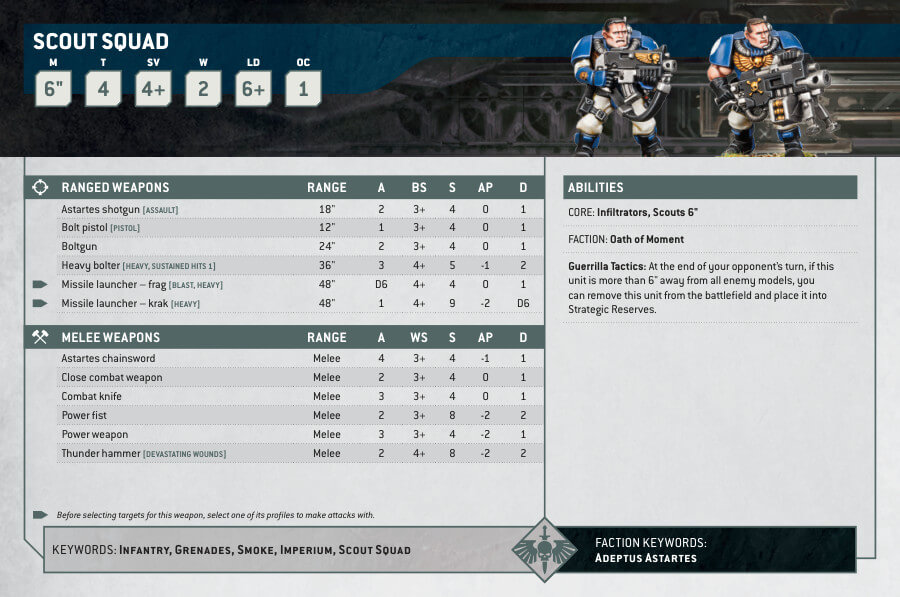
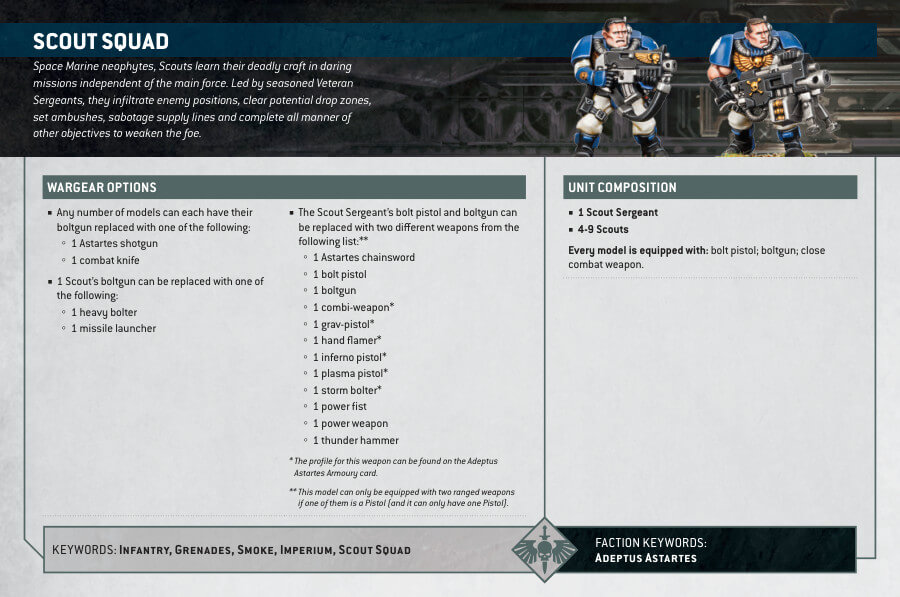
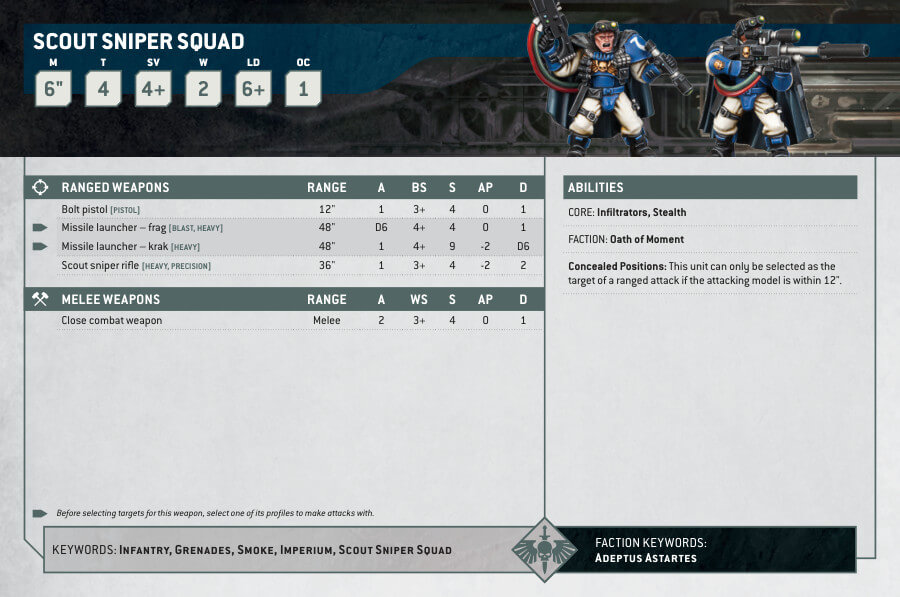
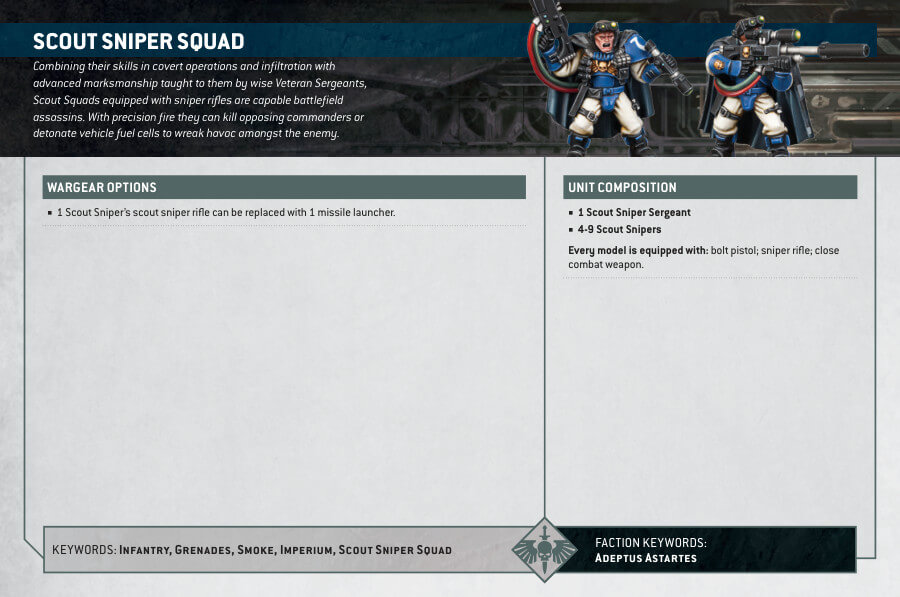
What’s in the Scouts box
- x55 piece plastic kit that creates a squad of 5 Space Marine Scouts.
- x5 25mm Citadel round bases
- x1 Ultramarines transfer sheet
How to paint the Scouts
- Step 1: Prime the miniatures
Spray or brush on a primer to create a smooth base for painting. Use a light color like White Scar or Grey Seer for easier layering. - Step 2: Basecoat the armor
Use a base color like Macragge Blue for the armor plates, Mephiston Red for any cloth or details, and Retributor Armour for any metallic areas. - Step 3: Layer the colors
Apply thinner layers of paint to gradually build up the color. For example, use Fenrisian Grey to layer the blue armor plates and Evil Sunz Scarlet to layer the red cloth areas. - Step 4: Highlight the edges
With a smaller brush, carefully highlight the edges of the armor plates and cloth using a lighter color. For example, use Ulthuan Grey to highlight the blue areas and Wild Rider Red to highlight the red cloth. - Step 5: Paint the details
Use a fine brush to paint the smaller details, such as the weapon grips, pouches, and belts. Use colors like Abaddon Black for the leather parts and Leadbelcher for the metallic details. - Step 6: Apply wash for shading
Using a wash like Nuln Oil or Agrax Earthshade, carefully apply it to the recesses and crevices of the miniatures. This will add depth and shading to the model. - Step 7: Highlight the raised areas
After the wash has dried, use a light drybrushing technique to highlight the raised areas. For example, lightly drybrush the edges of the armor plates with Fenrisian Grey to bring out the details. - Step 8: Final touches
Add any final touches such as painting the eyes, adding insignias or symbols, or applying decals if desired. Use a small brush and precise strokes for these finer details. - Step 9: Varnish for protection
Once the paint is fully dry, apply a layer of varnish to protect the miniatures. Citadel Munitorum Varnish or any matte varnish will work well.

