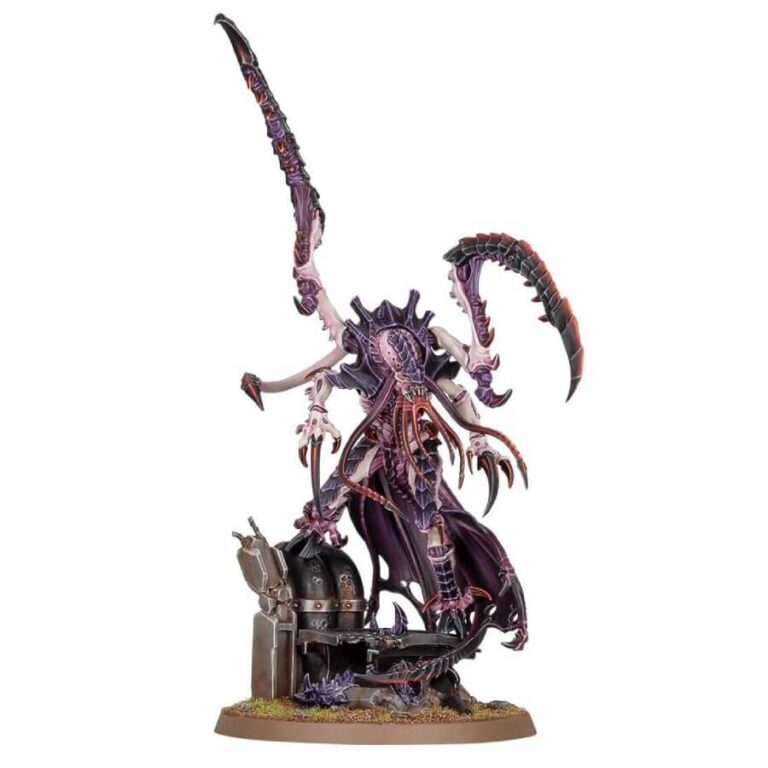
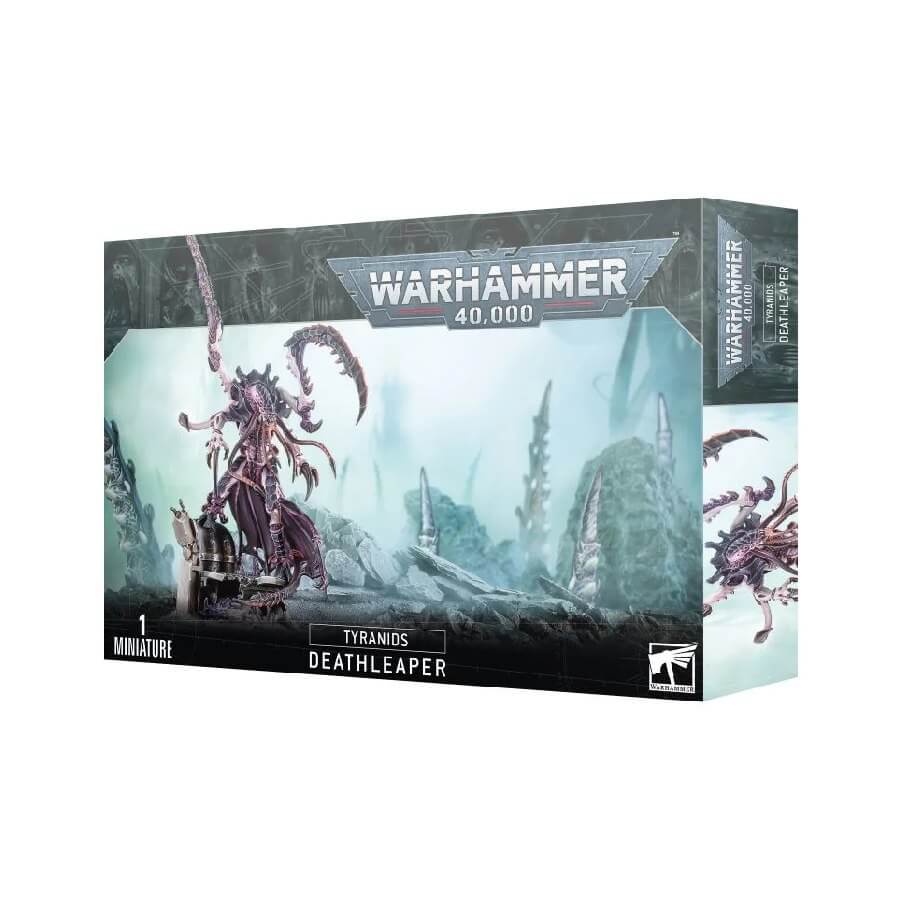
The Deathleaper represents a rare and highly evolved variant of the Lictor strain, perfectly honed to serve as a master of terror on the battlefield. This apex Lictor possesses an innate understanding of how to instill fear in both enemy forces and prey populations. It employs its formidable skills in stealth, infiltration, and assassination to sow paranoia and dread, effectively paving the way for the impending hive fleet onslaught.
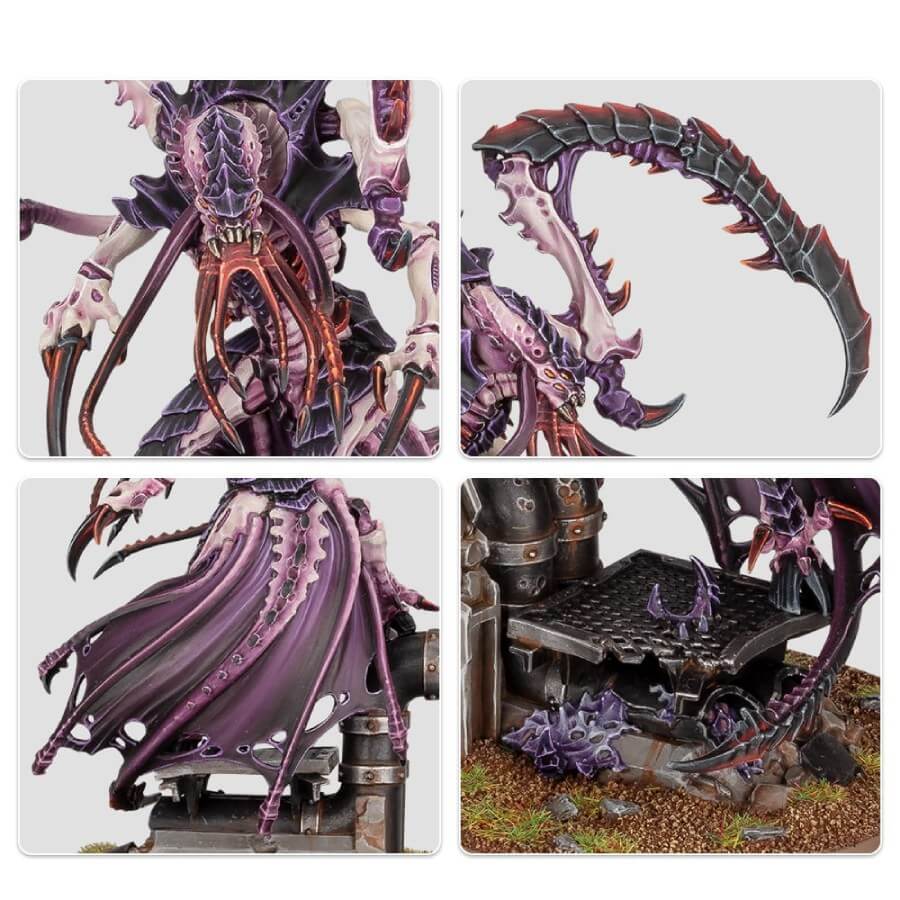
This multipart plastic kit enables you to assemble one Deathleaper, the pinnacle of Lictor evolution. This imposing creature stands dramatically above its lesser kin, perched atop the decaying remnants of a ruined structure. Deathleaper embodies all the iconic Lictor traits, but enhanced to a more impressive and menacing degree – boasting powerful talons and claws, elongated and spiked tendrils, two additional pairs of eyes, and a living cloak of membranous webbing that further obscures its sinister silhouette. For painters, this model offers an exciting challenge with its intricate alien biological details, and it serves as a striking centerpiece for stealth-oriented Tyranid armies.
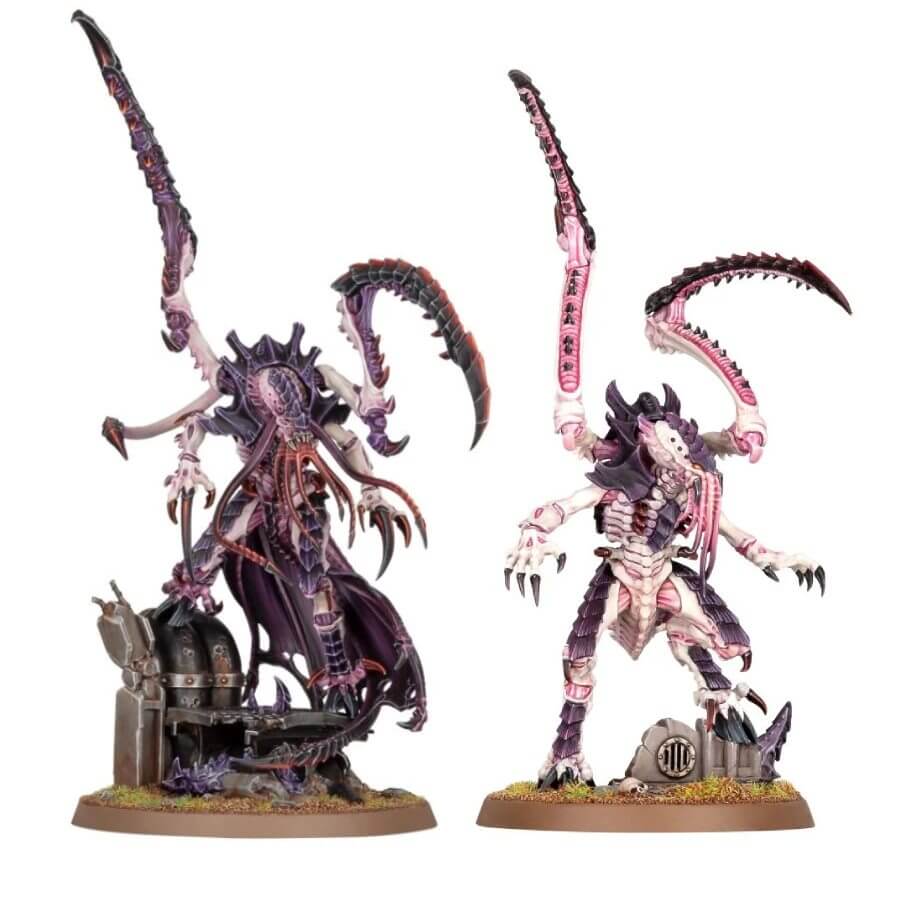
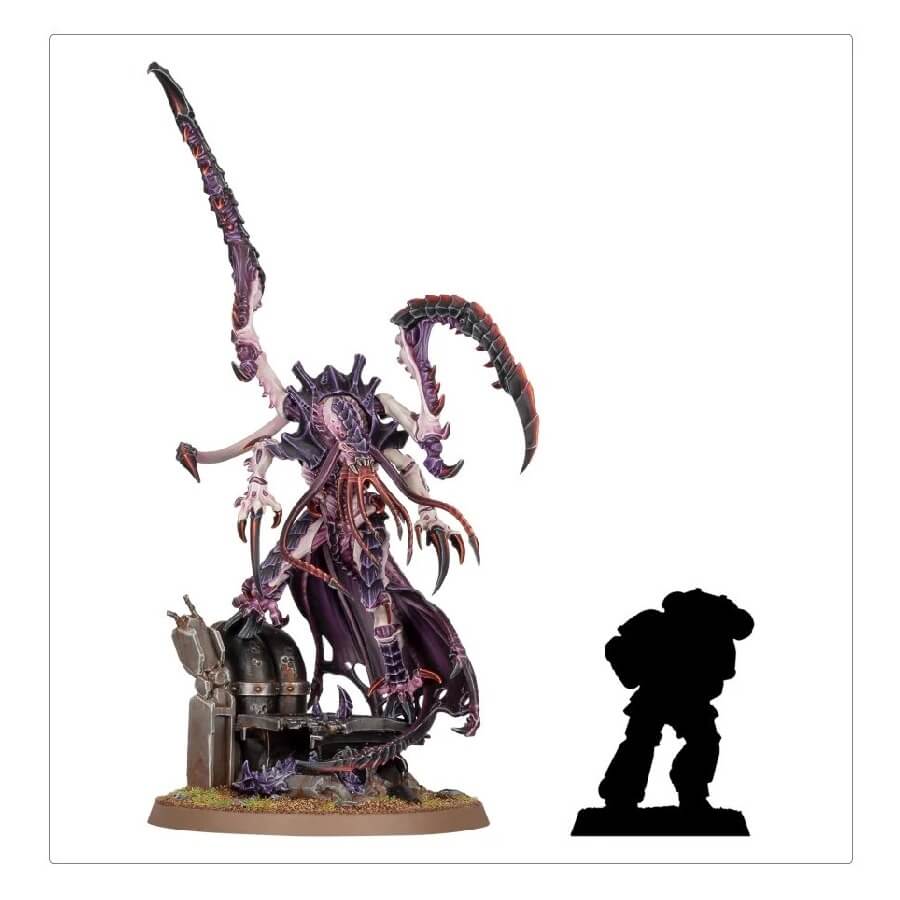
Deathleaper vs Lictor Sizes
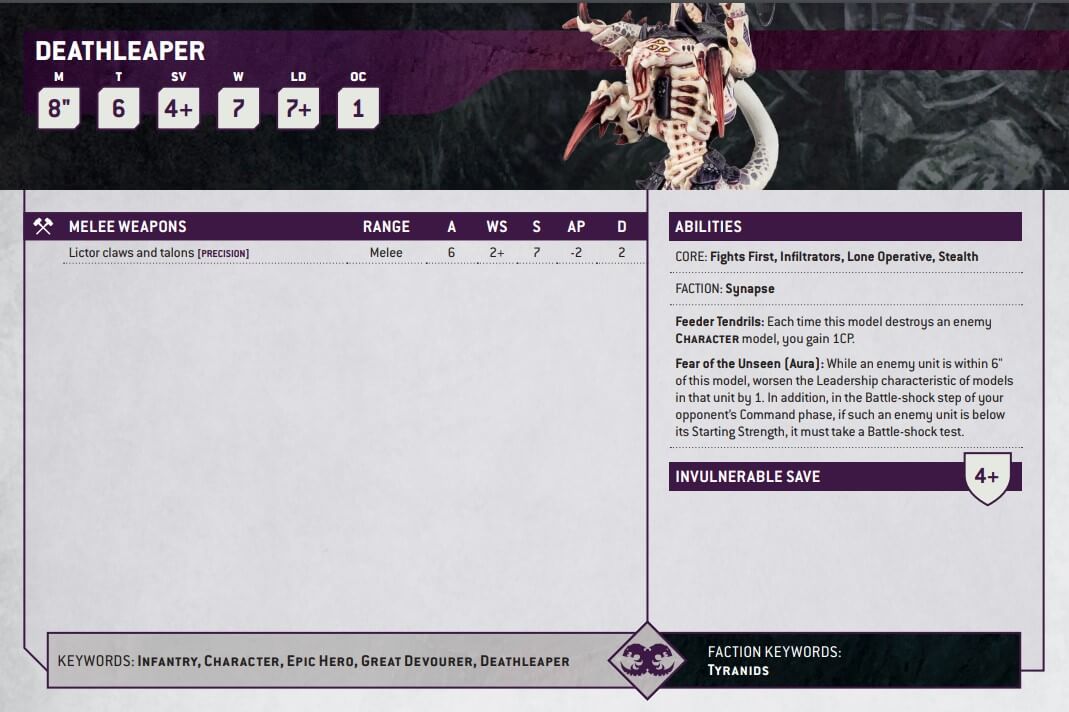
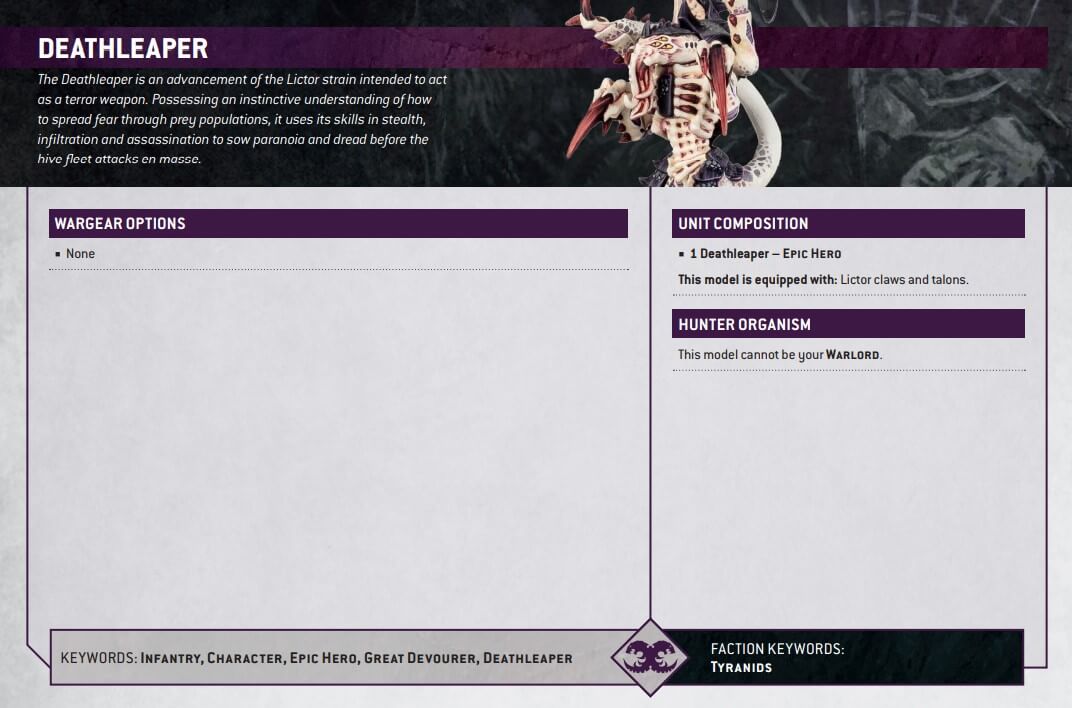
Deathleaper Datasheets
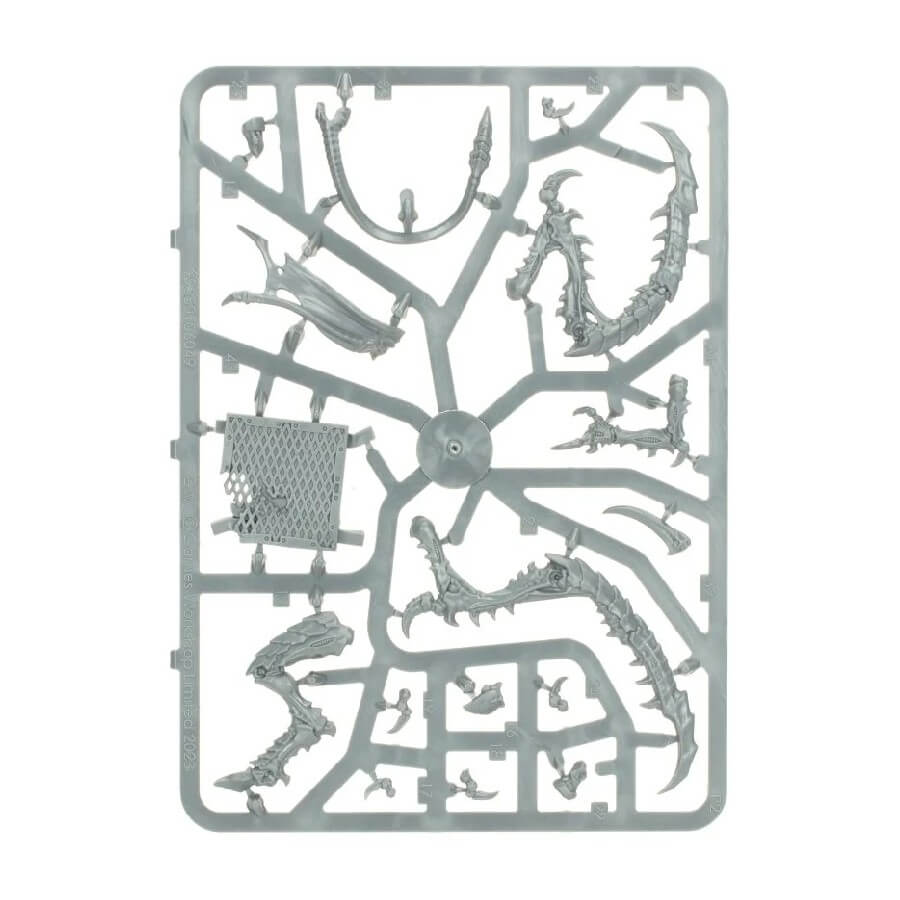
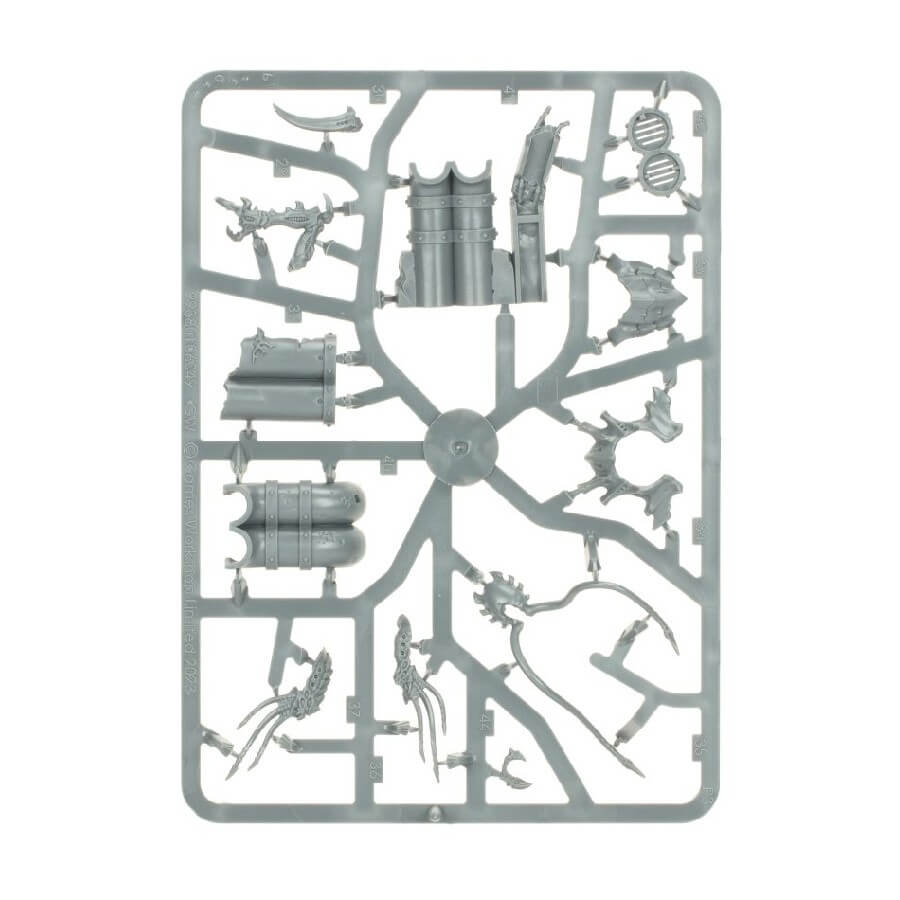
What’s in the Deathleaper box
- x44 plastic components that make 1 Deathleaper.
- x1 Citadel 60mm Round Base.
How to paint the Deathleaper set
- Step 1: Priming – Setting the Foundation
Begin by priming the Deathleaper miniature with Wraithbone spray. This crucial step provides a solid base for the subsequent layers of paint to adhere to, ensuring a smooth finish. Make sure to spray from a distance of about 8-10 inches and apply the primer evenly, covering all areas, including the intricate details and hard-to-reach spots. Allow the primer to dry completely before proceeding. - Step 2: Base Coating Chitin Armor – Eerie Purple Hues
For the chitin armor, start with Naggaroth Night as the base coat. Use a fine brush to carefully apply this paint, ensuring even coverage and preserving the intricate details. This deep purple base sets the foundation for the eerie and menacing look of the Deathleaper. - Step 3: Shading Chitin Armor – Creating Depth and Shadows
Now, let’s create depth and shadows on the chitin armor. Apply Druchii Violet for shading, focusing on the recesses and crevices of the armor. Use a controlled brush to ensure that the shade settles precisely where you want it, emphasizing the contours and adding a sinister dimension to the armor’s texture. - Step 4: Layering Chitin Armor – Achieving Vibrant Tones
Continue by layering the chitin armor. Start with Xereus Purple, applying it to the raised areas and leaving the shaded areas intact. This step brings out the details and creates a vibrant contrast. - Step 5: Base Coating Skin – Pale and Otherworldly
The Deathleaper’s skin should be painted with Rakarth Flesh as the base coat. Be meticulous in applying this base coat to cover the skin’s surface evenly while preserving the intricate details. - Step 6: Shading Skin – Emphasizing Contours
Now, let’s bring out the contours of the skin. Apply Reikland Fleshshade for shading, using a delicate touch to enhance the features and add depth to the skin tone. Ensure the shade doesn’t pool in one place. - Step 7: Layering Skin – Achieving a Pale Look
Layer on Flayed One Flesh, followed by Pallid Wych Flesh. These layers will help you create a pale and otherworldly skin tone while adding dimension and highlighting the skin’s features. - Step 8: Base Coating Details – Adding the Sinister Touch
To paint the intricate details, such as the talons and face tentacles, start with Khorne Red as the base coat. Use a fine brush to ensure precise coverage of these features. - Step 9: Shading Details – Adding Depth and Realism
Apply Agrax Earthshade for shading on the previously base-coated details. Take your time to carefully apply the shade, emphasizing the contours of the talons and face tentacles to add depth and realism. - Step 10: Layering Details – Enhancing the Details
Layer with Evil Sunz Scarlet, followed by Wild Rider Red, to make these features stand out and add vibrancy. Focus on the raised areas and edges to create highlights and bring out the details. - Step 11: Platform and Metallic Components – Dark and Metallic Contrast
Paint the platform that the Deathleaper sits on with Abaddon Black as the base coat. Layer it with Eshin Grey, followed by Dawnstone, to create a dark, contrasting platform. For the metallic components, use Leadbelcher as the base coat, shade with Nuln Oil for depth, and layer with Stormhost Silver for a metallic sheen. - Step 12: Painting the Base – Creating the Terrain
Enhance the base by using texture paints like Astrogranite Debris or Armageddon Dunes to create a realistic terrain effect. You can choose the texture paint that suits your desired base texture. Allow the texture paint to dry completely before proceeding. - Step 13: Adding Terrain Details – Grass Tufts or Rocks
For added realism, consider gluing on grass tufts or small rocks to the base. This step allows you to customize the terrain to your liking. - Step 14: Varnishing – Protecting Your Work
To protect your beautifully painted Deathleaper, apply a varnish. This will not only safeguard your miniature but also give it a finished look. Stormshield is a suitable choice for a matte finish that preserves the paintwork. Ensure the miniature is entirely dry before applying varnish.
