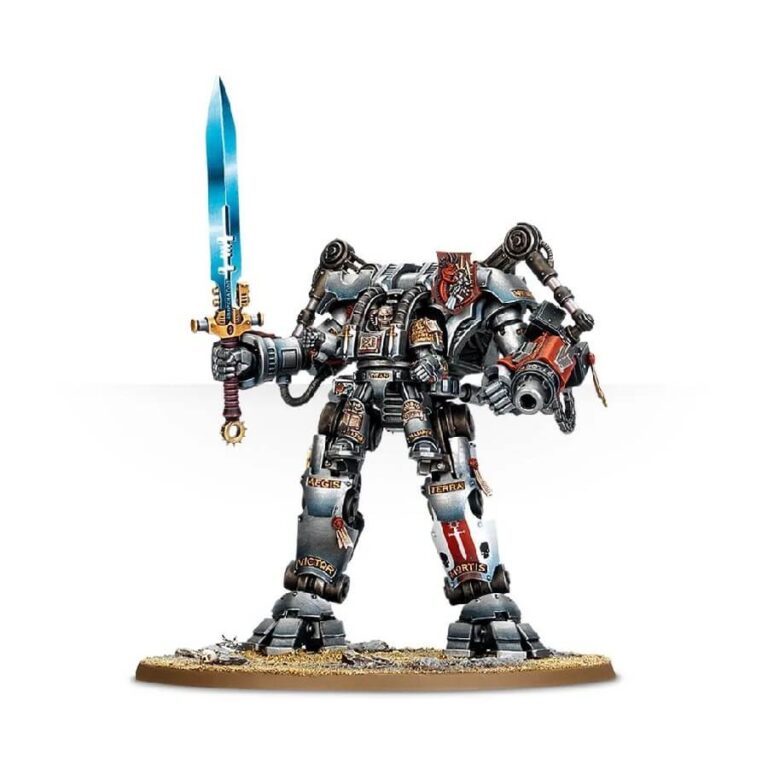
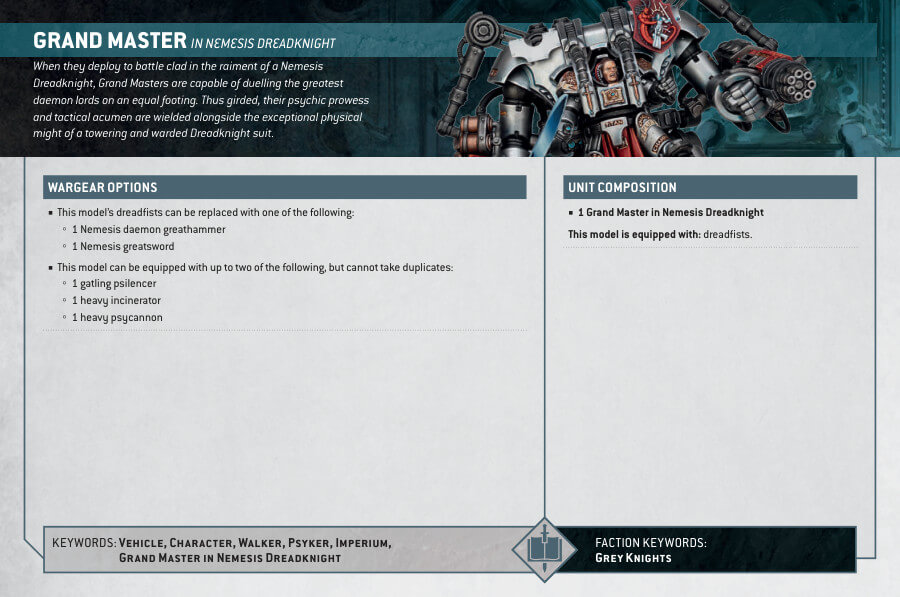
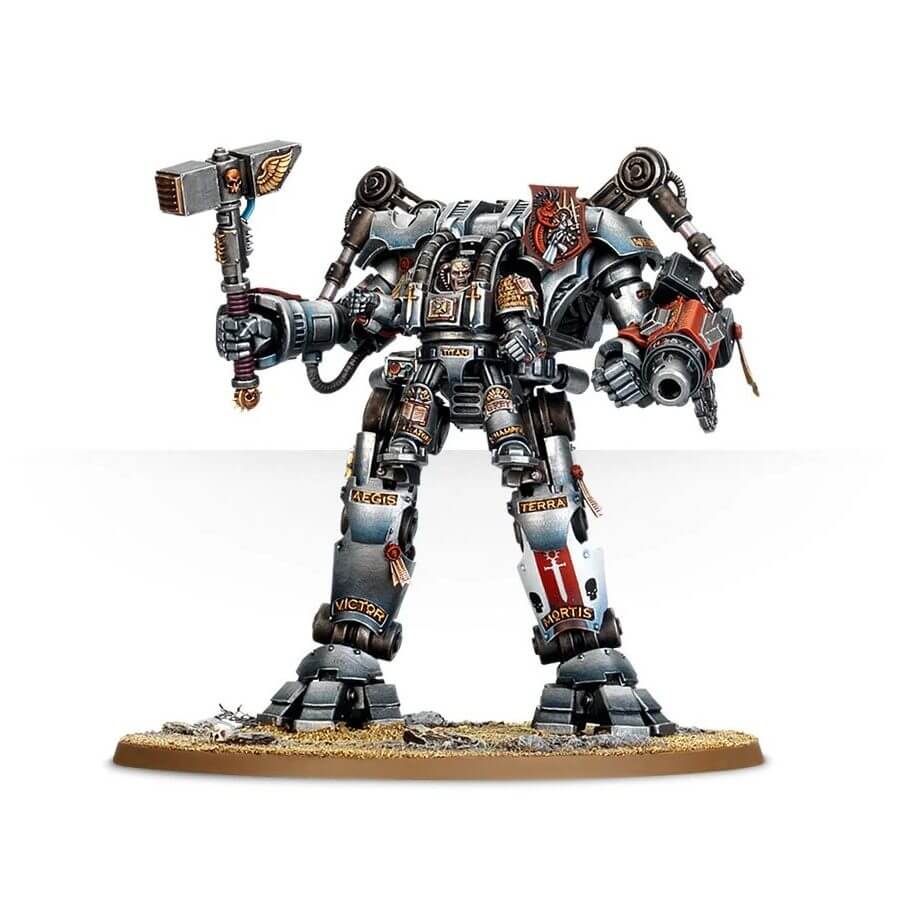
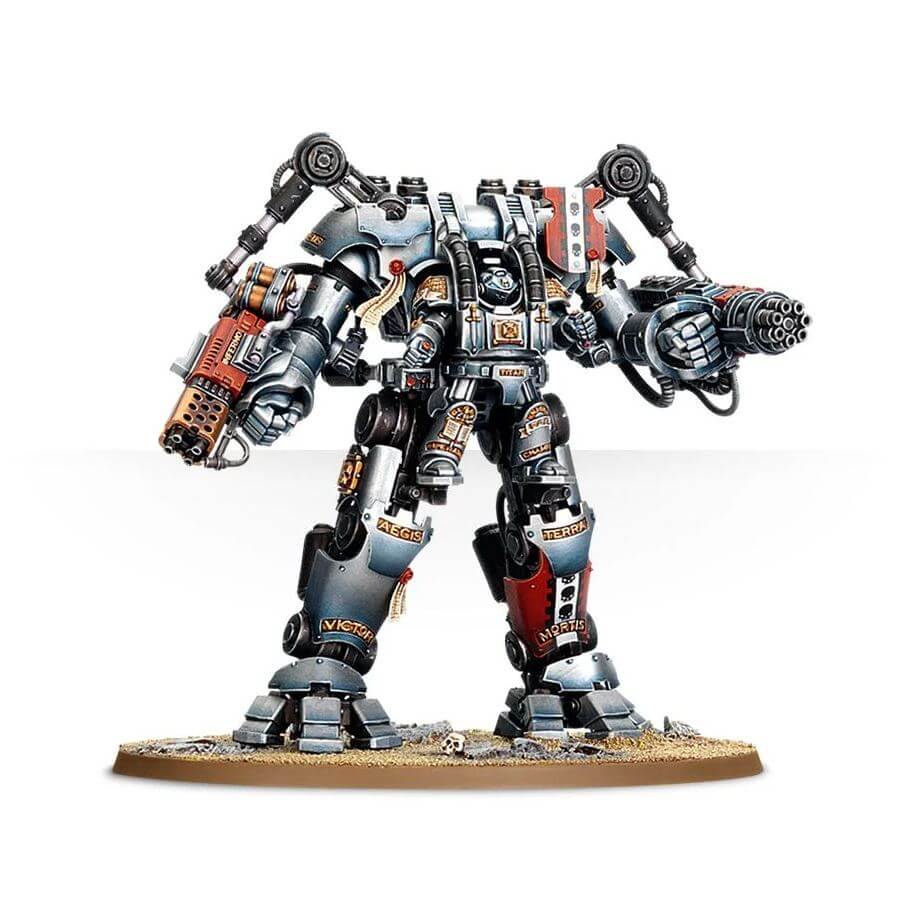
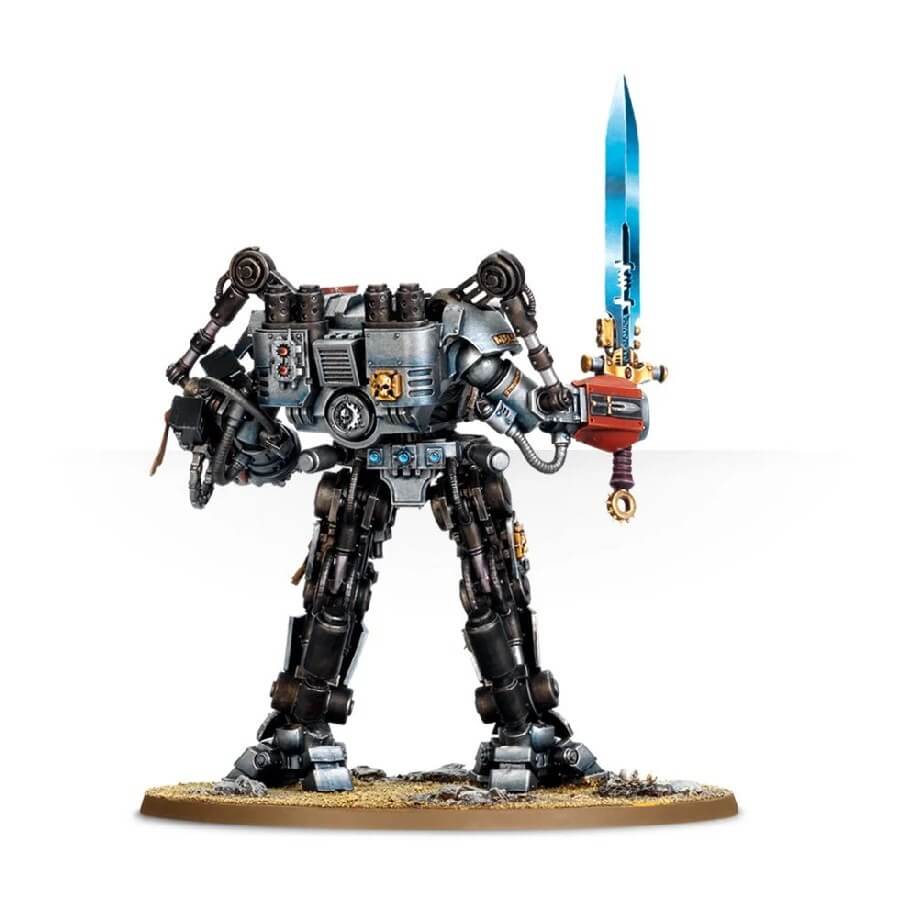
The Nemesis Dreadknight is a towering, heavily armored model designed to annihilate Greater Daemons and Daemon Princes. This unique model, resembling a Dreadnought, contains a Grey Knight strapped and wired in its center, and is adorned with intricate details such as plaques, purity seals, and sword symbols. The kit provides a range of options, including a Nemesis Daemon hammer, a Nemesis greatsword, a heavy incinerator, a gatling psilencer, and a heavy psycannon, allowing for customization of the model. With two different heads and ball-and-socket arm joints, the Dreadknight can be posed in various positions, ensuring that no two models in a collection will look the same.
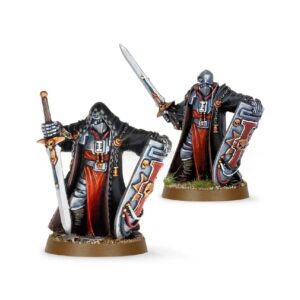
Also available in this box:
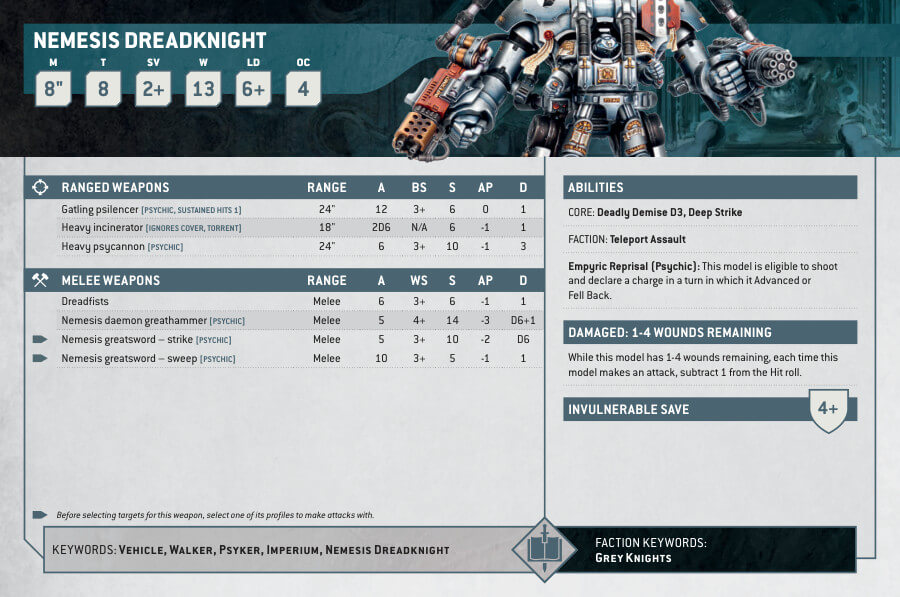
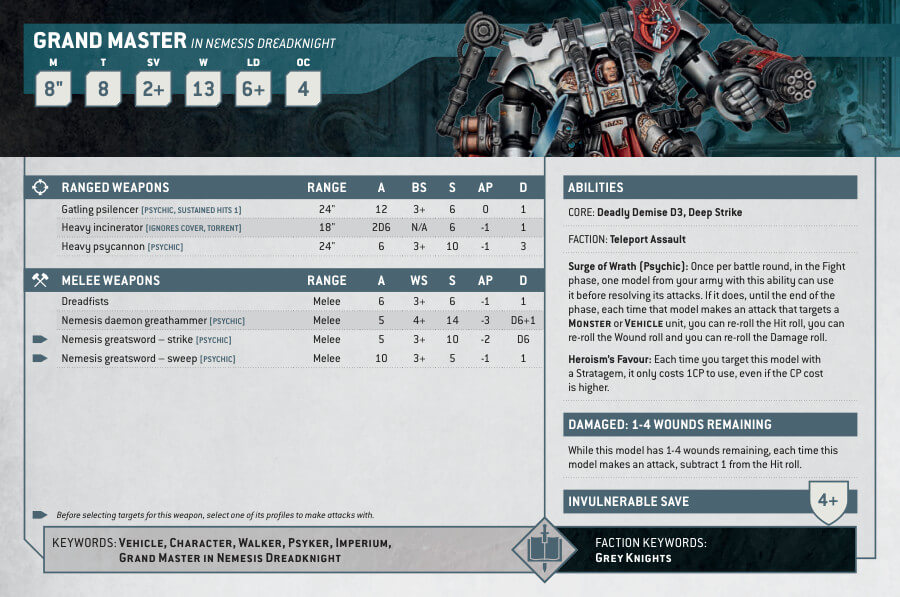
Nemesis Dreadknight Datasheets
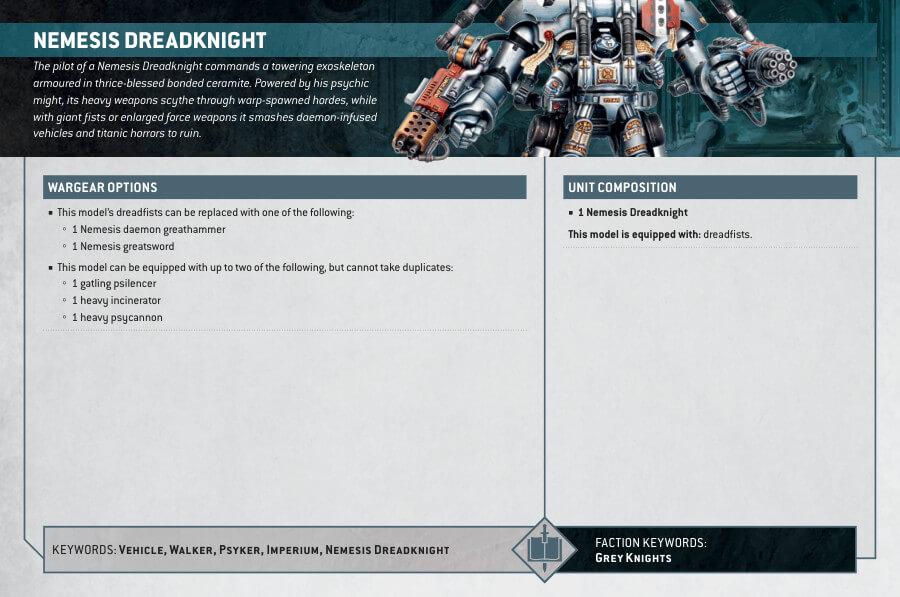
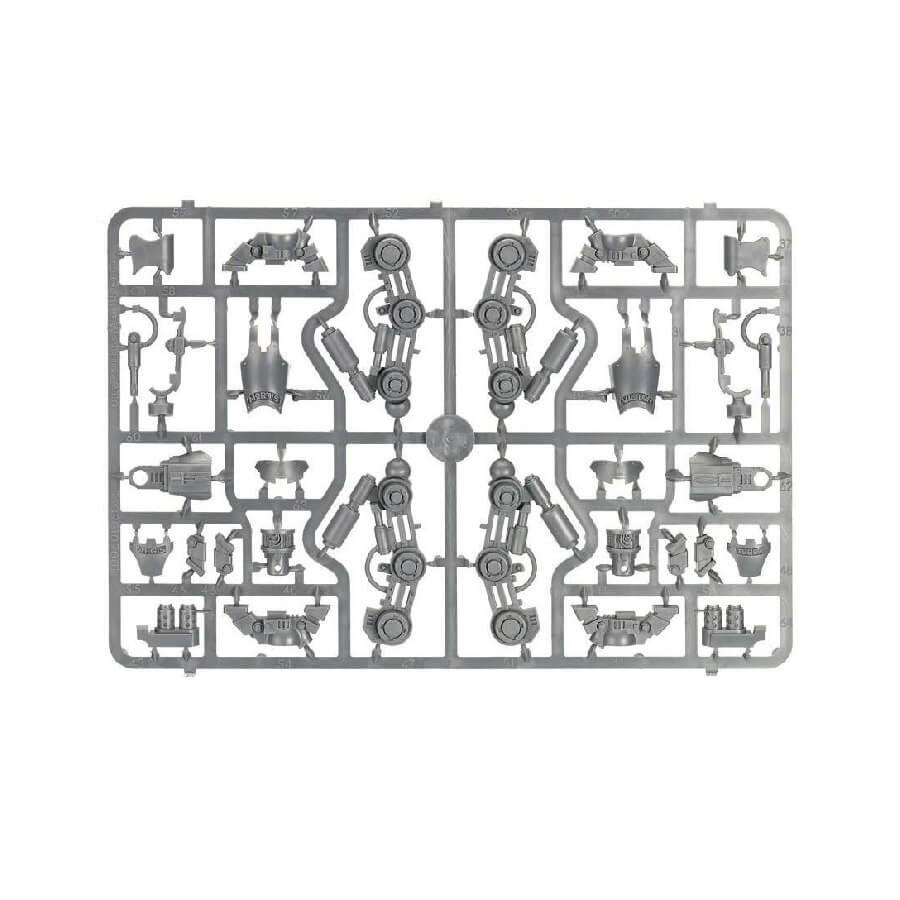
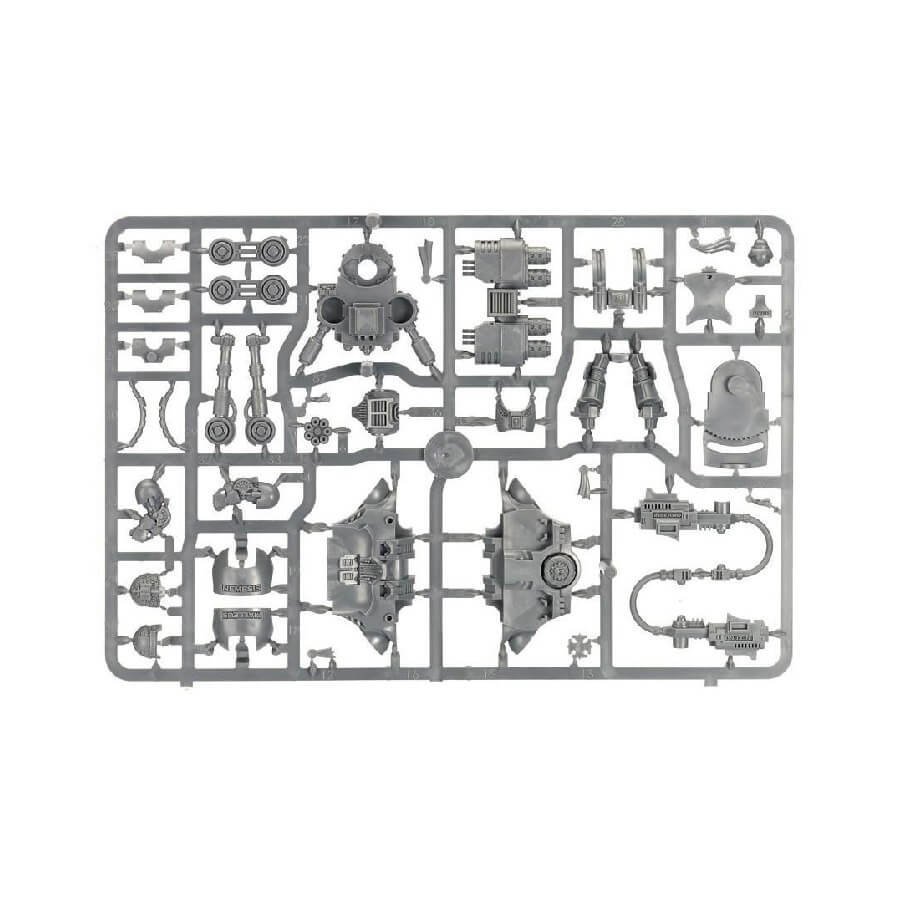
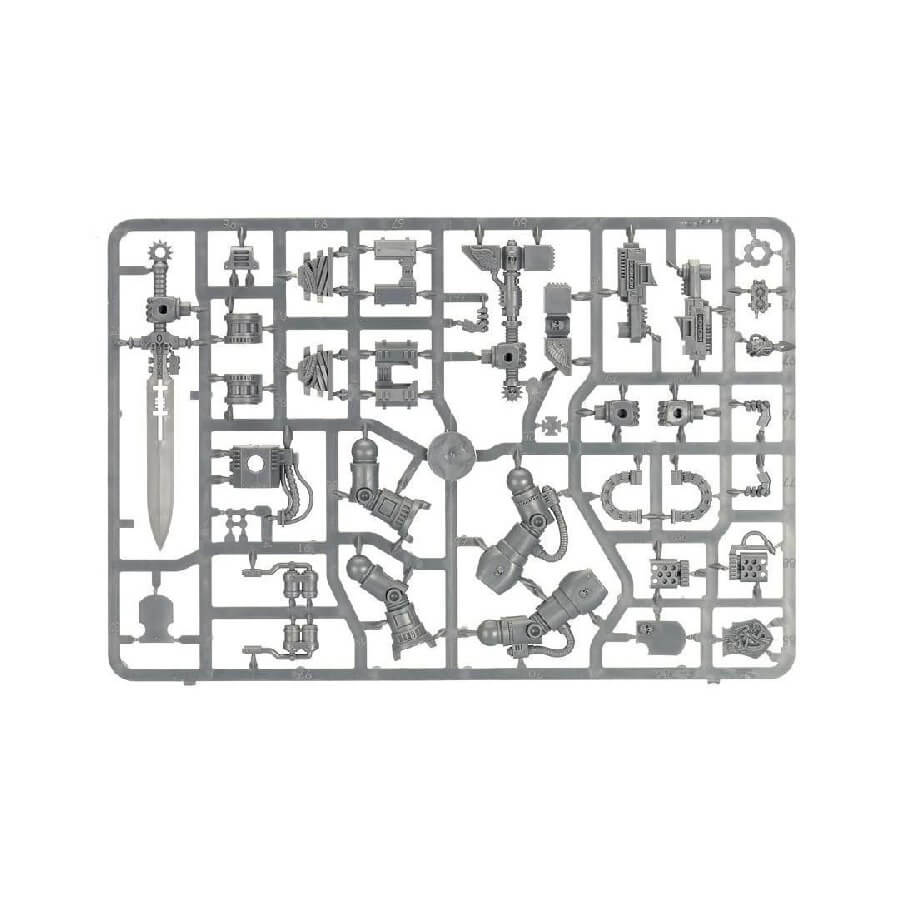
What’s in the Nemesis Dreadknight box
- x103 components you can use to build a Nemesis Dreadknight.
Included within the box are options for a Nemesis Daemon hammer, a Nemesis greatsword, a heavy incinerator, a gatling psilencer and a heavy psycannon, allowing you to personalise your model. - x1 Citadel 120 x 92mm Oval Base
How to paint the Nemesis Dreadknight
- Step 1: Priming
Begin by preparing the Nemesis Dreadknight for painting. To ensure paint adheres well, use Chaos Black spray paint as a primer. Apply this evenly across the entire model, covering both the metal and plastic components. Allow the primer to dry completely before moving on to the next steps. This is a crucial foundation for the paint layers. - Step 2: Armor Plates
For the armor plates of the Dreadknight, use Leadbelcher. Apply this paint evenly, ensuring full coverage on all the armored surfaces. Take your time to achieve a smooth and consistent coat. A solid base layer is essential for achieving the desired metallic look. - Step 3: Adding Depth
To create depth and shadow on the armor plates, apply a wash of Nuln Oil. Ensure the wash gets into the recessed areas and around details. The wash will settle naturally in these areas, emphasizing the sculpted features and adding depth to the metallic surfaces. Allow this wash to dry completely. - Step 4: Layering the Armor
Now, use Ironbreaker to layer the armor plates. Focus on the raised areas and edges, leaving the recessed areas with the Nuln Oil wash intact. This layering technique will create highlights on the armor, enhancing its appearance and giving it a more three-dimensional look. For finer highlights, apply Stormhost Silver with precision. - Step 5: Gold Details
Turn your attention to the gold details on the armor, such as the chest eagle, shoulder pads, and weapon handles. Paint these parts with Retributor Armour. Ensure that you achieve good coverage, as gold paint can be somewhat translucent. Allow it to dry completely. - Step 6: Adding Depth to Gold
Apply a wash of Reikland Fleshshade over the gold parts. This wash will settle into the recesses and details of the gold, creating depth and shadows. It’s important to be precise with this wash to preserve the luster of the gold. Allow it to dry thoroughly. - Step 7: Gold Highlights
To make the gold details shine, highlight the edges and corners of these parts with thin lines of Liberator Gold. This step adds a brilliant sheen to the gold elements, making them stand out beautifully. - Step 8: Parchment Parts
Use Screaming Skull to paint the parchment parts of the armor, including the purity seals and scrolls. Ensure complete coverage while maintaining the details of these features. - Step 9: Adding Depth to Parchment
Apply Agrax Earthshade wash over the parchment parts. This wash will seep into the folds and recesses of the parchment, creating depth and adding an aged appearance. Let it dry thoroughly. - Step 10: Parchment Highlights
Highlight the edges and corners of the parchment parts with thin lines of Ushabti Bone. This step gives the parchment a worn and weathered look, adding to the overall realism of the model. - Step 11: Sword
Turn your attention to the sword of the Dreadknight. Use Kantor Blue to paint the blade evenly. Ensure the blue is solid and covers the entire blade. - Step 12: Adding Depth to the Sword
Apply Drakenhof Nightshade wash over the sword. Focus on the central part of the blade to create depth and shadows. This step will give the sword a more realistic appearance. Allow it to dry completely. - Step 13: Sword Highlights
Highlight the edges and corners of the blue parts of the sword blade with thin lines of Alaitoc Blue. This addition adds a glowing and radiant effect to the blade, making it look more dynamic. - Step 14: Fine Details
Use White Scar to paint any fine details, such as the eyes, runes, or lightning effects on the force weapons. Take your time with these intricate details, as they can be eye-catching focal points on the model. - Step 15: Base Texture
Now, let’s give the model’s base some depth and character. Use a texture paint like Agrellan Earth or Stirland Mud to create a realistic base texture. Apply the texture paint to the base, spreading it evenly and adding any additional details like rocks or debris as desired. Allow it to dry completely. - Step 16: Varnishing (Munitorum)
To protect your model and give it a finished look, apply a matte varnish, preferably Munitorum Varnish, evenly over the entire miniature. This varnish will seal and protect the paintwork, preserving its quality for years to come. Allow it to dry thoroughly before displaying or using your Nemesis Dreadknight in battles on the tabletop.
