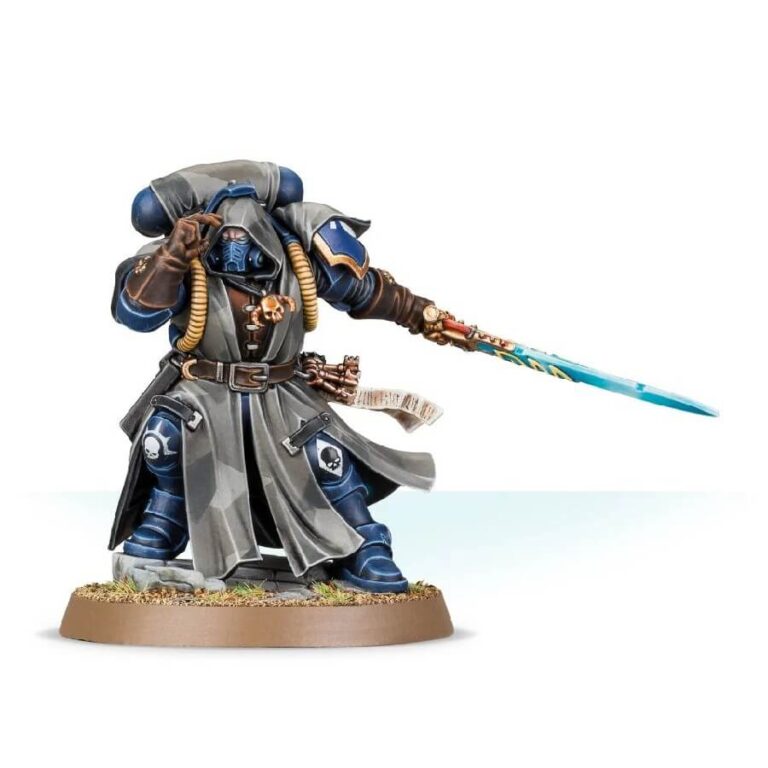
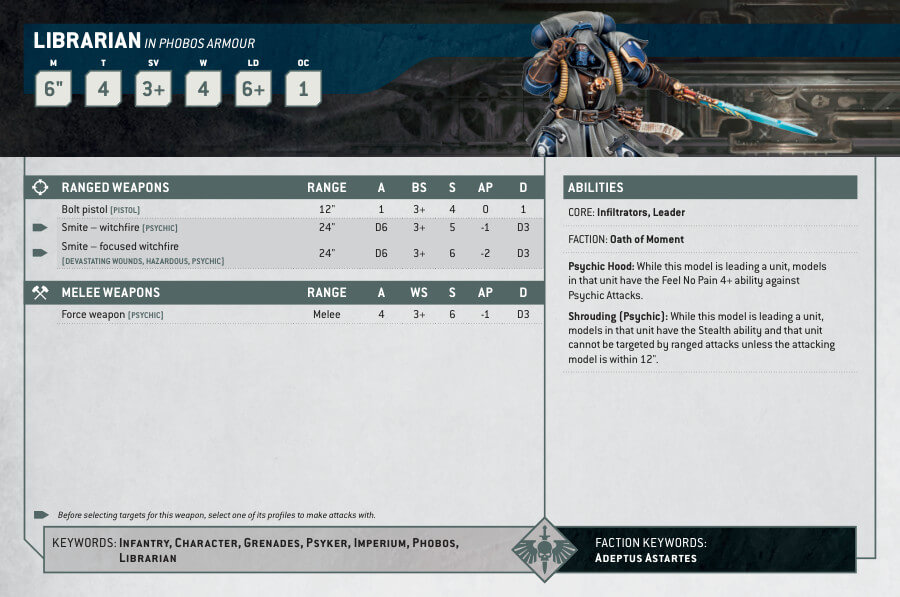
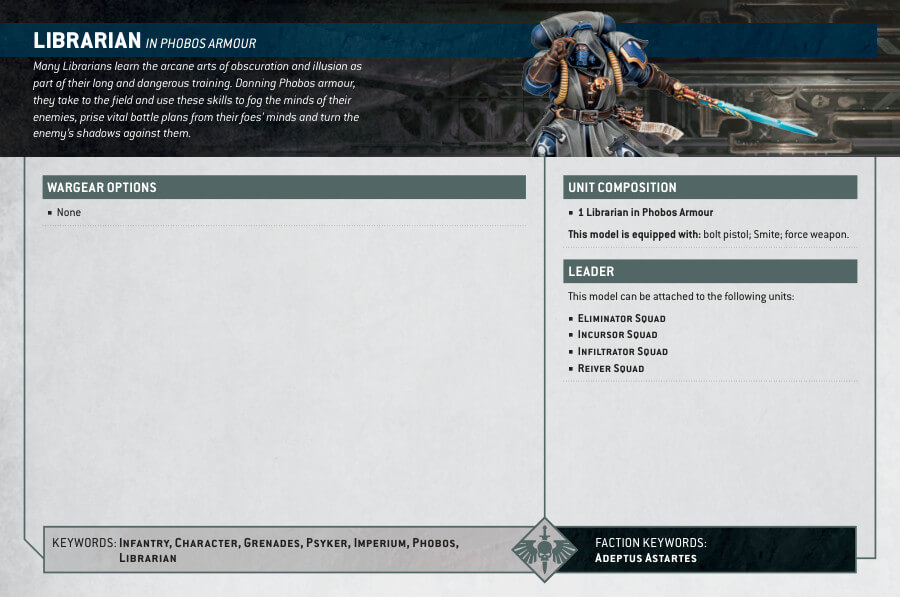
The Primaris Librarian in Phobos Armour is a formidable addition to any Adeptus Astartes Faction, including the Blood Angels, Dark Angels, and Space Wolves. This HQ choice is equipped with a psychic hood that increases his chances of blocking enemy psykers and can manifest powers from the Obscuration discipline. With eyes blazing and fists crackling with roiling energies, this Librarian is a powerful psyker who can hurl blasts of warp-force or twist time to crush his foes. He also wears a camo cloak to enhance cover and is armed with a force sword. As a Vanguard unit, the Primaris Librarian in Phobos Armour is a capable warrior, able to defend Humanity using his potent mutation as a force to protect his fellow Space Marines.
Primaris Librarian in Phobos Armour Datasheets
What’s in the Primaris Librarian in Phobos Armour box
- x10 components that make The Primaris Librarian in Phobos Armour.
- x1 Citadel 40mm Round Base.
How to paint the Primaris Librarian in Phobos Armour
- Step 1: Priming
Your journey begins with priming the miniature. Apply a smooth coat of Chaos Black primer, ensuring that every nook and cranny is covered. This initial step lays the groundwork for your painting adventure, allowing subsequent layers to adhere effectively. - Step 2: Painting the Armor
For the armor sections, grab your Macragge Blue. This vibrant blue will serve as your base coat. Apply it meticulously, ensuring complete coverage. This is the canvas upon which your Librarian’s armor will come to life. - Step 3: Layering for Depth
Now, let’s add depth to that armor. Use Fenrisian Grey, focusing on raised areas and edges. Leave the Macragge Blue showing in the recesses. This technique brings out the three-dimensional aspects of the armor, making it more visually striking. - Step 4: Shading
Time to shade. Nuln Oil is your go-to here. Apply it carefully to the armor, especially in areas where shadows naturally occur, like crevices and edges. This adds a touch of realism, making your Librarian look battle-hardened. - Step 5: Clothing
Switch your attention to the Librarian’s clothing, which should be painted in Administratum Grey. Ensure that all cloth sections receive a uniform coat. This neutral color complements the vibrant armor. - Step 6: Belts, Gloves, and Pouches
Mournfang Brown is the choice for belts, gloves, and pouches. These earthy tones provide a pleasant contrast to the overall color scheme, making these details stand out. - Step 7: Gold Details
These deserve the royal treatment with Retributor Armour. This opulent gold adds an elegant touch to your Librarian, making the model truly shine. - Step 8: Sword
Now, let’s work on the sword. Give it an enchanting appearance with Thousand Sons Blue. This vivid blue hue adds an otherworldly quality to the weapon, making it look like it holds ancient secrets. - Step 9: Parchments
For the parchments, use Screaming Skull. This off-white shade creates a weathered and aged effect, perfect for these ancient texts and scrolls. - Step 10: Purity Seals
Apply Mephiston Red to the purity seals. This deep crimson hue creates a striking contrast against the predominantly blue and grey palette of your Librarian. - Step 11: Adding Realism with Texture
Now, let’s bring the base to life. Incorporate two different texture paints, like Martian Ironearth and Agrellan Badland, to create a realistic terrain-like effect. This adds depth and immersion to the model’s base. - Step 12: Varnishing
To safeguard your painstakingly crafted masterpiece and give it a polished finish, use Stormshield varnish. This protective layer not only shields your model but also reduces any unwanted shine from the paints, ensuring a consistent and professional appearance.

