Unleash the Might of the Cerastus Knight Lancer!
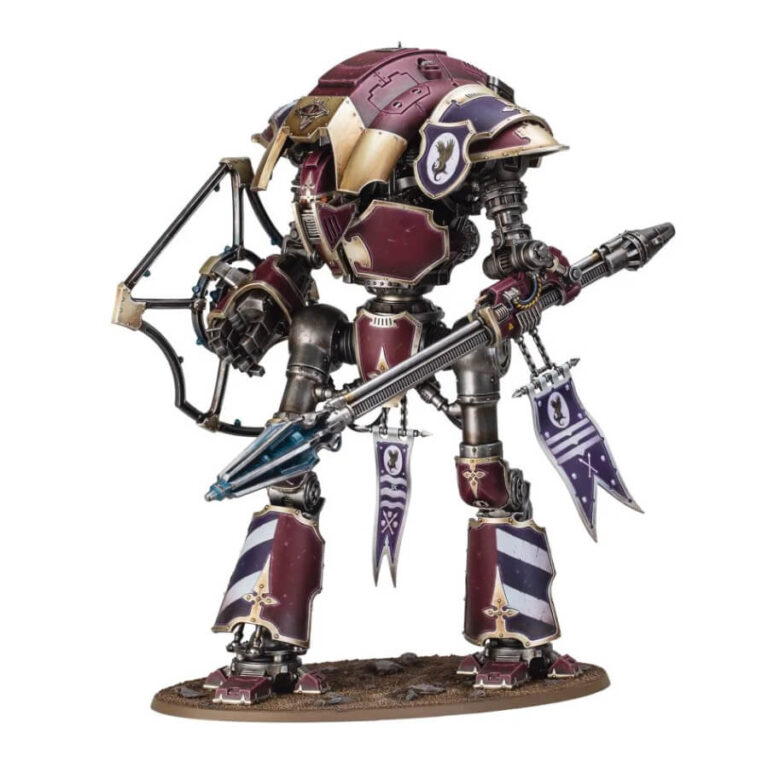
This multipart plastic kit offers you the chance to assemble your own Cerastus Knight Lancer, an agile and aggressive Knight specially equipped for close combat. Towering even above its Questoris-class cousins, the Knight Lancer strides effortlessly across the battlefield.
Its ion gauntlet shield deflects incoming attacks as it races forward, firing crackling bolts from its colossal arm-mounted shock lance, before delivering devastating impaling strikes upon the mightiest adversaries.
With meticulous attention to detail, this model allows for a high level of customization. Articulated joints in its ankles, knees, hips, head, arms, waist, and even individual fingers, provide limitless pose options to create your own dynamic display.
n-game adjustability is made possible with glueless assembly options for the head and arms, allowing you to reposition them mid-game for tactical advantage.
The kit also offers various cosmetic options, including two variant designs for kneepads, greaves, and pauldrons, four hull-mounted icons representing different allegiances, an armorial shield, and three distinctive pennants.
For an extra touch of realism, you can even construct the Knight with an open hatch, revealing the intrepid pilot seated within.
Ceratus Knight Lancer Datasheets
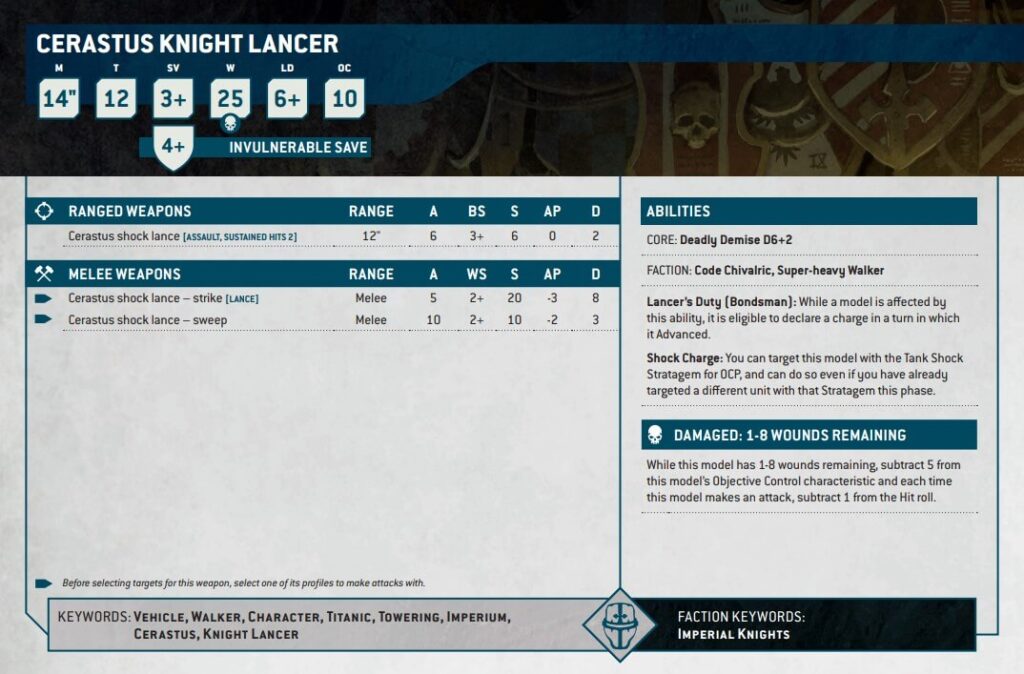
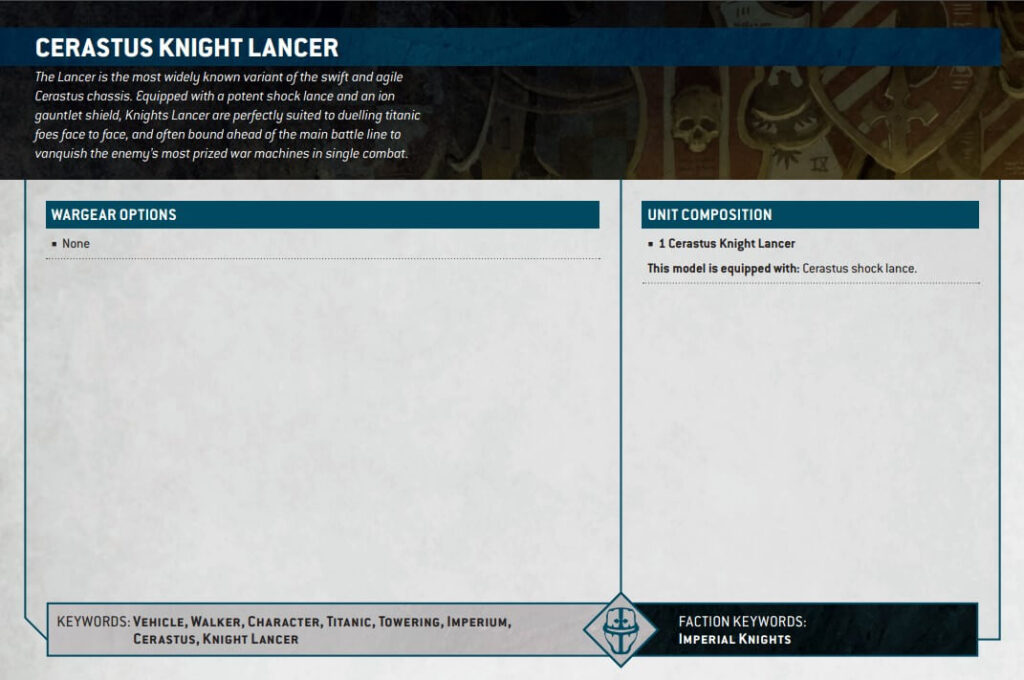
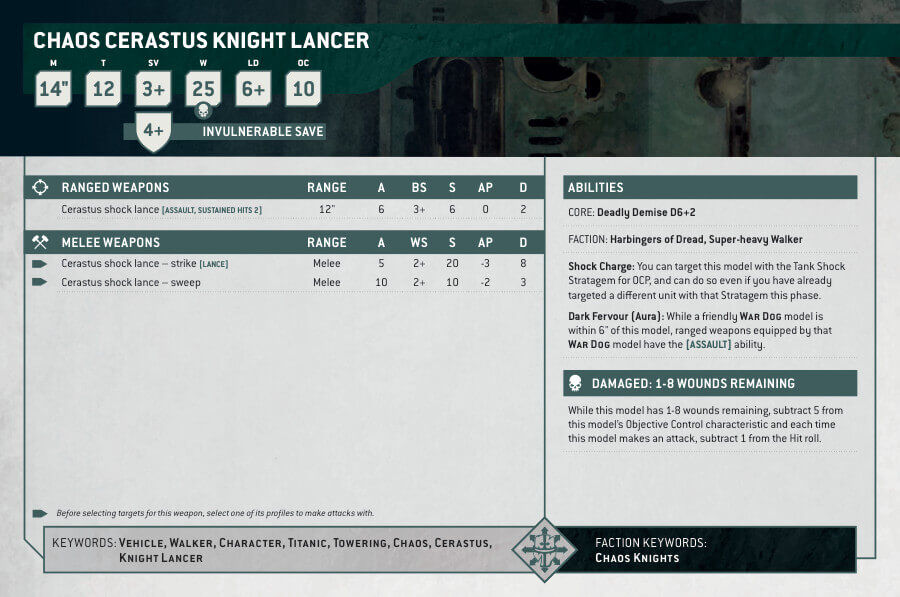
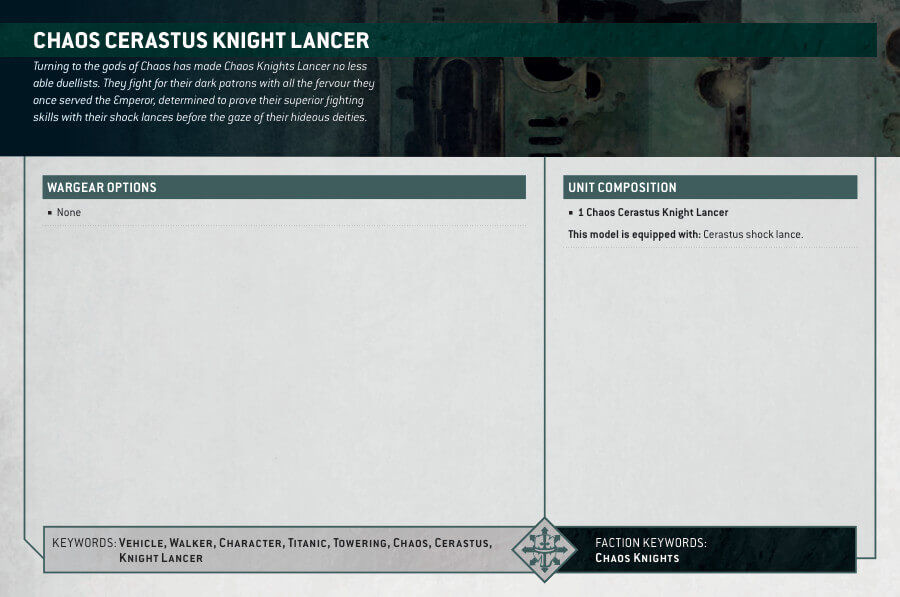
What’s in the Ceratus Knight Lancer box
- x208 plastic components that make one Ceratus Knight Lancer, a towering model that can lead your Imperium Armies or Chaos forces.
- x1 Citadel 170x109mm Oval Base.
- x1 Age of Darkness Cerastus Transfer Knight Sheet, containing 517 optional markings and icons for the Knight Households of the Horus Heresy.
How to paint the Ceratus Knight Lancer Set
- Step 1: Base Coat the Main Body Panels
Start by applying a solid base coat of red paint, such as Mephiston Red or Khorne Red, to the main body panels of the Cerastus Knight Lancer. Ensure even coverage for a smooth finish. - Step 2: Shade the Red Panels
Add depth and definition to the red panels using a shade like Nuln Oil or Agrax Earthshade. Apply the shade to the recessed areas of the armor, creating realistic shadows. - Step 3: Layer the Red Panels
Highlight the red panels with a slightly lighter red color, such as Evil Sunz Scarlet or Wazdakka Red. Focus on the raised areas to bring out the Knight’s details and add dimension. - Step 4: Paint the Metallic Areas
Use metallic colors like Leadbelcher or Ironbreaker to paint the Knight’s legs, intersections, ion gauntlet, and lance. The metallic sheen will give the model an impressive appearance. - Step 5: Add Purple Details
Enhance the model’s regal charm with purple details using Genestealer Purple or Naggaroth Night. Apply these accents to specific areas, like iconography and decorations, to exude an air of nobility. - Step 6: Brass Details
Emphasize the Knight’s elegance with brass details painted in Balthasar Gold or Brass Scorpion. Focus on insignias and intricate embellishments for a luxurious touch. - Step 7: Additional Layering and Highlights
For added realism, use lighter shades of the base colors, such as Wild Rider Red or Runefang Steel, to highlight edges and metallic parts. These touches will make the Knight look dynamic and lifelike. - Step 8: Weathering Effects (Optional)
For a battle-hardened appearance, incorporate weathering effects using technical paints. Try Ryza Rust and Typhus Corrosion to create chips, scratches, and weathered patches on the armor. - Step 9: Varnish the Model
Protect your hard work with a glossy varnish like Ardcoat or a matte appearance with Stormshield. Varnish ensures your model remains stunning for years to come. - Step 10: Paint the Base with Technical Paints
For a muddy and rocky terrain, use technical paints like Stirland Mud and Astrogranite to create a realistic base. Apply these textures to mimic the rough and rugged ground that the Knight is standing on.

