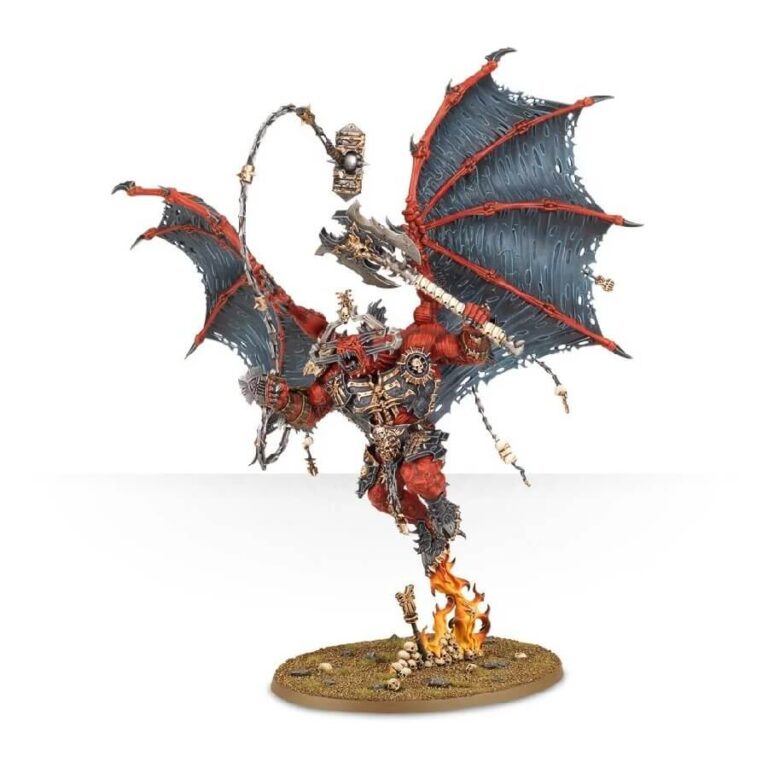
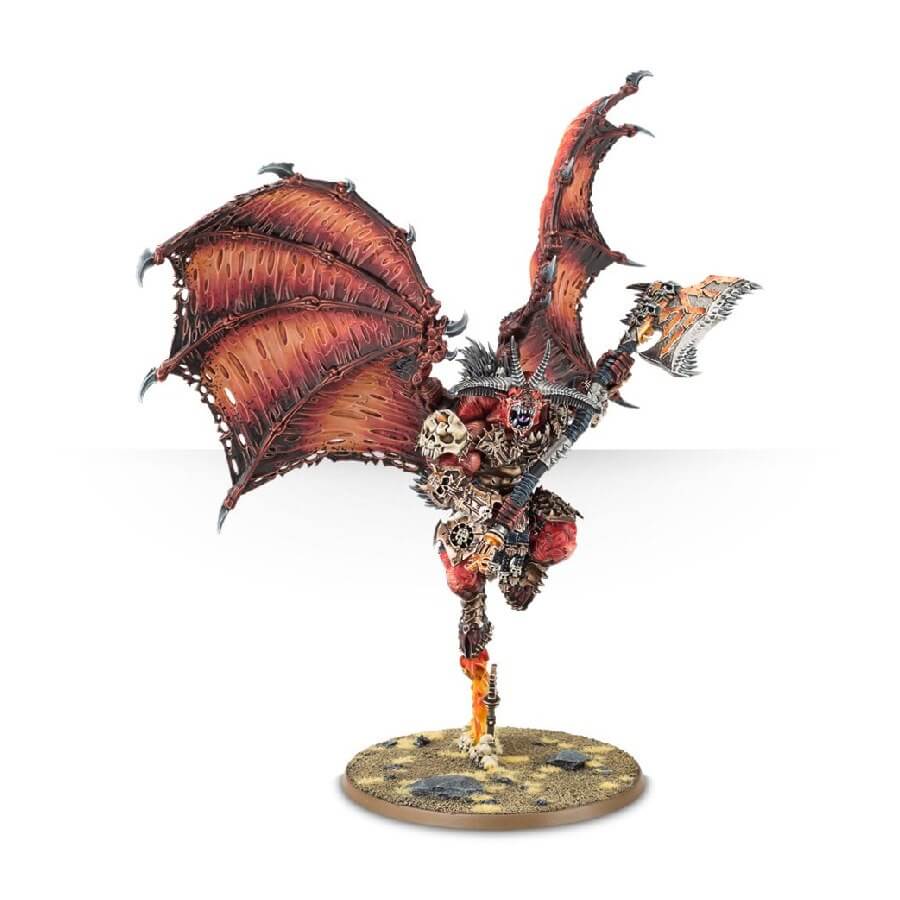
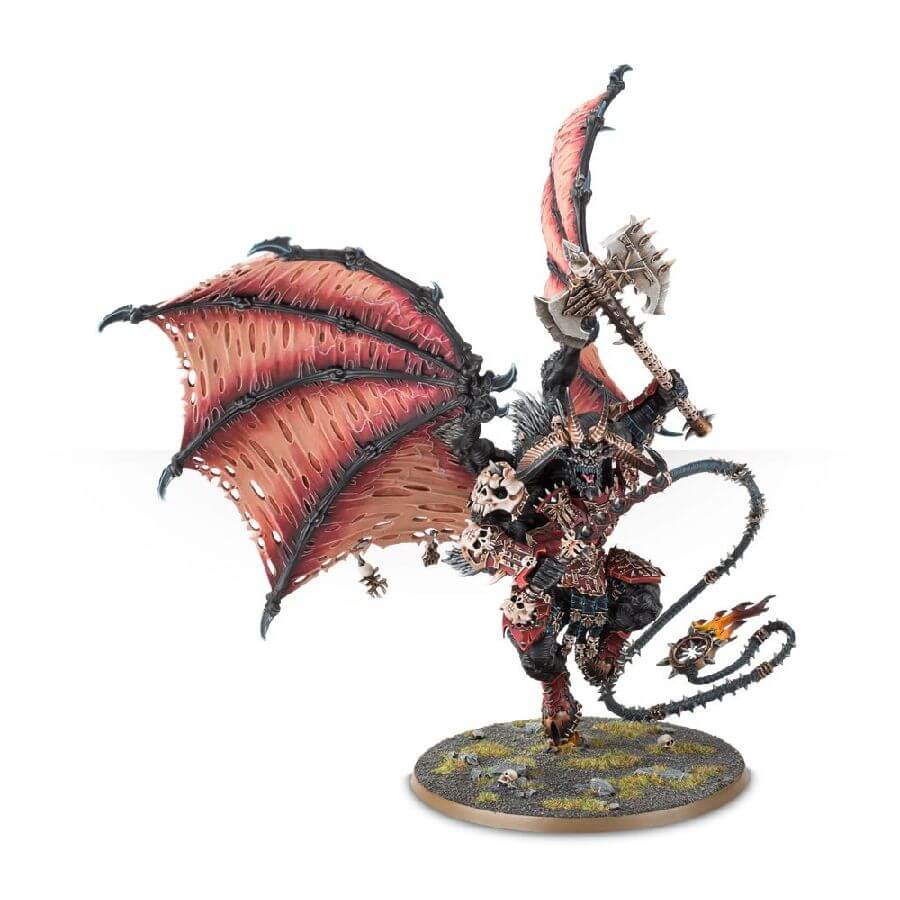
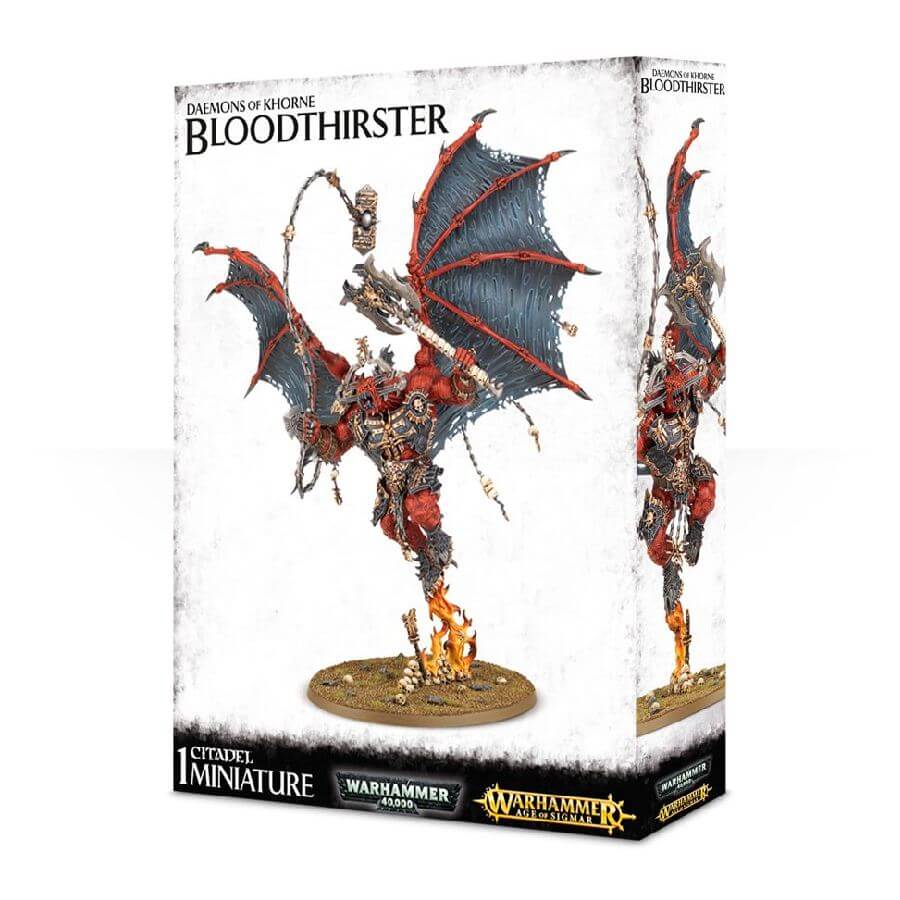
This incredible multi-part plastic kit grants you the power to bring to life one of three distinct types of Bloodthirsters: the Wrath of Khorne, the Bloodthirster of Insensate Rage or the Bloodthirster of Unfettered Fury.
The Wrath of Khorne Bloodthirster wields the fearsome wrathaxe, a double-headed axe with two equally deadly blades, accompanied by a bloodflail. Its imposing head perfectly captures the iconic hound-like face of the classic Bloodthirster, adorned with the emblem of Khorne.
Enter the Bloodthirster of Insensate Rage, armed with a colossal double-handed axe. This beast features a menacing fanged maw with a forked tongue, and atop its head sit four imposing horns that exude raw power.
Alternatively, embrace the might of the Bloodthirster of Unfettered Fury, equipped with a double-headed axe boasting two distinct blade sizes and a long, formidable whip. Its head, among the three, is the most macabre, resembling a terrifying skull.
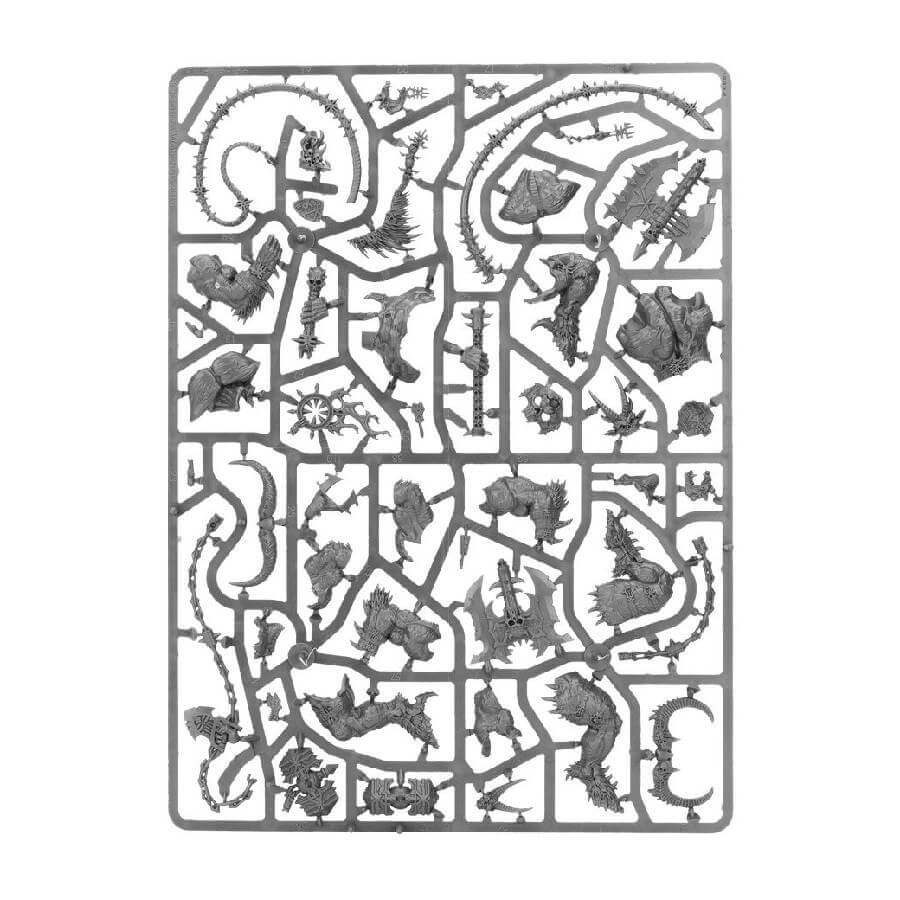
No matter which variant you choose the model is an epitome of Khorne’s iconography, its weapons, wings, and armor detailing adorned with the fearsome symbols of the Blood God. You’ll have the flexibility to opt for running or leaping legs atop fiery flames. Additionally, three different torso fronts, two belly plate designs, two loincloth choices, and the option to add armor plates to the legs and torso await your artistic vision.
In conclusion, this model is a true monstrosity in the best sense possible. Channel the unstoppable might of Khorne and unleash your creative prowess as you paint and assemble your very own Bloodthirster, ready to dominate the battlefield and strike terror into the hearts of your opponents. Embrace the fury of war and let your passion for painting and the Warhammer universe bring this awe-inspiring miniature to life!
What’s in the Daemons Of Khorne Bloodthirster box
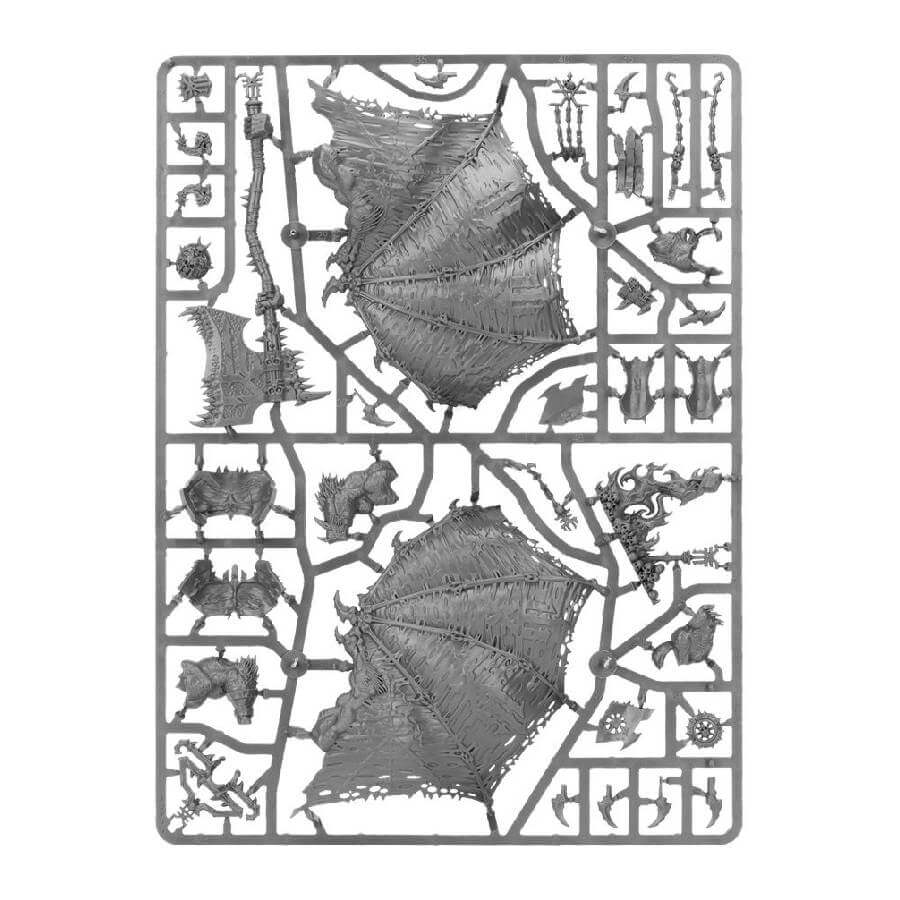
- x80 plastic components that makes 1 of these 3 Bloodthirsters: The Wrath of Khorne Bloodthirster, The Bloodthirster of Insensate Rage or The Bloodthirster of Unfettered Fury.
- x1 Citadel 120 x 92 mm Oval Base
How to paint the Daemons Of Khorne Bloodthirster set
- Step 1: Prime the miniature
Apply a thin and even coat of primer to the model. A black or grey primer works well. This helps the paint adhere better and provides a smooth surface to work on. - Step 2: Basecoat the skin
Start by applying a basecoat of red paint to the skin areas of the miniature. For example, you can use Mephiston Red to cover the torso, arms, and legs. Apply multiple thin coats for smooth and even coverage. - Step 3: Highlight the skin
To bring out the details and create depth, highlight the skin with a brighter shade. Mix a little Wild Rider Red with the base red color and apply it to the raised areas of the muscles, such as the chest and limbs. Focus on creating thin, controlled lines. - Step 4: Shade the skin
To add shadows and definition, apply a shade to the recesses of the skin. Mix a small amount of Carroburg Crimson shade with Lahmian Medium to dilute it slightly. Apply this shade selectively to the deeper areas of the muscles, such as the crevices and under the arms. Aim for a subtle effect. - Step 5: Basecoat the armor
Moving on to the armor, apply a basecoat of black or metallic paint, such as Abaddon Black or Leadbelcher, to the armor panels. Cover the helmet, chest plate, and leg guards. Use thin layers for better control. - Step 6: Highlight the armor
Highlight the armor to make it stand out. For example, mix a small amount of Thunderhawk Blue or Fenrisian Grey with the base color. Apply this mixture to the edges and raised areas of the armor panels. Create thin, precise lines for a crisp and defined look. - Step 7: Shade the armor
To add depth and shadows to the armor, apply a shade like Nuln Oil or Agrax Earthshade. Brush the shade onto the recesses and joints of the armor. Use a smaller brush for more controlled application. Allow the shade to dry completely. - Step 8: Paint the details
Focus on painting the intricate details of the model. Use appropriate colors for different elements, such as Retributor Armor for golden trims, Abaddon Black for weapon handles, and Warpstone Glow for the eyes. Take your time and use a small brush for precision. - Step 9: Base and basing
Finish off the miniature by painting the base. Use a variety of colors and textures to represent different terrain elements. For example, use Stirland Mud for earth and Astrogranite Debris for rubble. Experiment with dry brushing techniques to add highlights and make the base visually appealing. - Step 10: Final touches
Take a step back and assess your work. Make any necessary touch-ups or additional highlights to ensure all details are crisp and vibrant. Use a fine detail brush to add any fine lines or intricate patterns, such as tattoos or markings. Pay attention to any additional accessories, such as weapons or jewelry, and paint them accordingly. - Step 11: Varnish the miniature
To protect your hard work, apply a coat of varnish to the entire model. This will help prevent chipping and keep the colors looking fresh. Use a matte varnish for a more realistic finish or a gloss varnish for a shiny, vibrant look. Follow the instructions on the varnish bottle for application and drying times.
Here’s a video tutorial on how to paint the Bloodthirster of Insensate Rage variant.
