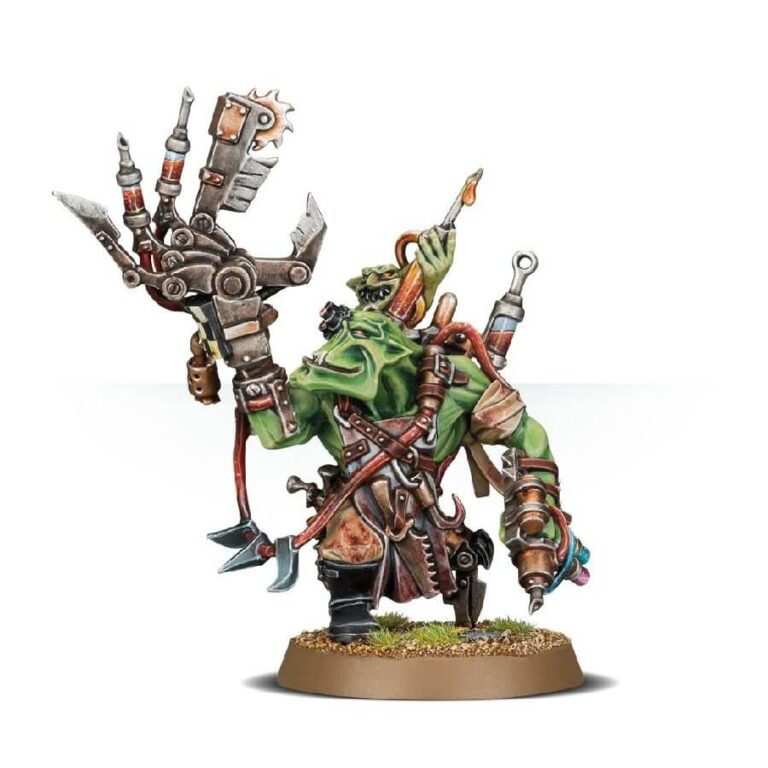
Enter the indomitable Orks, the Painboys, masters of carnage and repair on the battlefield, tirelessly mending severed limbs, expertly wielding the welding torch to mend shattered visages, and ingeniously equipping the Warboss with a freshly forged flame-throwing arm. Their expertise is honed through a unique blend of instinct, experiential learning, and the revered wisdom of “Orky know-wotz.”
What’s in the Ork Painboy box
- x6 plastic components that make one Painboy , accompanied by a grot orderly. He is equipped with Dok’s tools and an ‘urty syringe.
- x1 Citadel 32 mm round base.
How to paint the Ork Painboy set
- Step 1: Prime the Miniature
Apply a thin layer of primer, such as Chaos Black or White Scar, to the entire Painboy model. This helps the paint adhere better and provides a smooth surface for painting. - Step 2: Base Coat the Skin
Using a medium-sized brush, apply a base coat of green paint, like Waaagh! Flesh, to the skin areas of the model. Apply the paint evenly, covering all the skin areas. - Step 3: Paint the Clothing and Accessories
Using different paints of your choice, paint the clothing and accessories on the Painboy. For instance, you can use Skrag Brown or Mournfang Brown for the clothing, and Leadbelcher or Balthasar Gold for metallic elements. - Step 4: Add Details and Weathering
With a smaller brush, add details to the model, such as teeth, nails, and various tools or gadgets the Painboy carries. You can use Rakarth Flesh for teeth, Stirland Battlemire to add mud to his legs, and Nuln Oil for weathering effects. - Step 5: Paint the Tools and Weapons
Using a fine brush, paint the Painboy’s tools and weapons with appropriate paints. For example, you can use Retributor Armour or Runelord Brass for metallic tools, and Blood for the Blood God for syringes or surgical equipment. - Step 6: Highlight the Skin
With a small brush, add highlights to the Ork’s skin by using a lighter shade of green, such as Warpstone Glow or Moot Green. Apply the paint to the raised areas to create depth and bring out the details. - Step 7: Paint the Eyes
Using a fine brush, paint the Ork’s eyes with a bright color like Mephiston Red or Averland Sunset. Take your time to carefully apply the paint and make the eyes stand out. - Step 8: Final Touches
With a fine brush, add any final details to the model, such as tattoos, scars, or additional weathering effects. You can use Agrax Earthshade for washes and Stirland Mud for the base texture.

