Lieutenants are an indispensable part of any Adeptus Astartes faction, serving as the right hand of their Captains and providing flexibility on the battlefield. They excel in directing their battle-brothers and are often given the responsibility of commanding a demi-company or strike force, overseeing squad-level combat logistics, and serving as an exemplary leader.
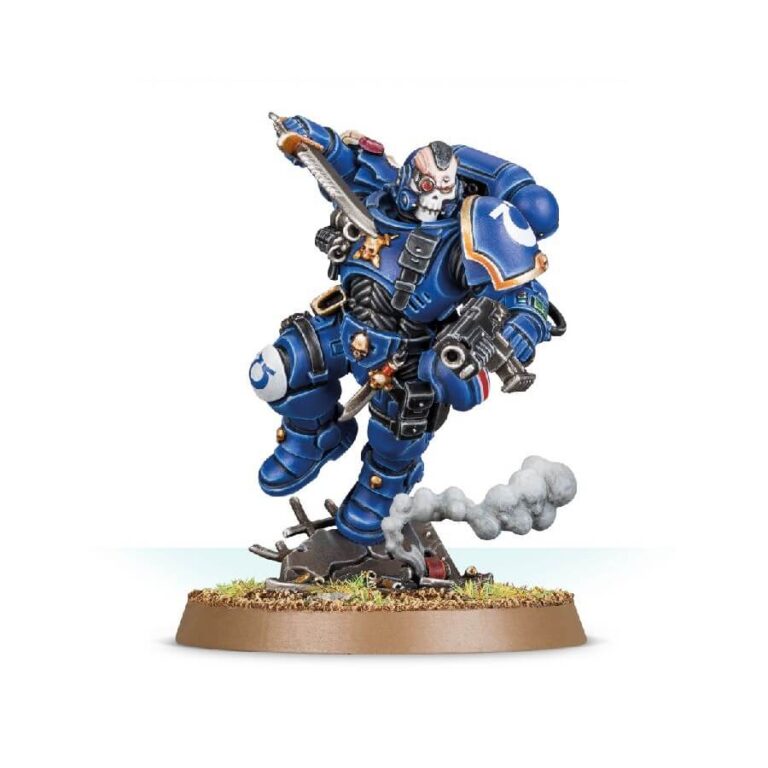
One such Lieutenant, clad in the sleek and modern Mark X Reiver armor, is a prime example of the Adeptus Astartes’ unmatched combat prowess. This skilled warrior is dynamically posed, running full speed towards the enemy while concealed behind a screen of smoke. He is a true asset to any Adeptus Astartes army, capable of elevating the troops around him to even higher martial standards.
With his impressive abilities and unwavering dedication to the cause, this Lieutenant is the perfect addition to any Adeptus Astartes army. Whether you are looking to bolster your forces or lead your troops to victory, this dynamic and versatile leader is a must-have for any aspiring Space Marine commander.
Primaris Lieutenant in Reiver Armour Datasheets
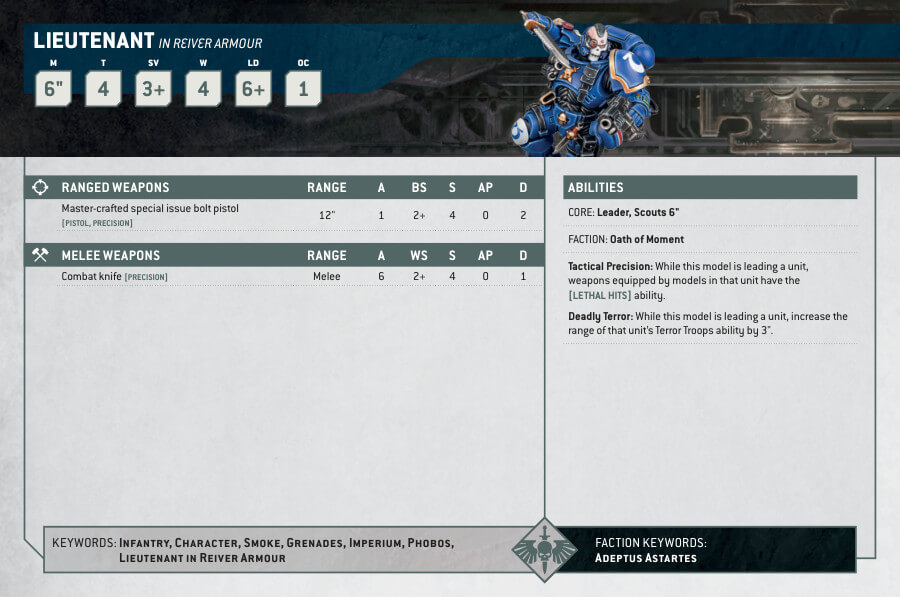
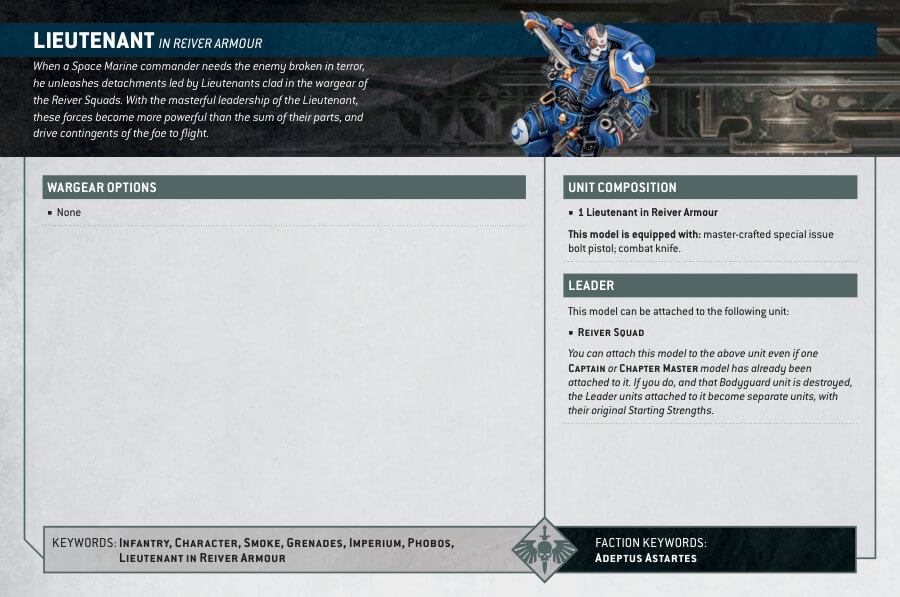
What’s in the Primaris Lieutenant in Reiver Armour box
- x12 plastic parts that allow you to build 1 Primaris Lieutenant in Reiver Armor.
- x1 Citadel 40mm Round Base that provides a stable platform for the miniature.
How to paint the Primaris Lieutenant in Reiver Armour
- Step 1: Priming – Laying the Foundation
Begin with Chaos Black primer. Apply this even coat to your Primaris Lieutenant in Reiver Armour. Priming is essential to ensure paint adheres effectively to the model. - Step 2: Armor – A Blue Canvas
For the armor sections, select Macragge Blue. This bright blue will be the base for your Lieutenant’s armor. Ensure you cover all armor parts evenly. - Step 3: Shading – Adding Depth
To add depth to the armor, apply Nuln Oil as a shade. Focus on the recessed areas, such as crevices and edges. This shading technique enhances the realism of the armor. - Step 4: Layering the Armor – Lighter Shades
Now, let’s layer the armor with Lothern Blue. Concentrate on the raised areas and edges. Leave the blue basecoat showing in the recesses. This layering technique makes the armor stand out. - Step 5: Exposed Head – Realistic Flesh Tones
For the Lieutenant’s exposed head, begin with Rakarth Flesh as a basecoat. This is the canvas for the skin tone. - Step 6: Layering the Head – Adding Depth
Layer the head with Kislev Flesh. Focus on the contours and features, leaving the Rakarth Flesh visible in the shadows. This technique brings the face to life. - Step 7: Face Mask – Crisp White
Paint the Lieutenant’s face mask with White Scar, ensuring precision and crisp details. - Step 8: Eye Lenses – Fiery Red
For the eye lenses, use Mephiston Red. Apply it carefully to achieve the fiery red glow of the lenses. - Step 9: Gold Details – Adding Elegance
Identify the gold details, such as trims and emblems, and coat them with Retributor Armour. This opulent gold adds an elegant touch to your Lieutenant. - Step 10: Bolt Pistol and Details – Deep Black
For the bolt pistol and other details, like pouches and belts, use Abaddon Black. Ensure an even application and precision. - Step 11: Layering Details – Adding Dimension
Layer these black details with Eshin Grey, focusing on edges and raised portions. This layering technique adds dimension and highlights. - Step 12: Metallic Components – Shiny Silver
Identify metallic components, such as weapon parts, and paint them with Leadbelcher. This metallic silver provides a realistic appearance. Layer them with Stormhost Silver. - Step 13: Base – Creating a Thematic Terrain
Choose two textured paints, such as Astrogranite Debris or Martian Ironearth, to paint the base. This adds depth and context to your Lieutenant’s display. - Step 14: Varnishing – Protect and Enhance
To safeguard your painted masterpiece and enhance certain areas like the metallics, use Munitorum varnish. This protective layer adds a polished finish.

