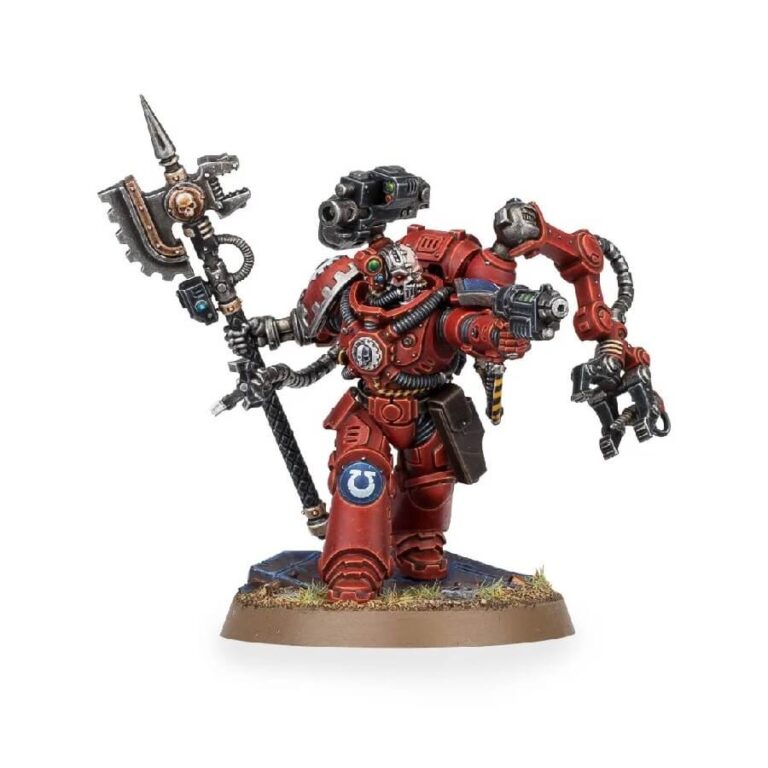
The Primaris Techmarines are a vital addition to any Warhammer 40k Space Marines army that relies heavily on armored warfare. These specialists can be seen bravely traversing the battlefield, even under heavy fire, in order to tend to the machine spirits of wounded tanks and war machines.
With their unique set of skills and specialized tools, Techmarines can expertly repair burnt-out cabling, warped panels, and damaged armor plates. For optimal performance in battle, be sure to include a Techmarine or two in your army!
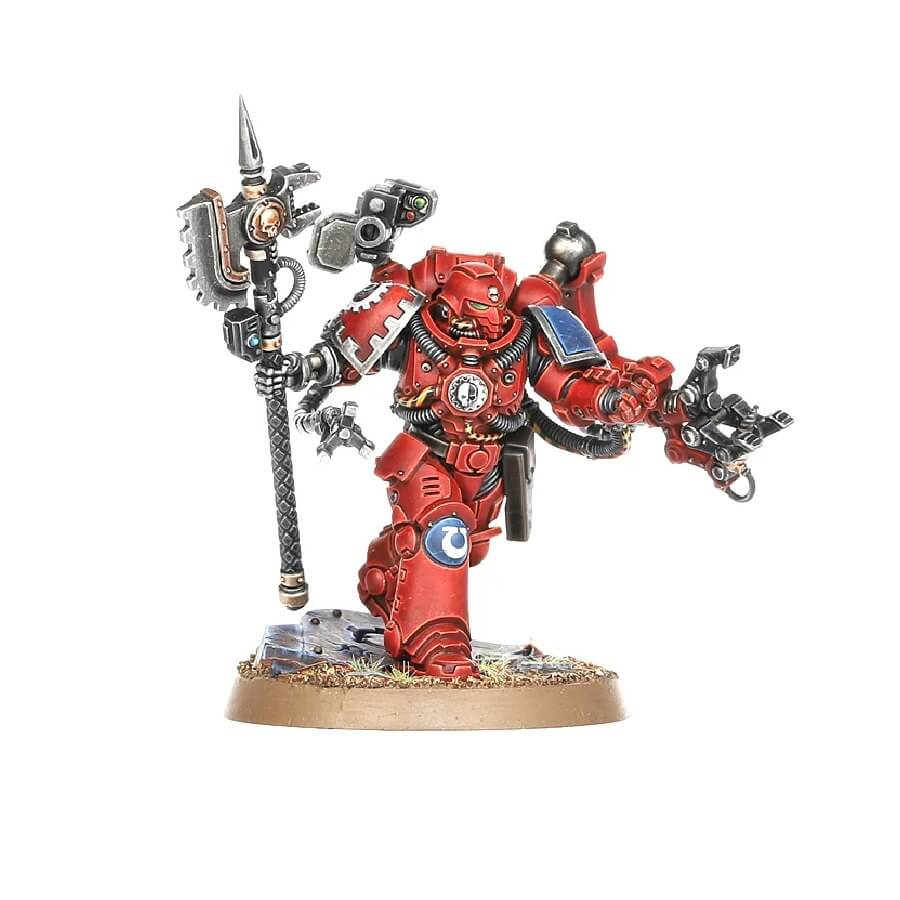
The model is equipped with a grav-pistol, a pistol that uses graviton technology to propel its rounds, which is useful for close combat situations. Additionally, the Techmarine is armed with an Omnissian power axe, a powerful melee weapon that can easily cut through armour and flesh.
The model also features a servo-arm, which can be used to make repairs or manipulate objects. There is a mechadendrite, which is a cybernetic tentacle-like appendage, that can be used to aid in repairs or hacking. This model is also fitted with a shoulder-mounted forge bolter, a powerful rapid-fire weapon used for ranged combat.
Primaris Techmarine Datasheets
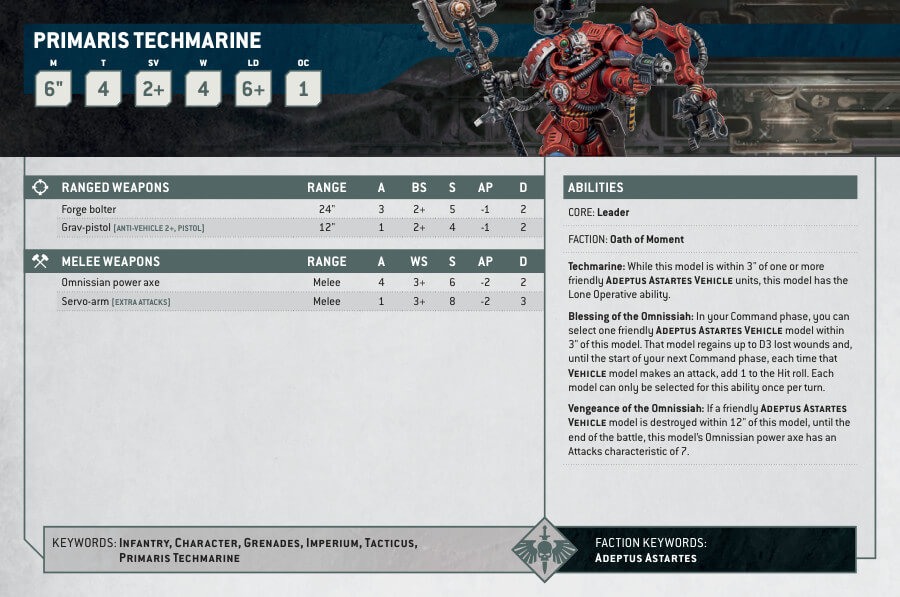
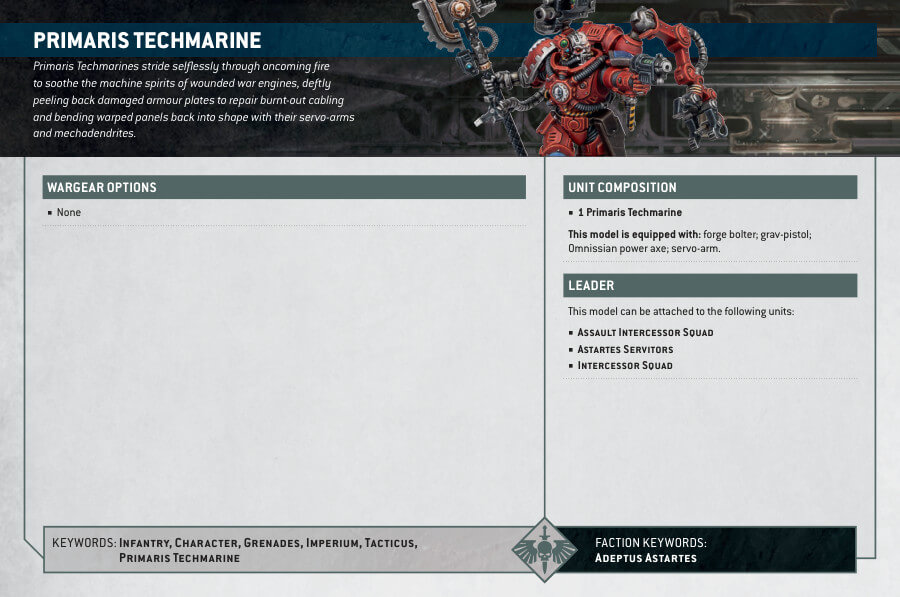
What’s in the Primaris Techmarine box
- x24 plastic components that make one Primaris Techmarine model.
- x1 Citadel 40mm Round Base.
Primaris Techmarine Price per Country
| Country | Price |
|---|---|
| United States | $40 |
| Canada | $50 |
| Europe | €32.50 |
| United Kingdom | £25 |
How to paint the Primaris Techmarine
- Step 1: Primer Coat
Before you start painting, it’s essential to apply a primer. Use Chaos Black primer to create a solid foundation for your paint. This step ensures that the paint adheres well and provides an even surface for your colors. - Step 2: Armor Painting
Begin by painting the Techmarine’s armor with Khorne Red. Ensure a smooth and even coat by thinning your paint slightly with water. This base color will serve as the foundation for the model’s distinctive red armor. - Step 3: Shading
To add depth and definition to the armor, apply Agrax Earthshade generously. Focus on the creases, recesses, and edges of the armor plates. Let the shade settle and dry, enhancing the contrast and creating shadows. - Step 4: Layering
Now, it’s time to build up the color on the armor. Layer Evil Sunz Scarlet on top of the basecoat. Concentrate on the raised areas and edges, leaving the shaded areas intact. This layering technique adds highlights and dimension. - Step 5: Final Highlight
For the final highlight, use Wild Rider Red. Apply it sparingly to the edges and extreme highlights of the armor. This step adds a vibrant pop of color and sharpens the contrast. - Step 6: Painting the Skin
Focus on the exposed skin areas of the Techmarine. Paint them with Rakarth Flesh, ensuring a smooth and even application. This flesh tone creates a realistic contrast with the armor. - Step 7: Shading the Skin
To add depth to the skin, apply Reikland Fleshshade over the Rakarth Flesh. Concentrate on the facial features and creases. The shade will settle into these areas, creating natural shadows and definition. - Step 8: Highlighting the Skin
Now, carefully layer the skin with Flayed One Flesh. Focus on the raised areas of the face and hands. This layering technique gives the skin a lifelike texture and highlights the facial features. - Step 9: Metallic Components
Moving to the metallic parts of the model, use Leadbelcher. Apply this metallic paint evenly to the power axe, forge bolter, and any other metal components. Ensure a smooth and reflective finish. - Step 10: Shading Metallic Parts
Enhance the metallic look by shading the components with Nuln Oil. Apply this shade to the recesses and details of the metal parts. It adds depth and creates a realistic weathered effect. - Step 11: Layering Metallic Parts
To achieve a polished metallic appearance, layer the previously painted metal parts with Ironbreaker. Concentrate on the raised surfaces. This step adds a gleaming shine to the metallic elements. - Step 12: Highlighting Metallic Parts
For the final touch, use Stormhost Silver to add bright highlights to the edges and prominent areas of the metal components. This creates a striking contrast and makes the metal look freshly polished. - Step 13: Small Details Now, focus on the smaller details. Paint the Techmarine’s shoulder pad and knee pad with Macragge Blue. Use Runelord Brass for the brass details on the power axe, and Abaddon Black for the handle of the axe. The cyborg eye should be painted with Mephiston Red for a menacing effect.
- Step 14: Applying Texture Paint to the Base
For the base, consider using texture paints like Astrogranite Debris or Armageddon Dunes to create a realistic terrain effect. Apply the chosen texture paint evenly across the base and let it dry thoroughly. - Step 15: Varnish for Protection
To protect your beautifully painted model, consider applying a varnish. A matte varnish like Ardcoat is an excellent choice as it provides a protective layer without altering the finish. Make sure the model is entirely dry before varnishing.

