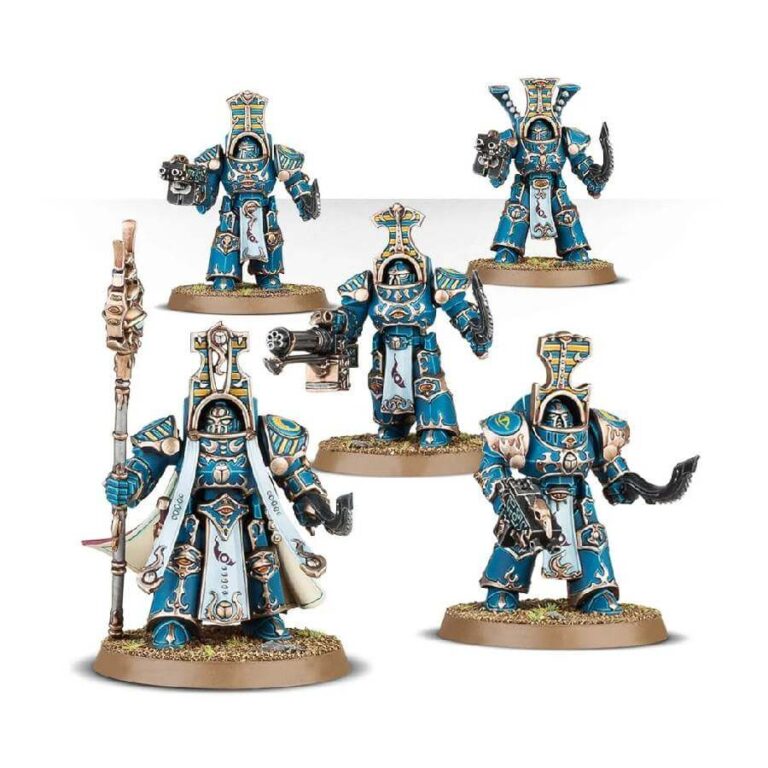
Step into the captivating world of Scarab Occult Terminators, once the elite psykers of the Thousand Sons Legion and esteemed bodyguards of Magnus the Red himself. Though reduced to dust alongside their fellow warriors, they still possess a faint glimmer of their former intellect. Now, under the command of their sorcerous masters, they stride into battle with an eerie and unwavering composure.
Clad in resplendent and intricately designed armor, the Scarab Occult Terminators advance upon their enemies, exuding an unsettling silence. It is only when their devastating weaponry is unleashed that the battlefield echoes with a sickening symphony of destruction. The razor-sharp khopesh blades and Inferno combi-bolters tear through the flesh of their adversaries, delivering a swift demise to those audacious enough to oppose the warriors of Prospero.
Also available in this box:
What’s in the Scarab Occult Terminators box
- x90 plastic components you can use to assemble 5 Scarab Occult Terminators, armed with Inferno combi-bolters and khopesh blades. One model can be assembled with an included heavy warpflamer, soulreaper cannon or hellfyre missile rack. One model can be assembled as a Scarab Occult Sorcerer, who can exchange his combi-bolter for an included power sword.
- x5 Citadel 40mm Round bases
How to paint the Scarab Occult Terminators set
- Step 1: Prime the models
Start by applying a thin, even coat of primer to your Scarab Occult Terminators. Use Chaos Black spray or any black primer of your choice. This will create a smooth surface for the paint and help it adhere better. - Step 2: Basecoat the models
Using a medium-sized brush, apply a basecoat to your Scarab Occult Terminators. For the armor, you can use colors like Thousand Sons Blue or any blue color you would like. For the other areas, consider using colors like Retributor Armour or Abaddon Black and feel free to experiment with other colors to make your miniatures look unique. Make sure to cover all the relevant areas evenly. - Step 3: Shade the models
Apply a shade wash to the models to enhance the details and add depth. You can use shades like Tyran Blue for the blue armor and Nuln Oil for the other areas. Apply the shade wash carefully to the recessed areas and allow it to dry completely. - Step 4: Highlight the models
Using a lighter color like White Scar, carefully highlight the raised areas of the armor. For other areas, you can use lighter shades of the base colors or lighter complementary colors. Apply these highlights sparingly to create contrast and make the details stand out. - Step 5: Paint the details
Switch to a smaller brush and focus on painting the smaller details of your Scarab Occult Terminators. Use colors like Skullcrusher Brass for the symbols, Ushabti Bone for skulls and any other colors for additional details such as the lenses or iconography. Be patient and aim for precision. - Step 6: Add additional effects
To make your Scarab Occult Terminators even more striking, consider adding additional effects like glowing eyes or weathering effects. For glowing eyes, choose a bright color like Kroxigor Scales. For weathering effects, use drybrushing techniques with lighter or darker shades of the base colors to simulate wear and tear. - Step 7: Base the models
Apply texture paint to the bases of your Scarab Occult Terminators. Use texture paints like Stirland Mud or any brown or earthy texture paint of your choice. Once dry, you can drybrush the base with a lighter color like Ushabti Bone to highlight the texture and create a realistic look. - Step 8: Varnish the models
Protect your paint job by applying a layer of varnish. Choose either a matte or gloss varnish based on your preference. This will ensure your models are well-preserved and provide a protective finish.

